Lean UX Design (Kanban)
Transforming Carsguide's design operations with a tailored iterative design thinking strategy, yielding substantial advancements in SEO, page views, and user-centricity.
OVERVIEW
Transforming Carsguide's design operations with a tailored iterative design thinking strategy, yielding substantial advancements in SEO, page views, and user-centricity.
Outcome
Going through this process Cars Guide was able to revamp a bunch of different pages and achieve the desired business effect in terms of SEO, page views while keeping user centricity.
Carsguide had been subcontracting design before this as they had really high expectations of how a design process should be a quality gateway on its own right. After going through this process the Head of Carsguide was happy to return to the in-house design team to take care of its most challenging design issues.
Process
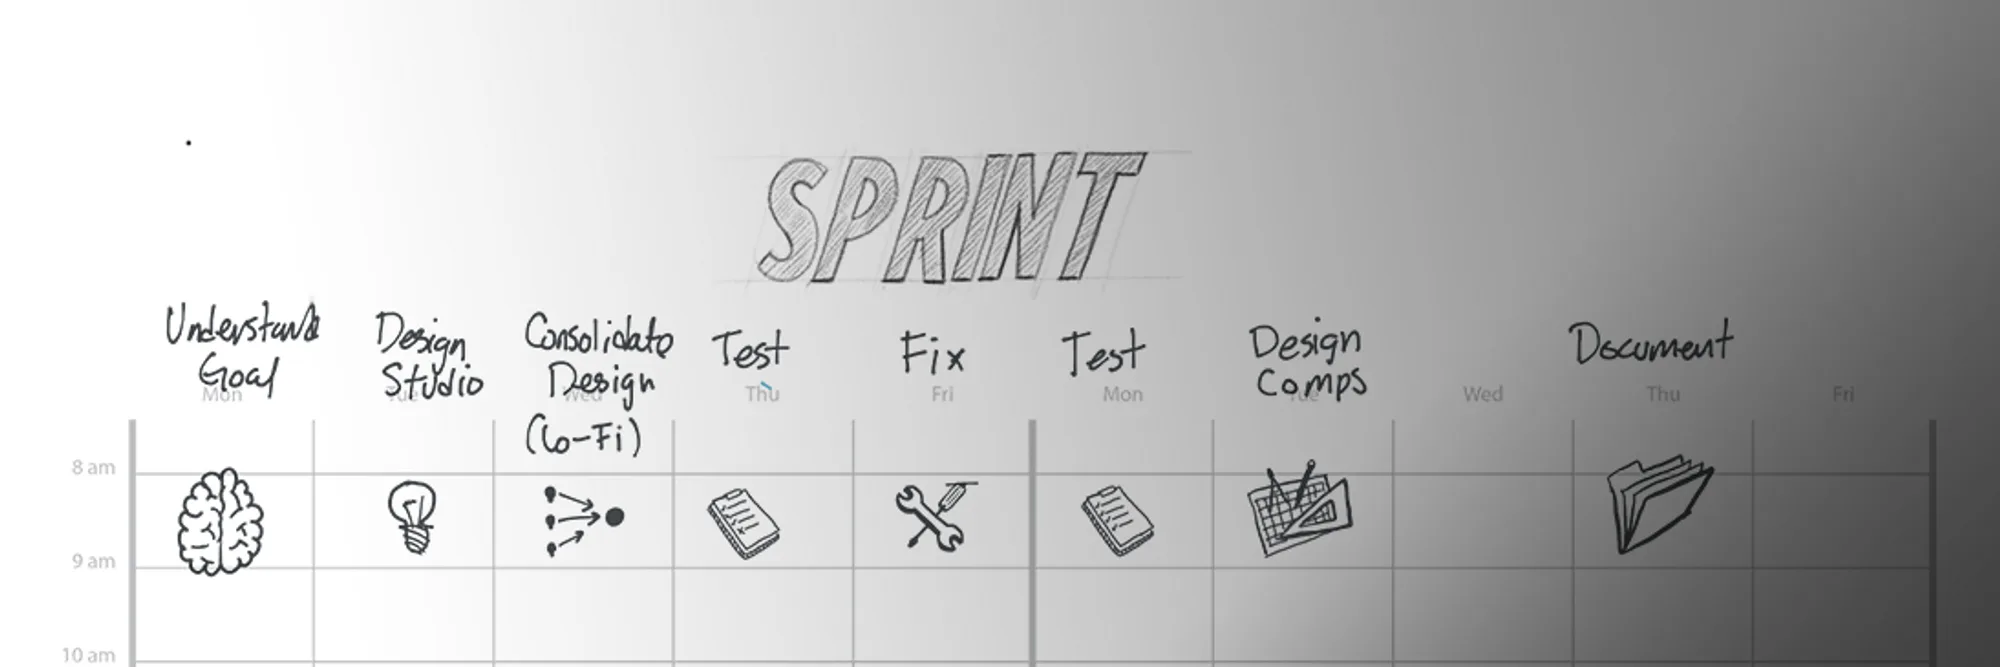
This process is an iteration of the Design Thinking ‣ process I rallied my team with in the past, but adjusted to the company culture and processes, with the main difference being the cadence. Carsguide particular approach had peculiarities that impeded a back to back design sprint approach, and instead we did multiple overlapping design sprints that started at different points. Below is an example of one.
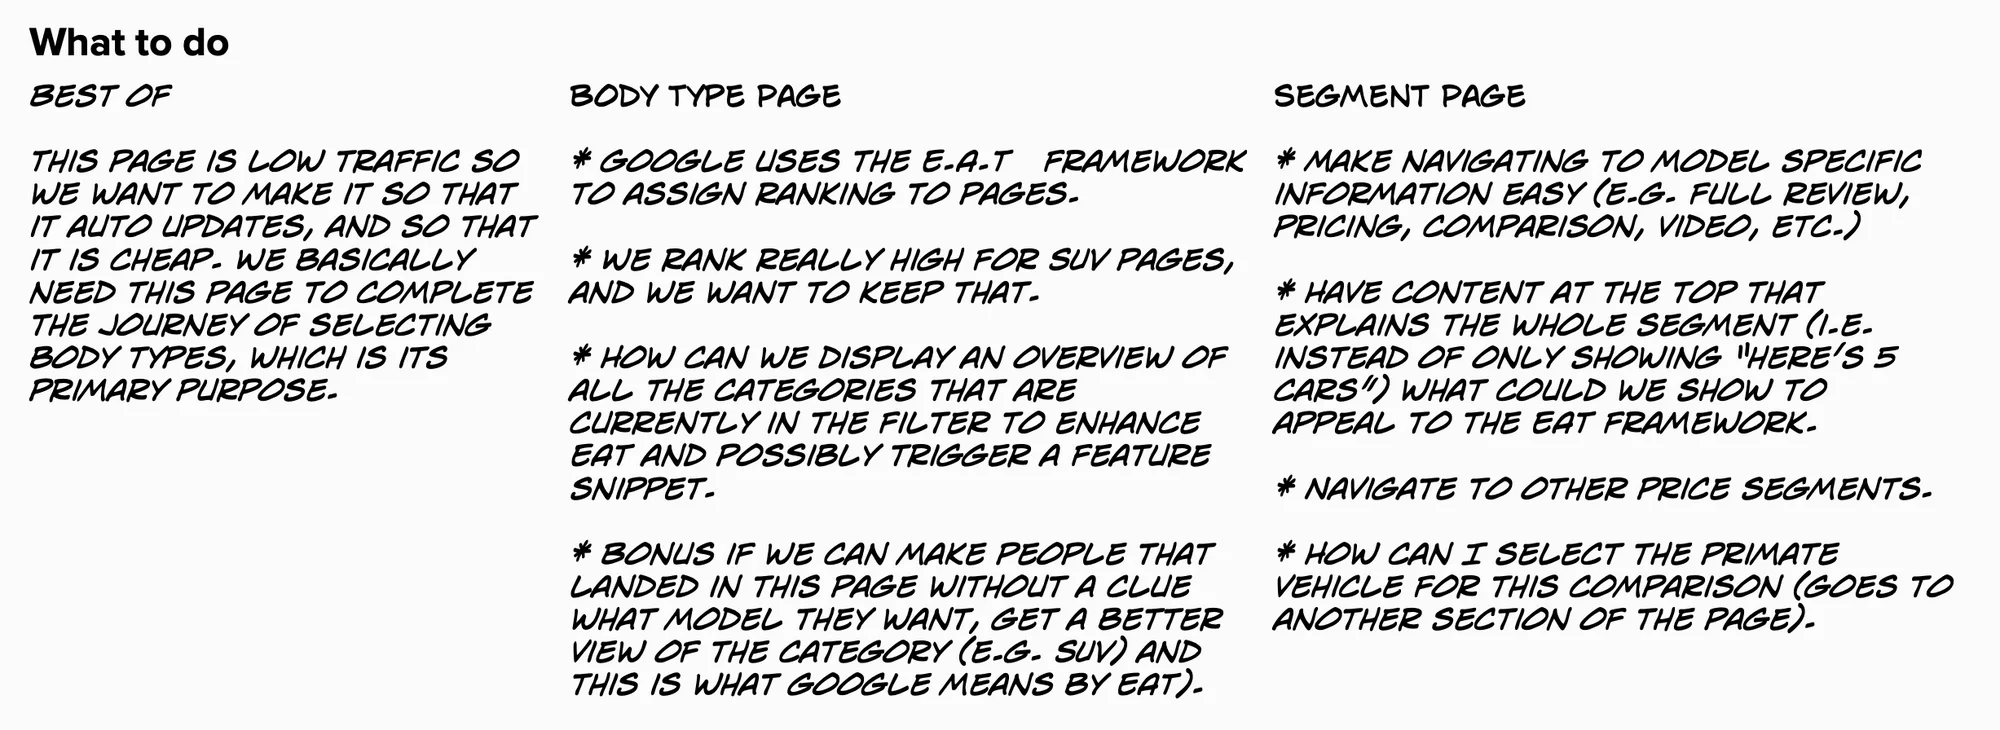
1. Understand the Problem
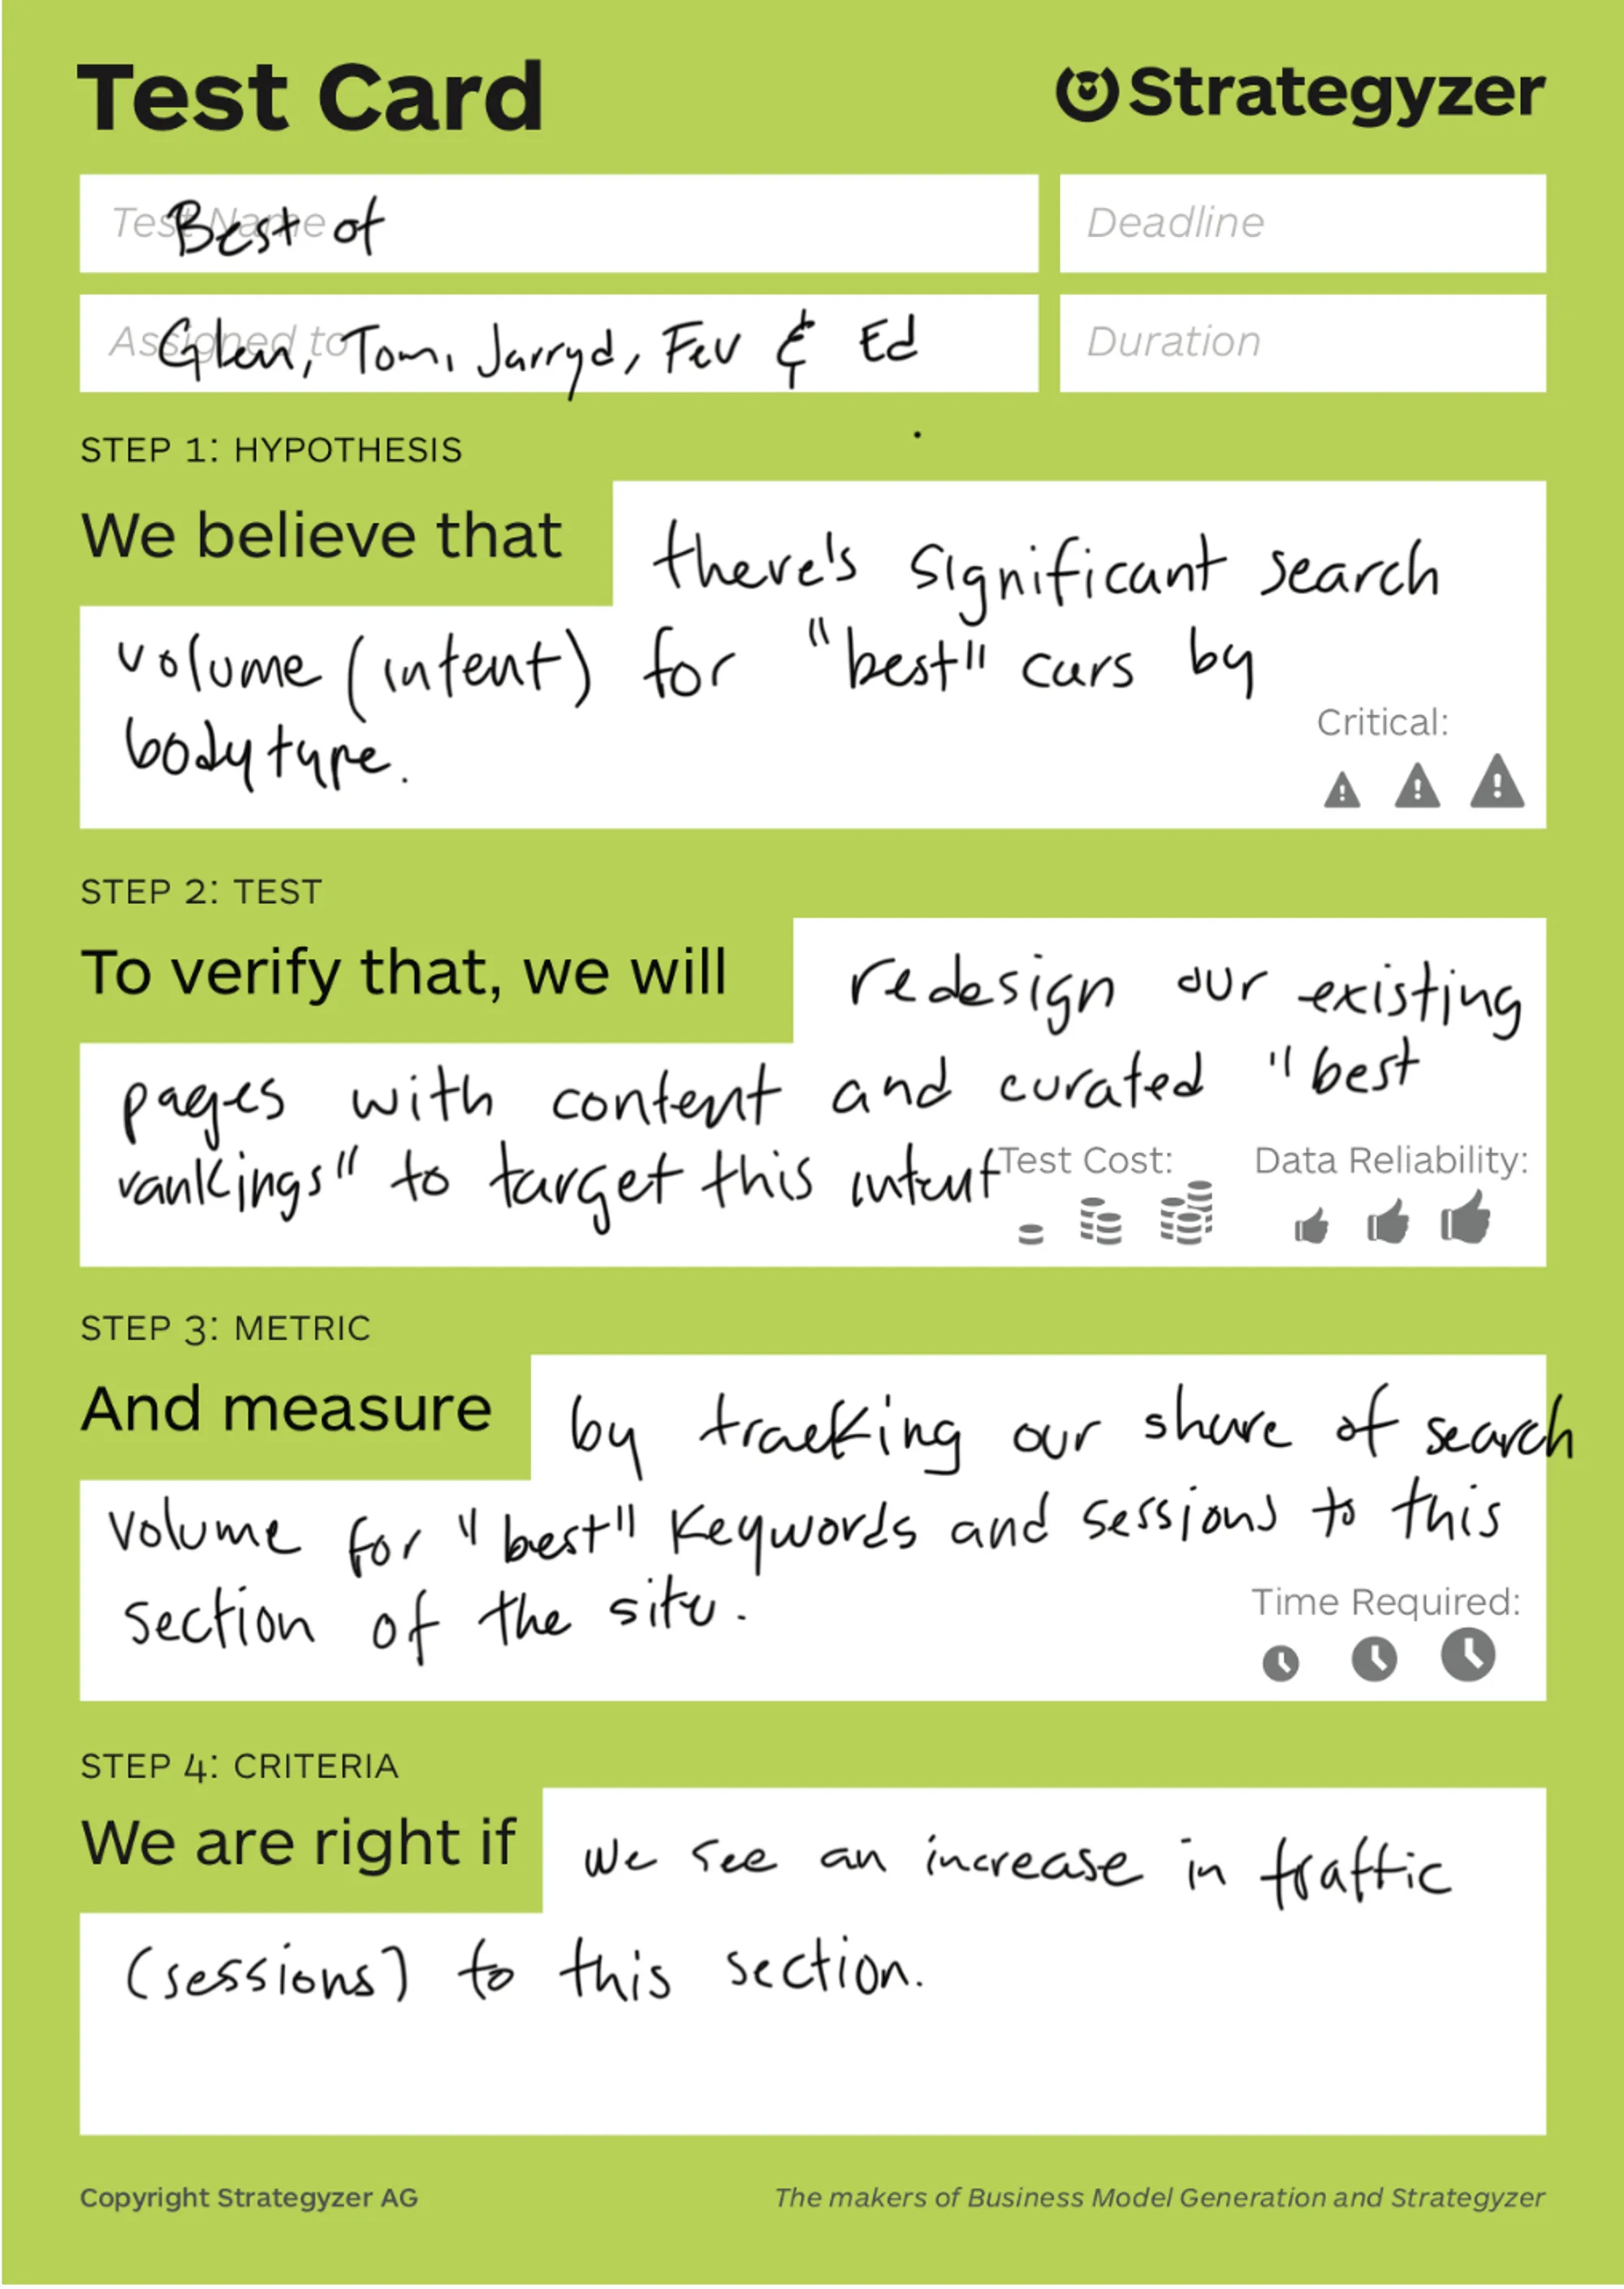
1.1 Getting Briefed
When stakeholders ask for features they typically do as in "I want you to do X solution for me". Putting that person in a risky position, since he might have not clearly identified what the problem is. Out of all the tools out there to perform root cause analysis is relentlessly asking "why?". And when I do, I try to do it in such a way that I facilitate the answers to these questions.
When a stakeholder ask me to add a button, I typically ask questions like:
- Hypothesis. What is the driving force behind this request?
- Test. What do we need to change in order for this to be a success?
- Metric. How can we measure the change? Is there a baseline? Has it changed in the past?
- Criteria. How do we know if we are right?
1.2 Breaking Down the Brief
Straight after getting the Test Card done, I jump into exploding the card into a flow of tasks and steps.
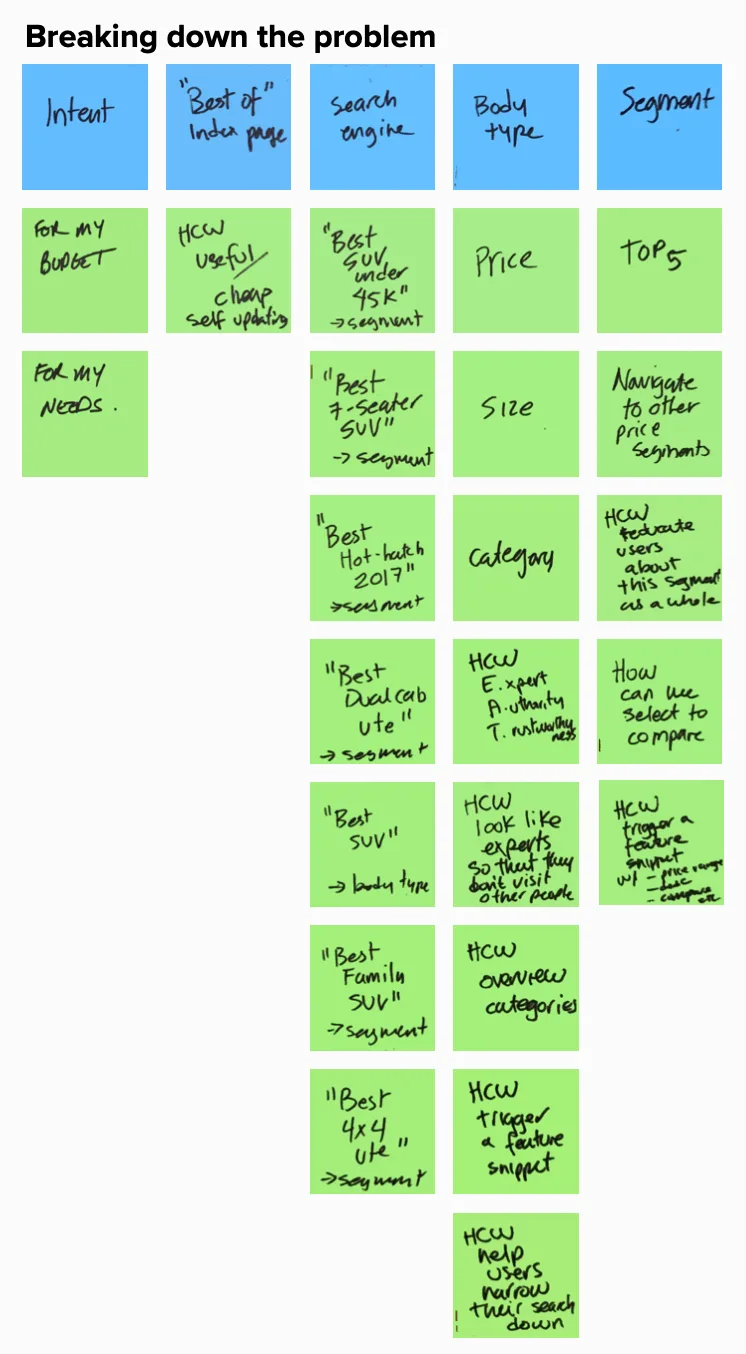
Facilitating a session like this has a couple of benefits
- Allows you and others to see the big picture.
- Allows everyone to get on the same page.
✌🏼 People tend to call different things the same and vice-versa. Aligning language with one of these session is a great way to kick off the design of new features.
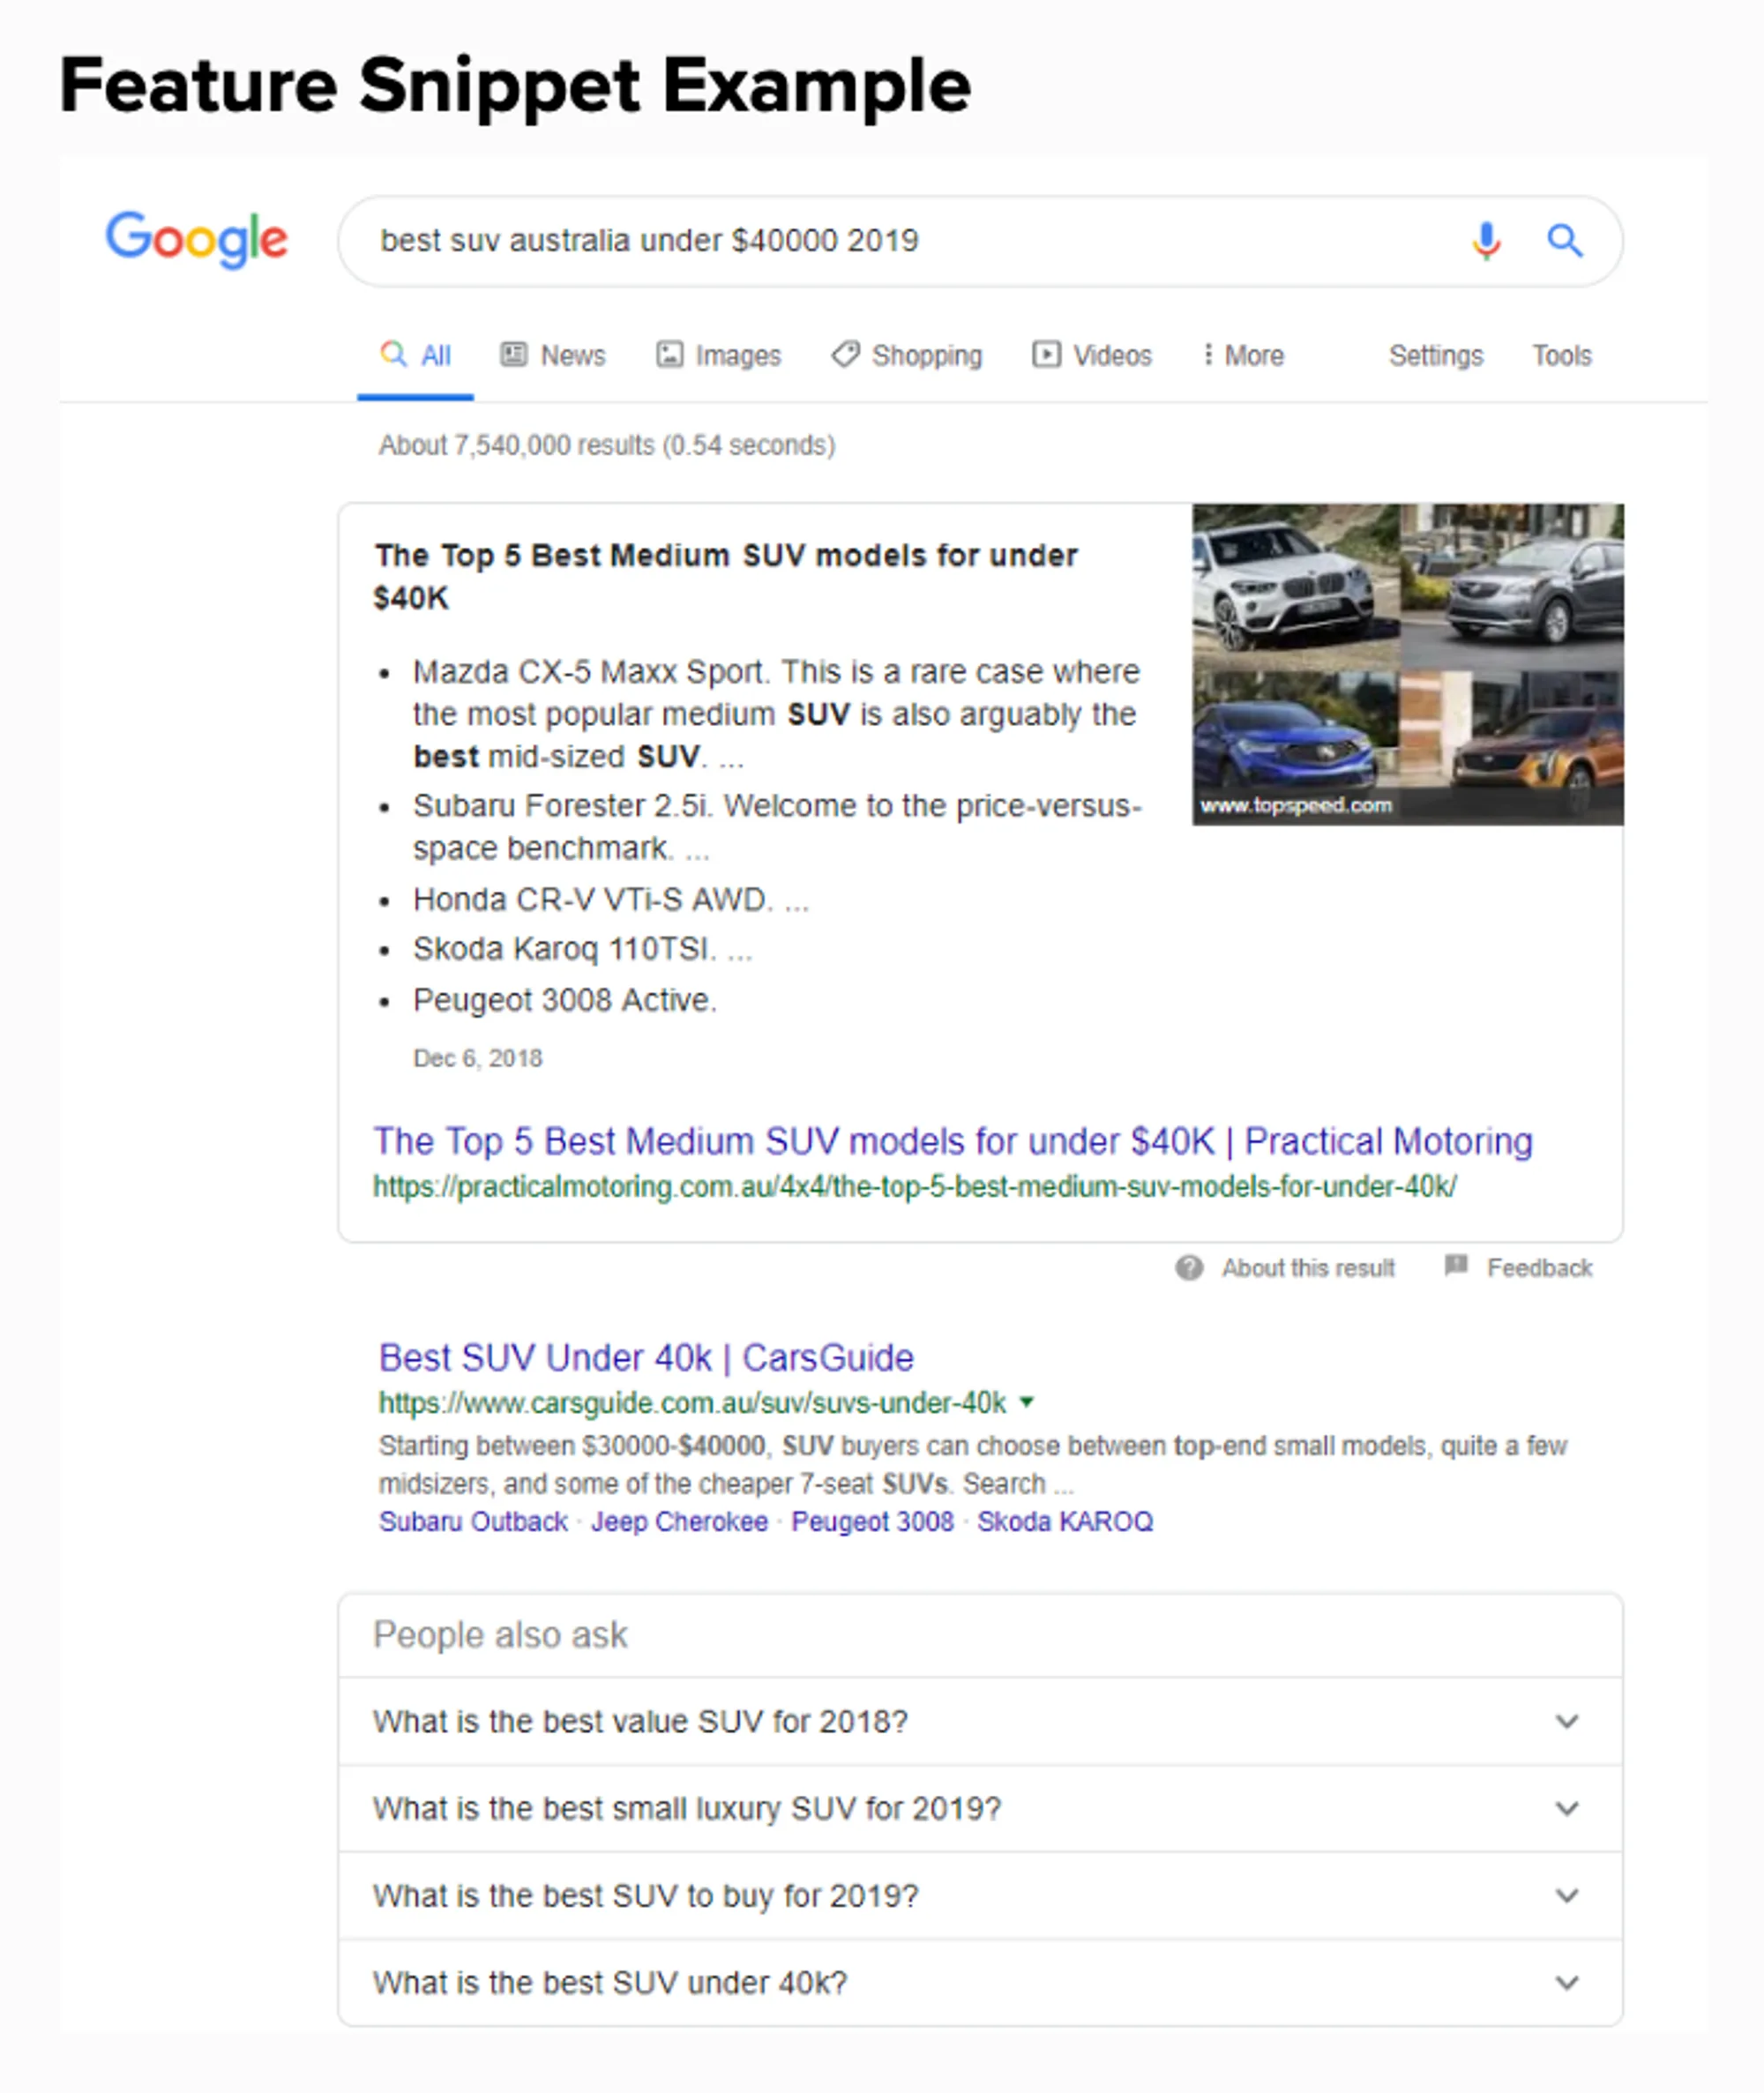
1.2 Understanding Design and Technical Constraints and Desirability
Before I start designing I try to get examples of how others do what we want to do. This is typically useful to get people's creative juices going. However in this case, the example is more subtle. This is an example of the desired effect of the change.
1.4 Scoping it in Plain English
This step is a sneaky one, as one can go without it, but trust me that the benefit of talking over a story in plain english is bullet points it's worth its effect in the collaborative design session.
2. Collaborative Design
The same design studio I've been running for years. The session breaks down as follows:
- Agenda. Talking over the activities ahead.
- Sketching Toolkit. Overview on how to do simple wireframes and letting people know it is not a drawing competition.
- Scope. Reading through, or allowing time to read through the Scope in Plain English or Problem Story Map above.
- Divergent Design. Getting different ideas from all stakeholders.
- Pitch 1. Pitching individual ideas.
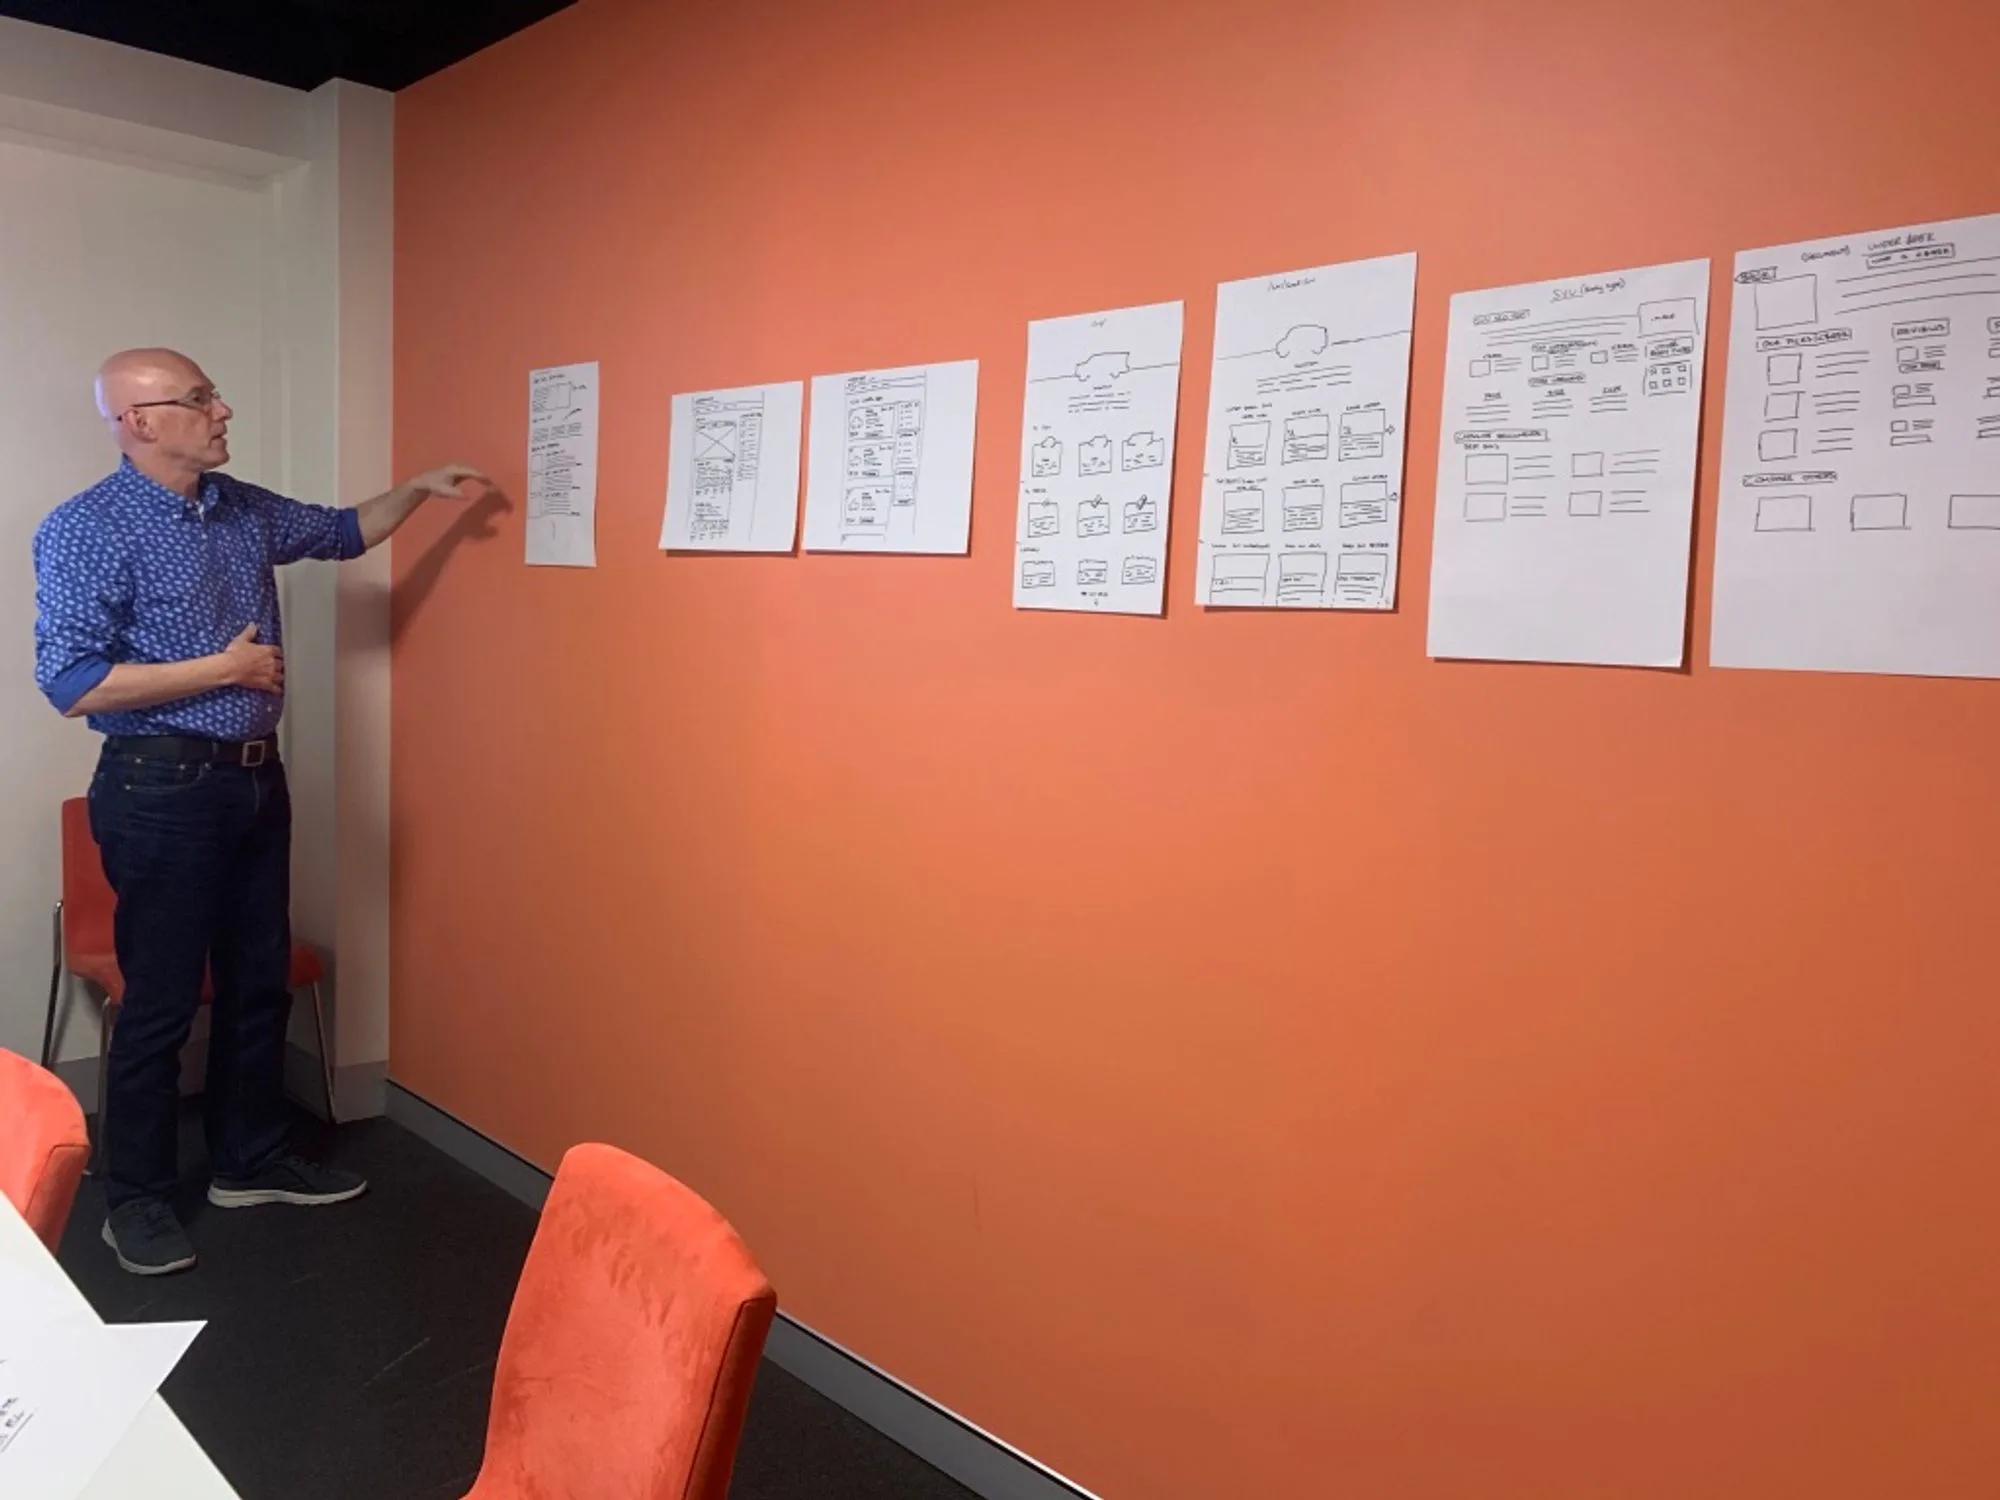
- Emergent Design. Stealing ideas from each other.
- Pitch 2. Pitching individual ideas.
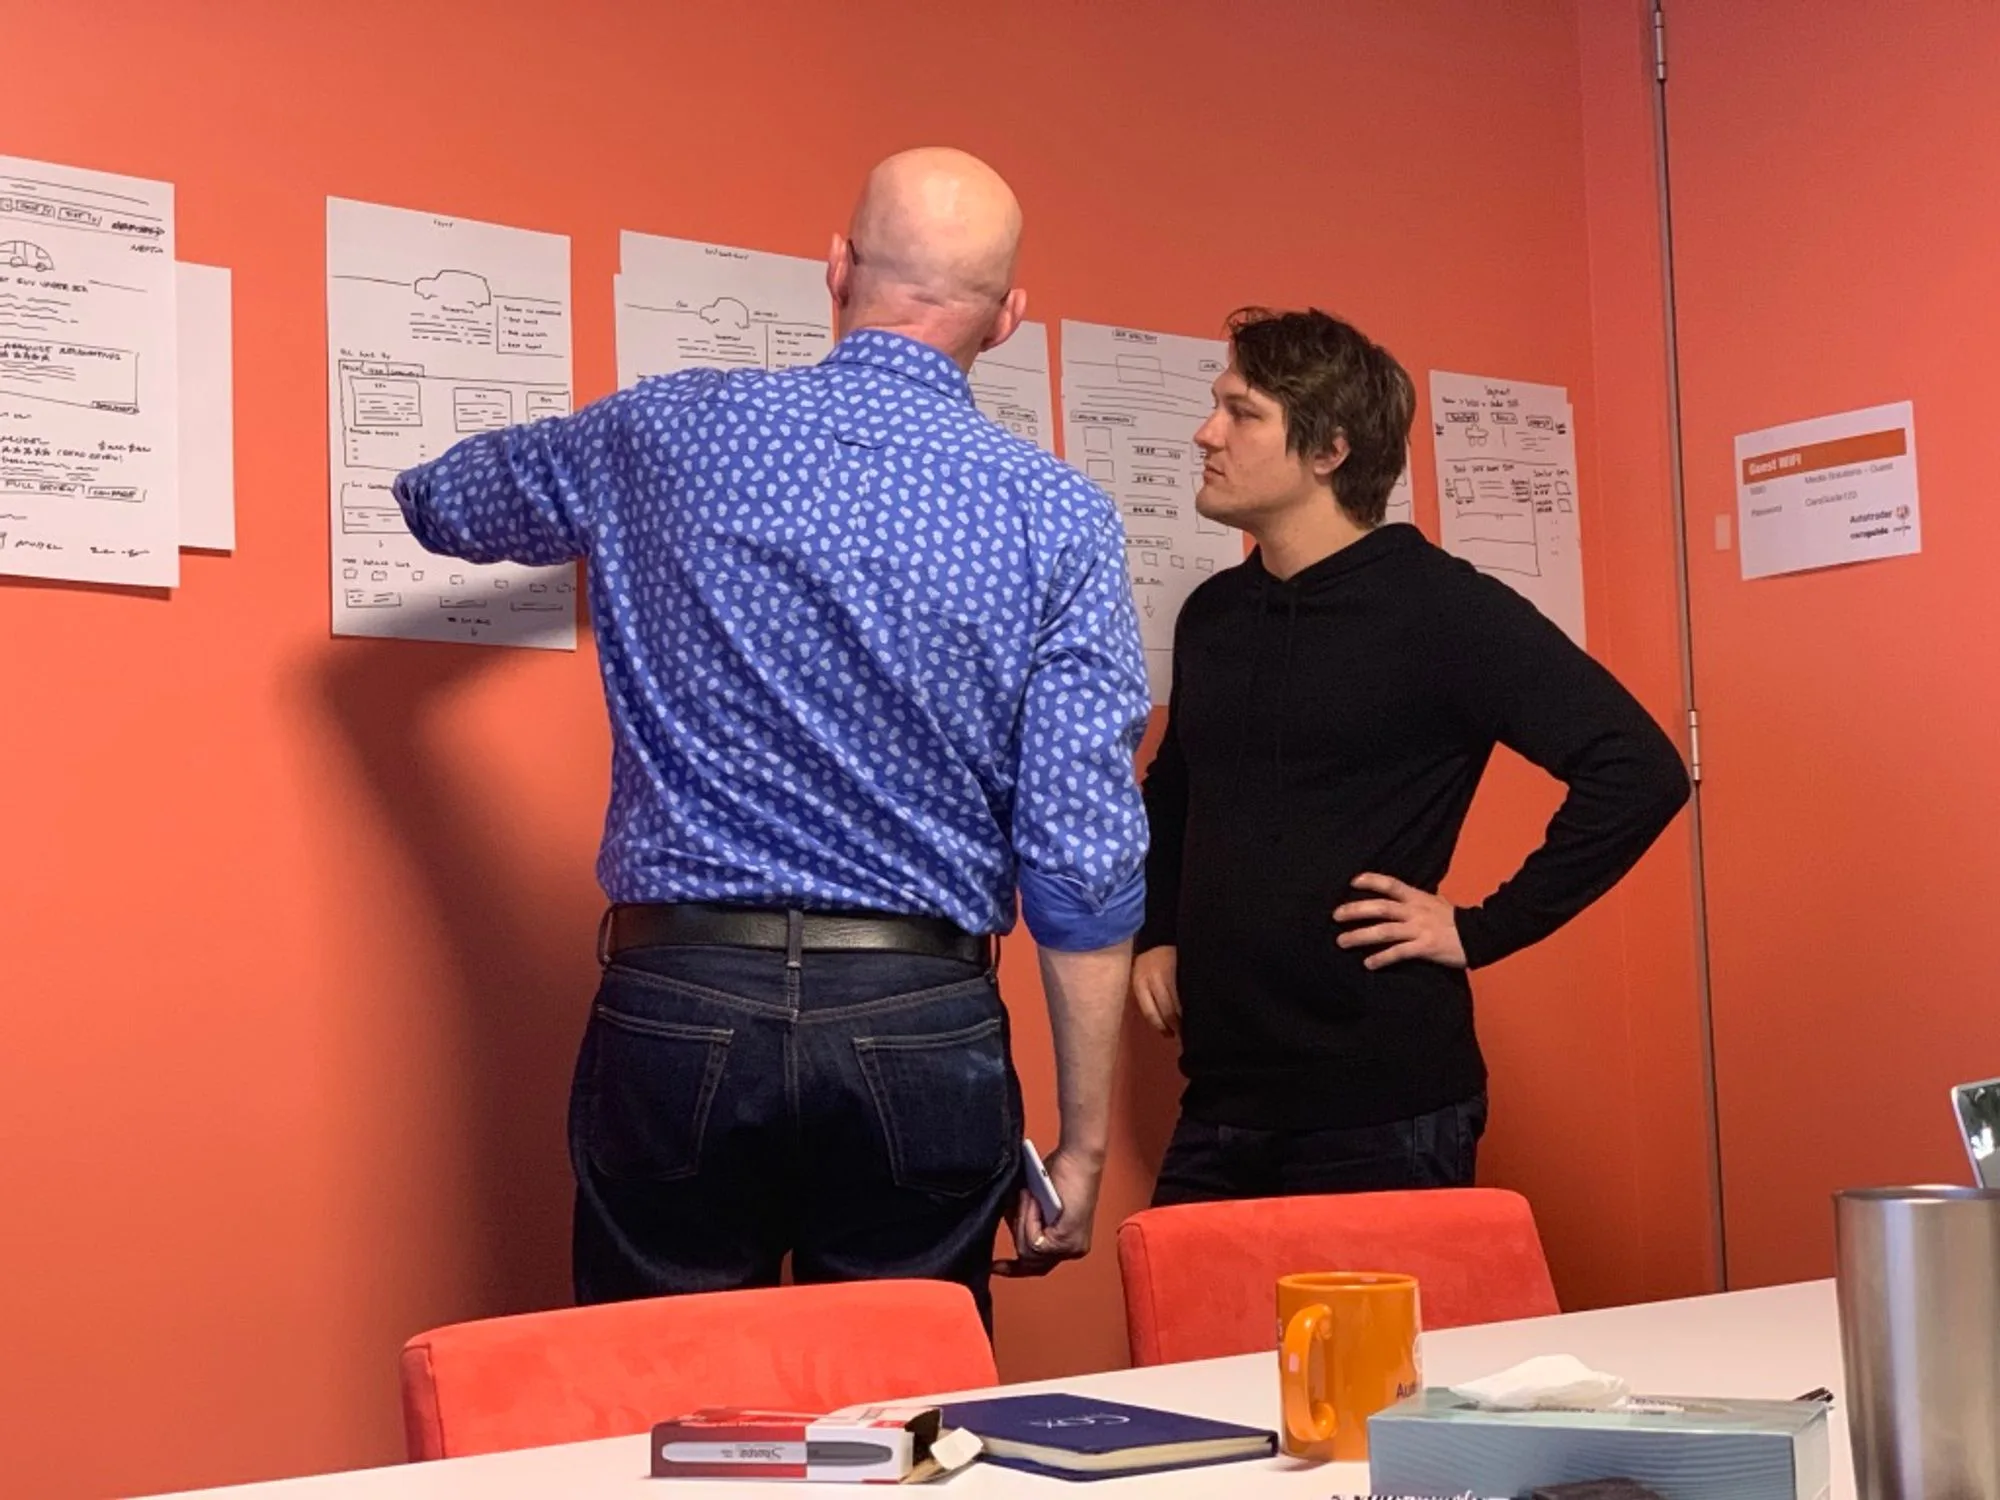
- Playback. Summarising highlights of what happened during the sessions. Explaining how designs are going to be used, and talking about the common patterns used across all designs.
3. Design Consolidation
Design consolidation is about converging in a solution that covers everything spoken about in the collaborative design session, including:
- What works
- What doesn't work
- Technical dependencies
- Blind spots mentioned
- etc.
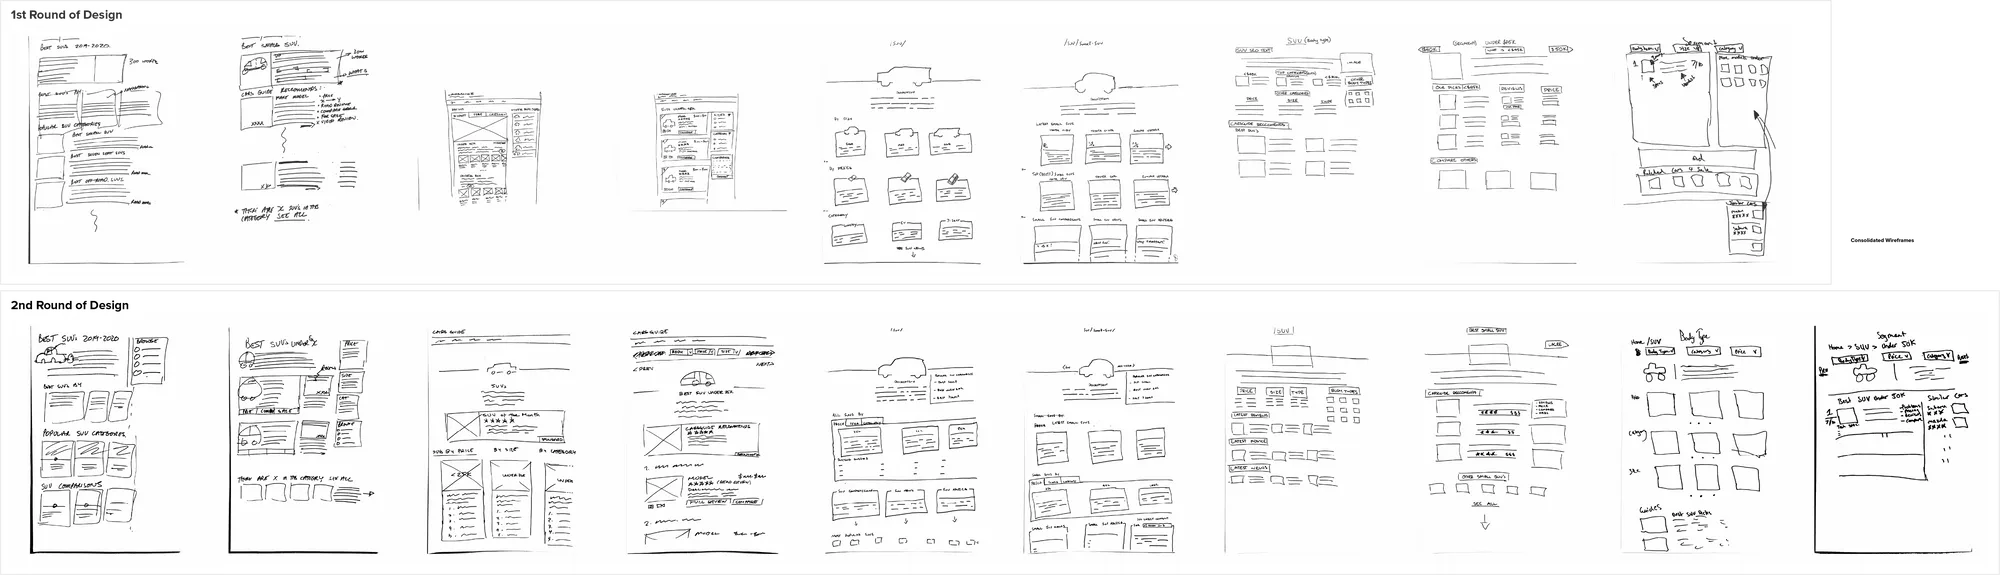
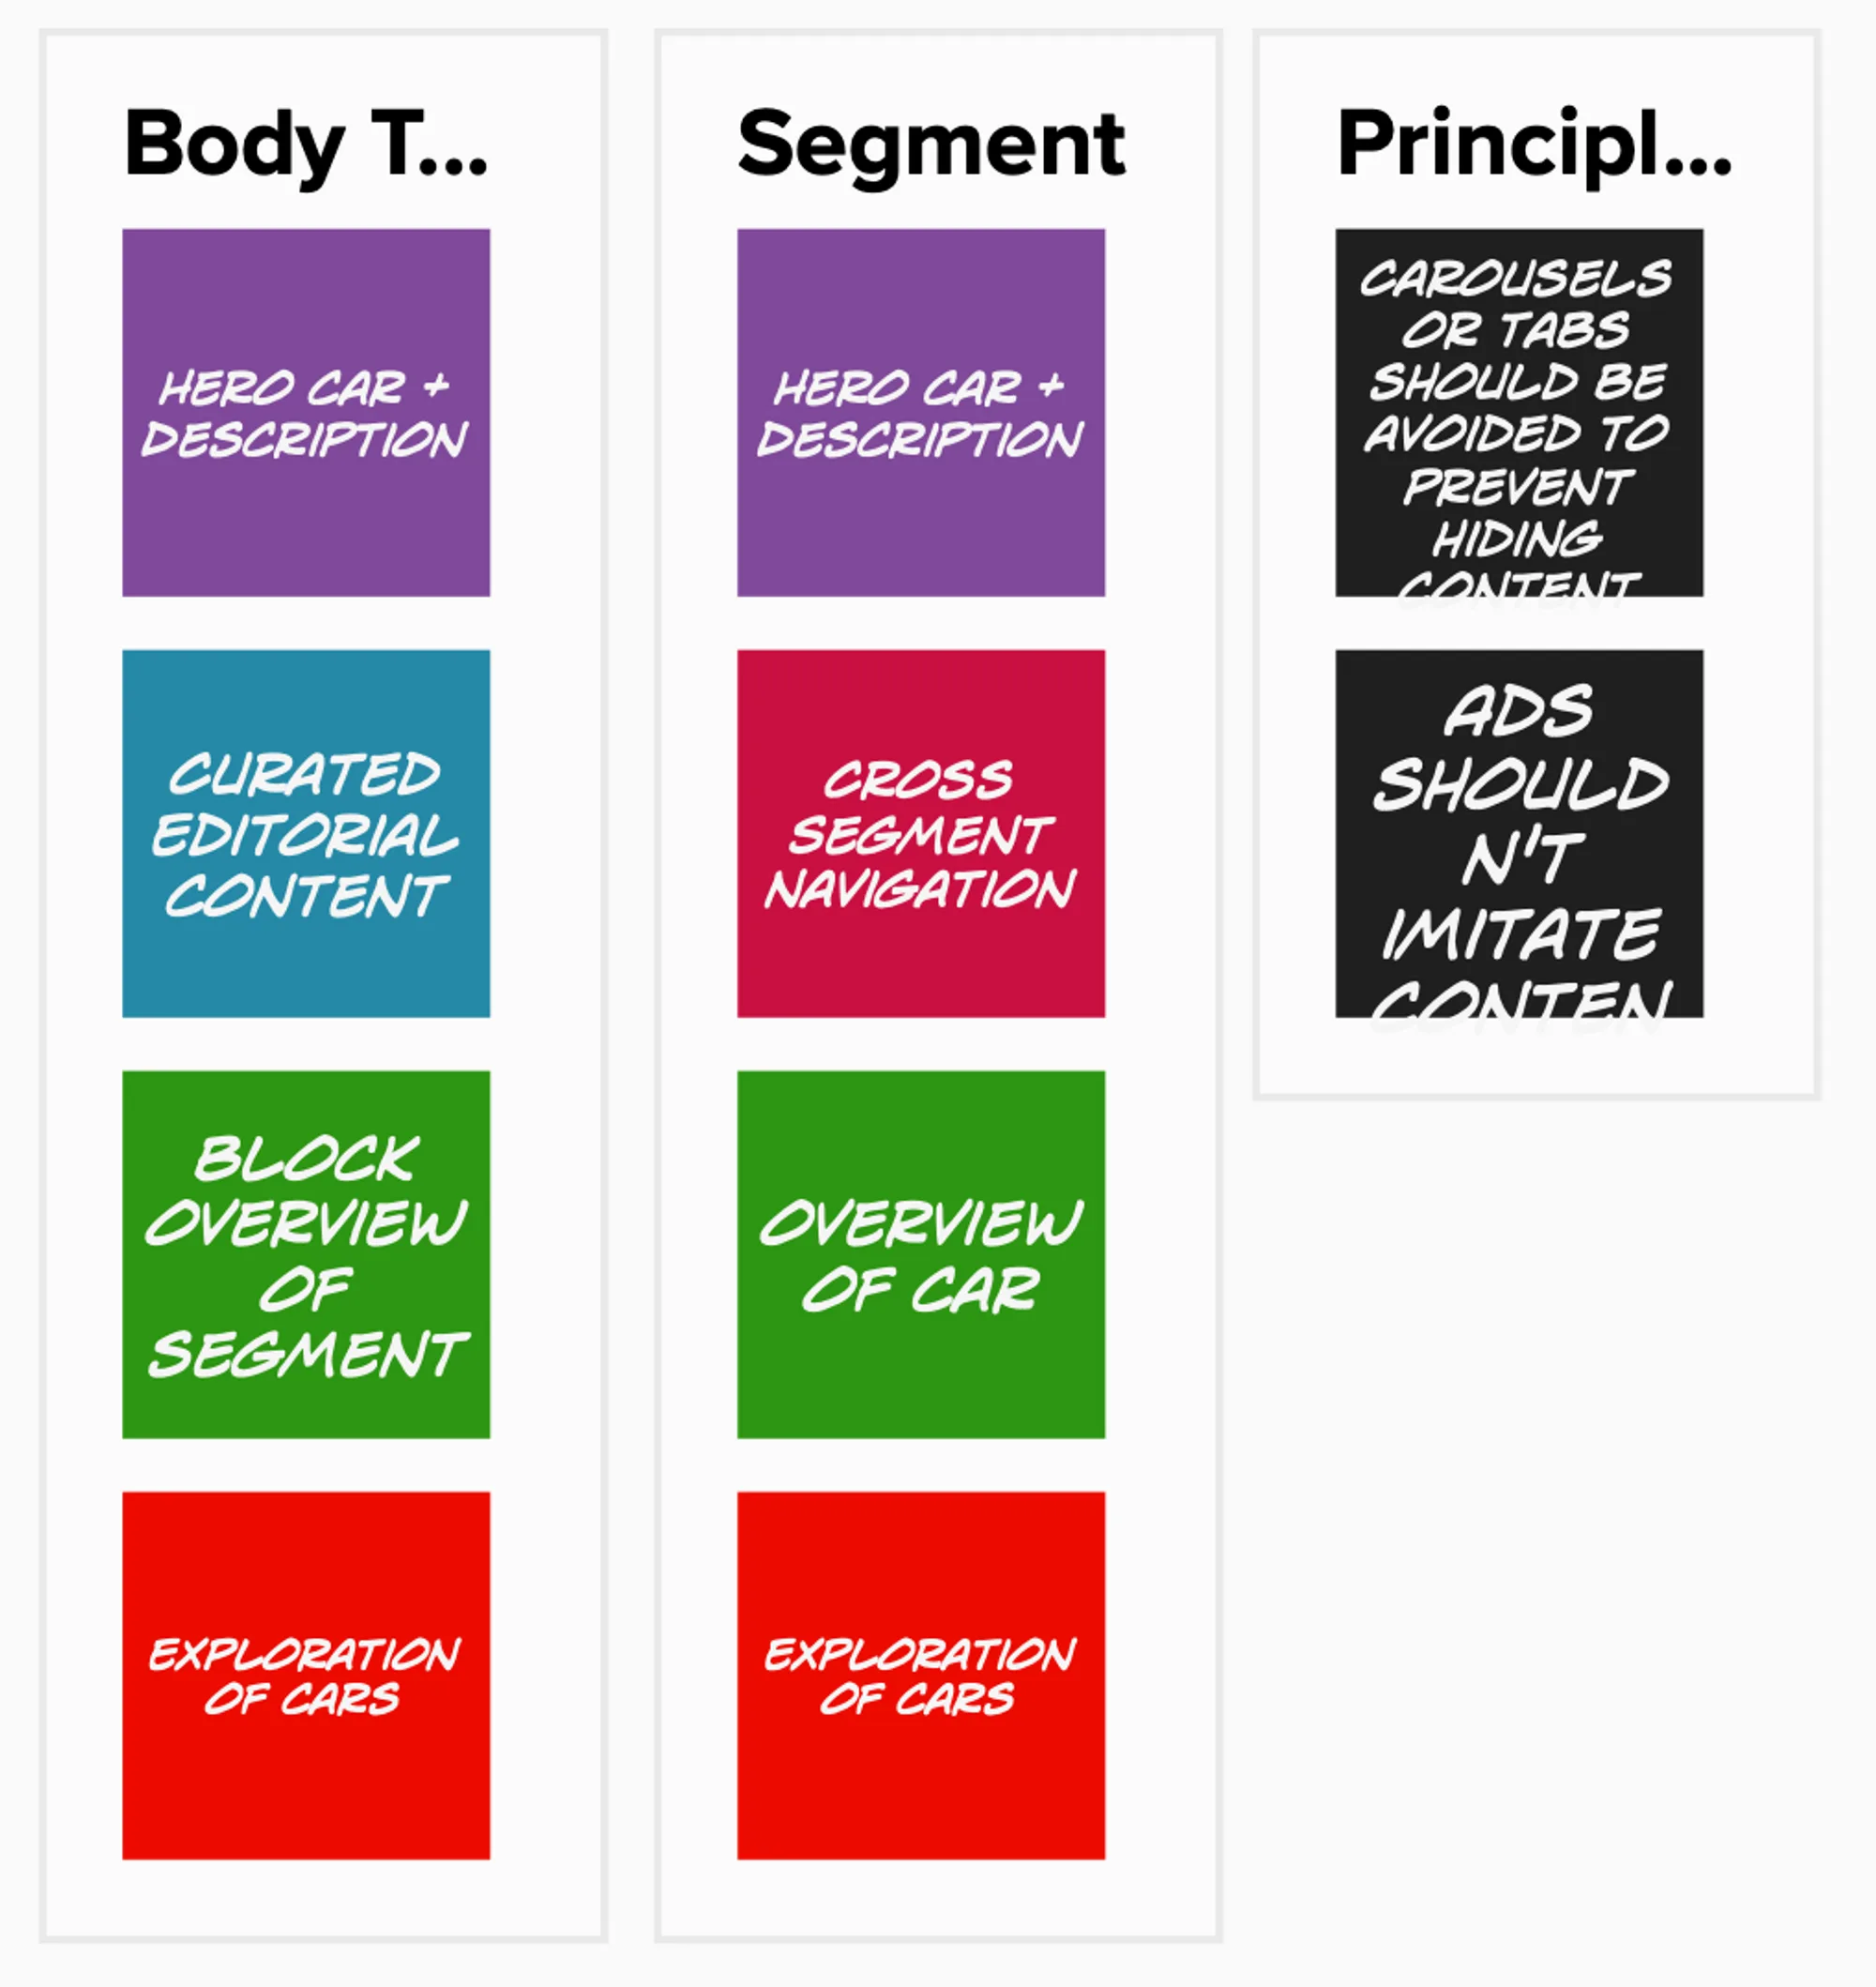
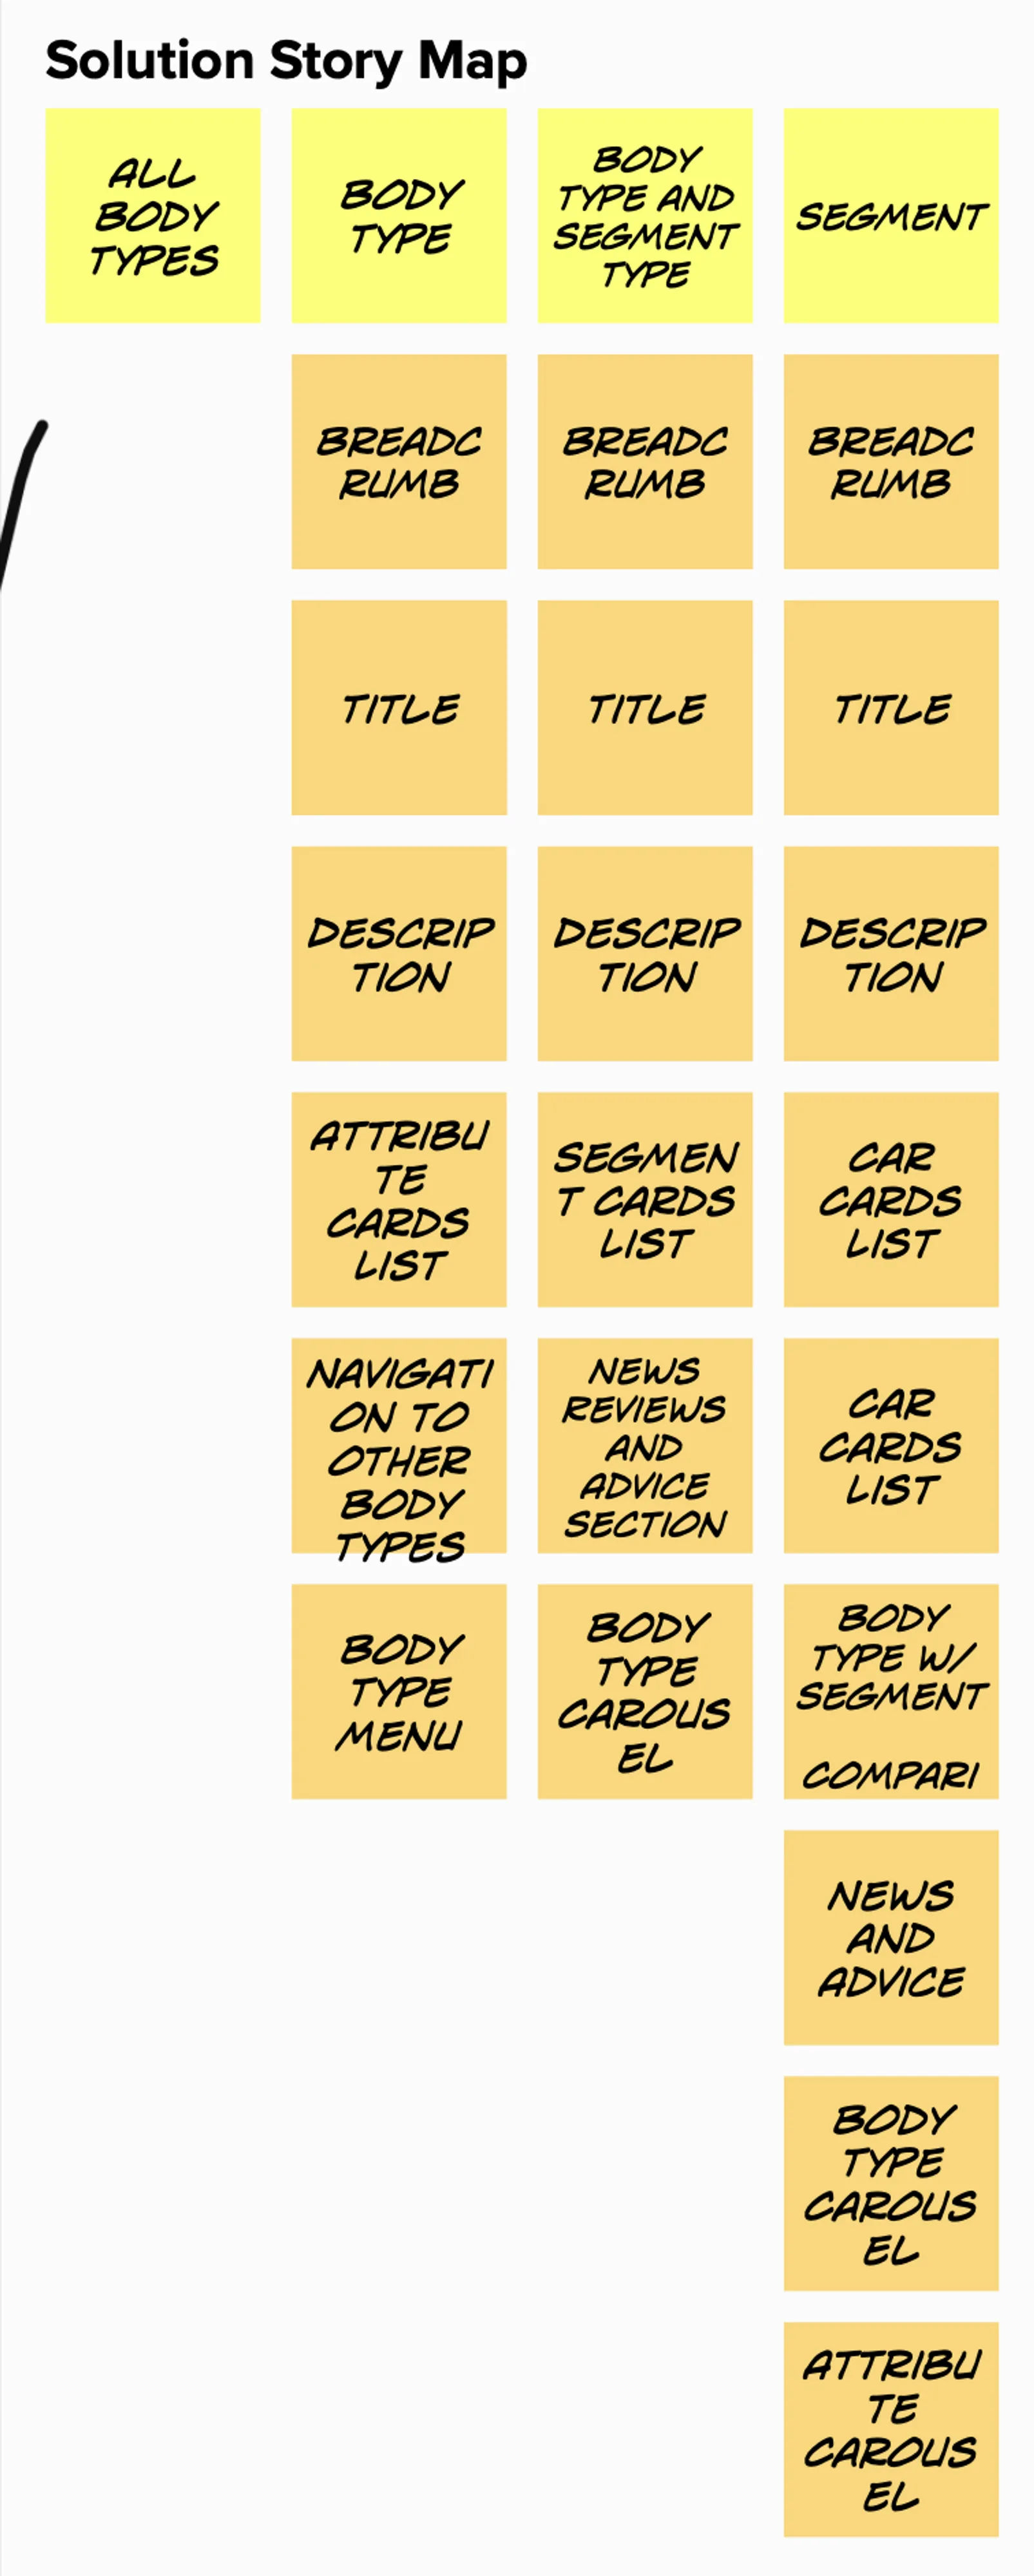
3.1 Pattern Finding
I started by highlighting similar concepts appearing across all designs.

Based on the marks, I make a design-spec storymap that is used as the foundation of the consolidated design.
3.2 Rapid Iteration
I start iterating quickly designs going from really high level with scribble as titles and text and some mark up on top. This is fleshed out enough to convey ideas to my stakeholders.
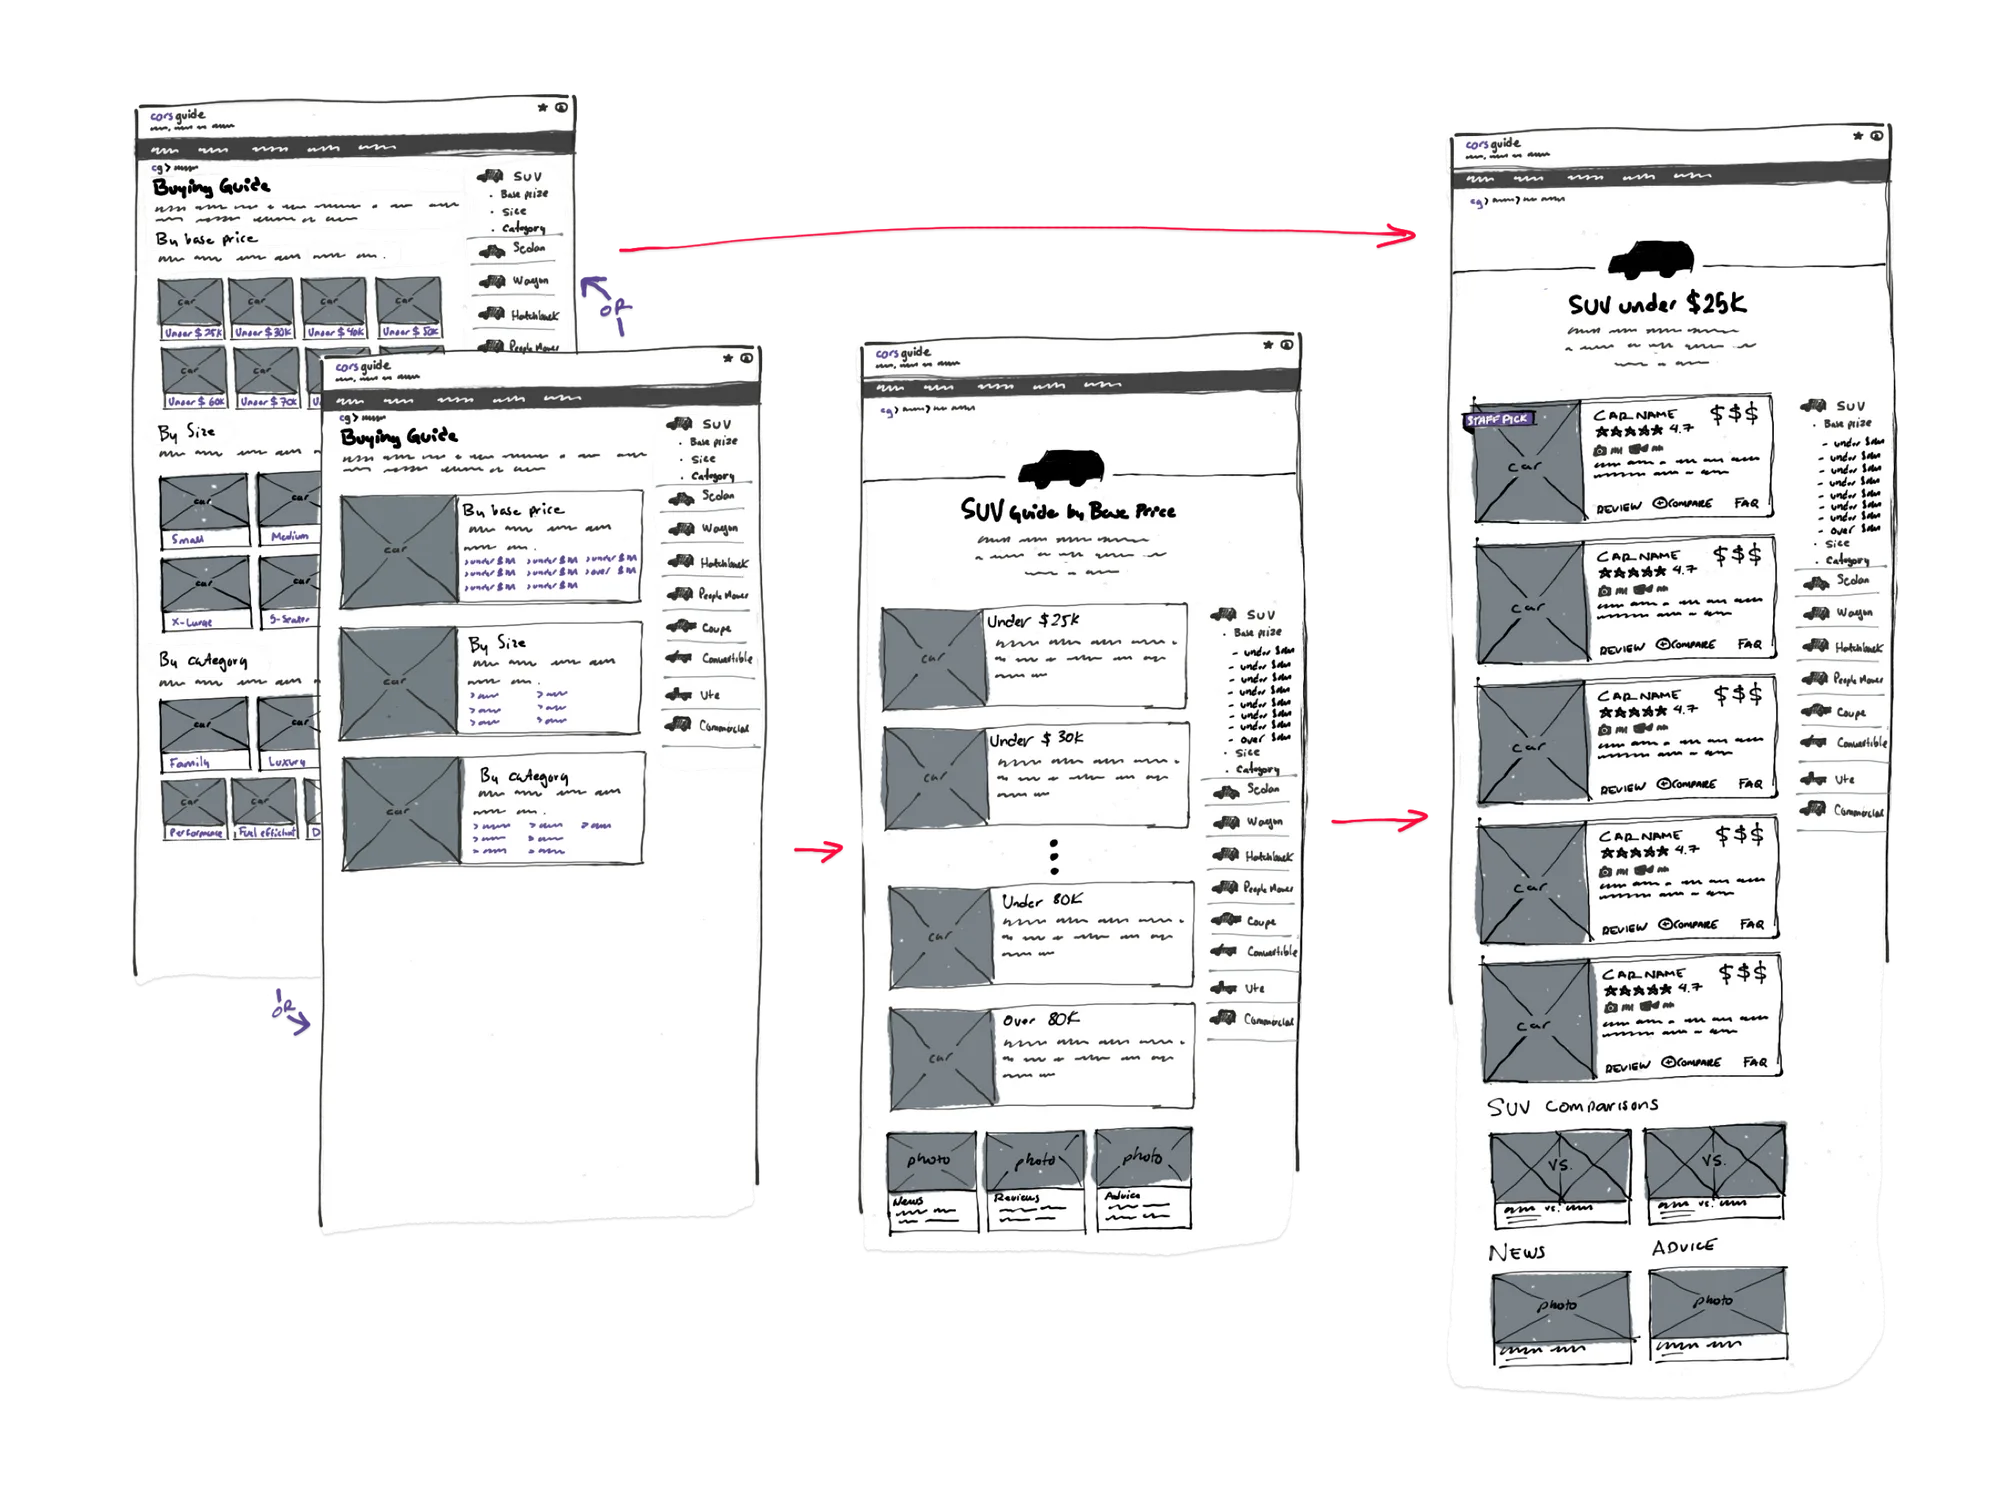
Once high level flow has been approved i start fleshing it out a bit more so that I can get help from more junior designers to start making this a high-level wireframe.
Designs get maturity from iteration to iteration. Those iterations are based on face to face conversations with stakeholders.
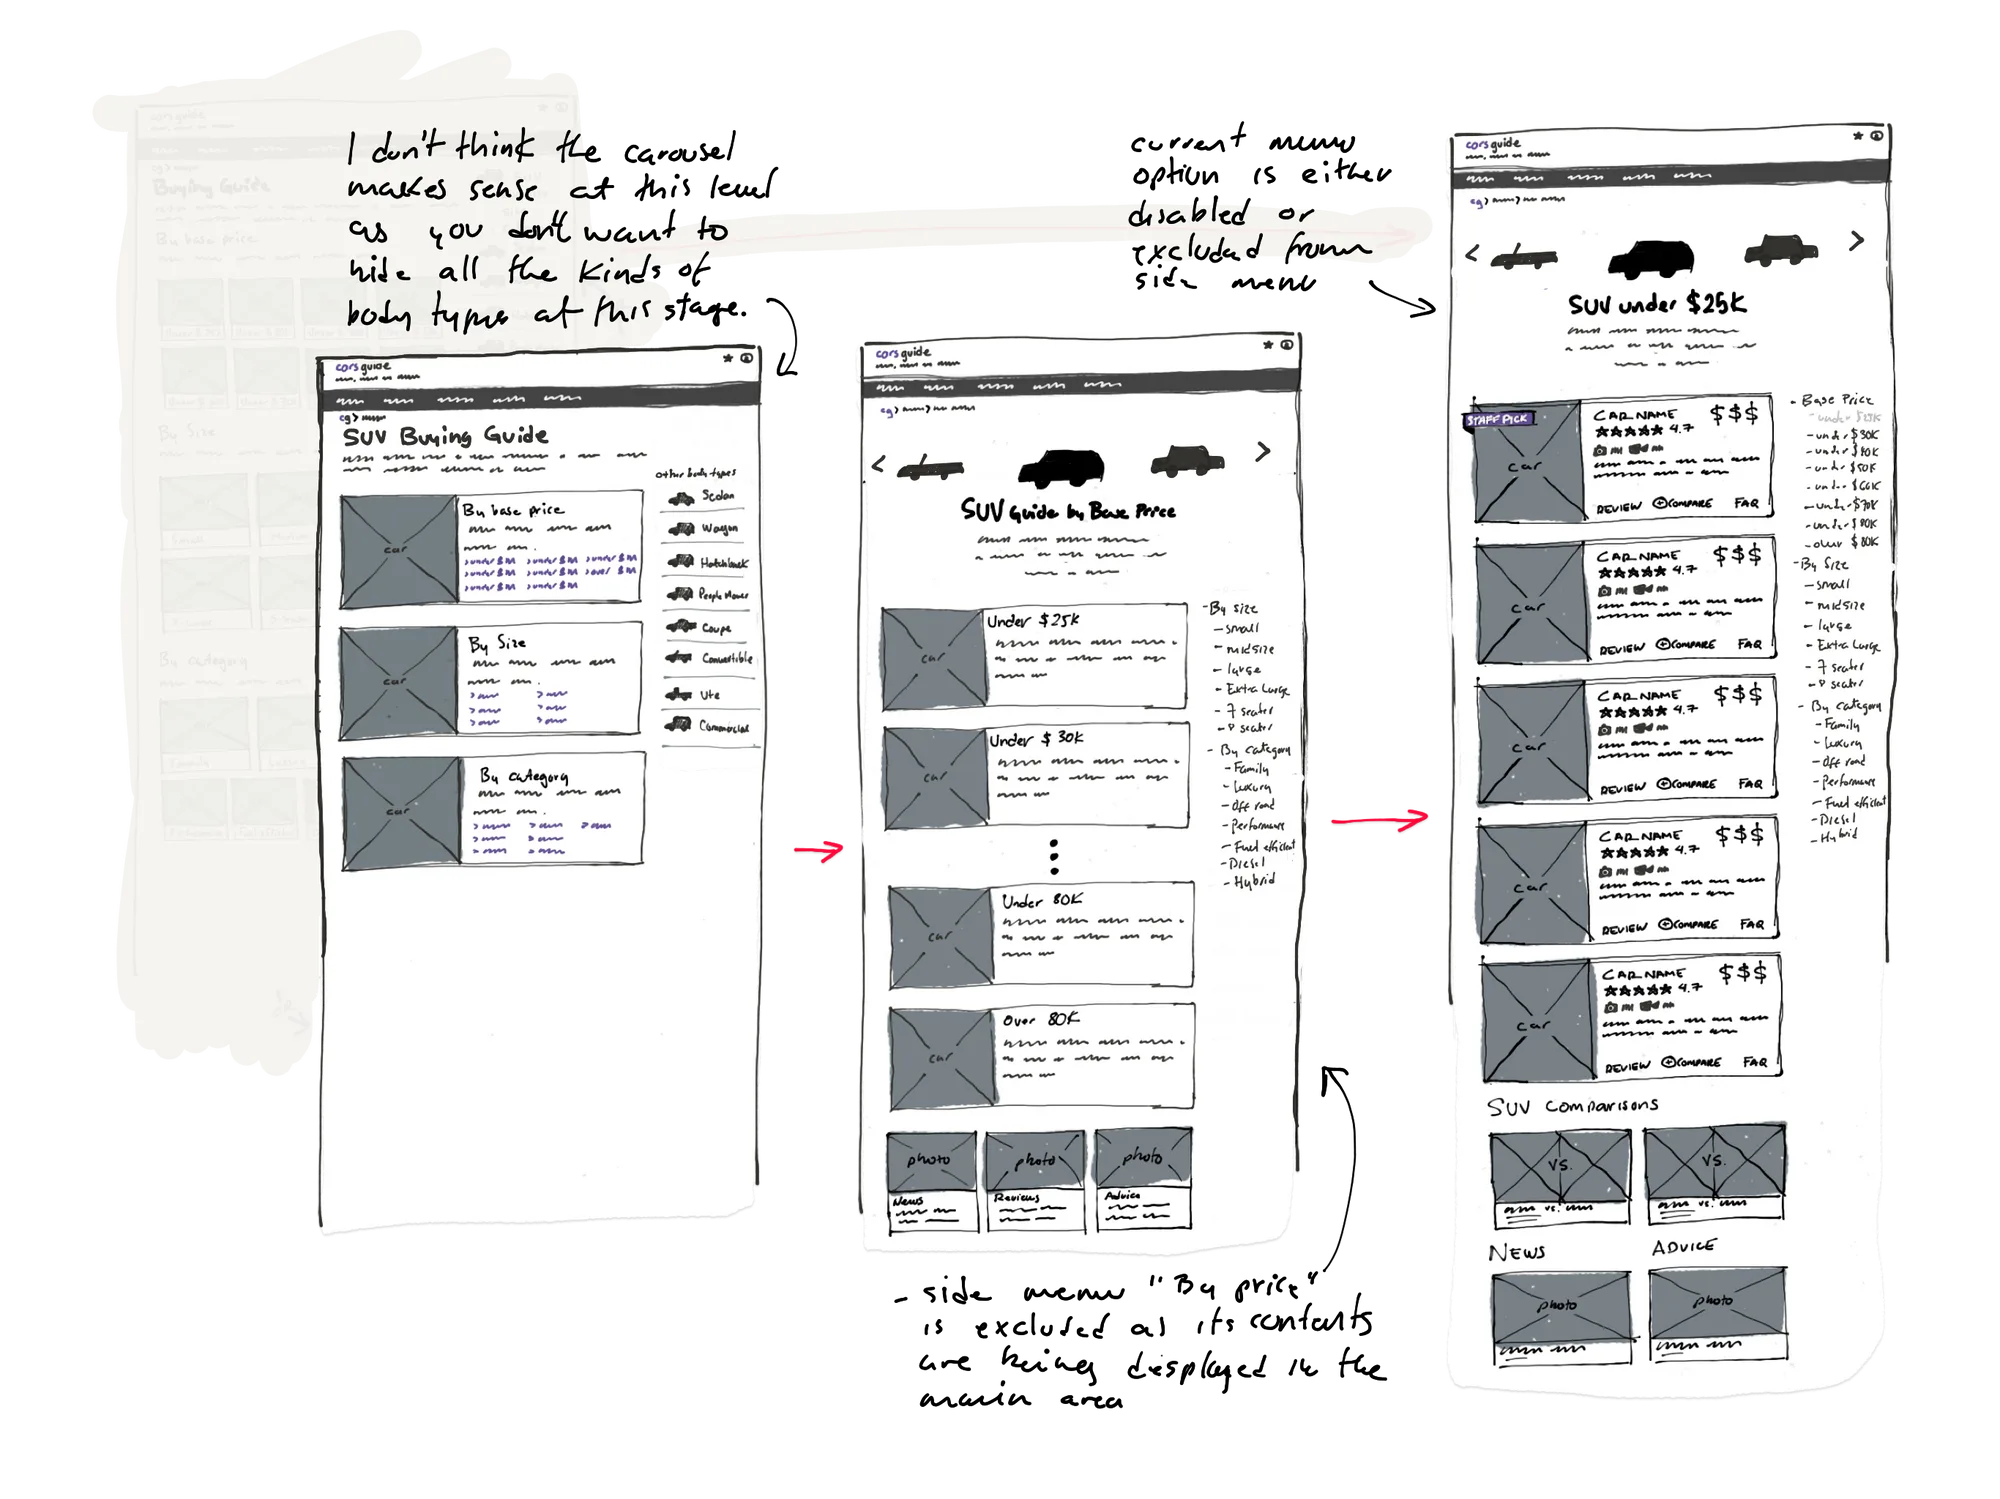
4. Design System & Specification
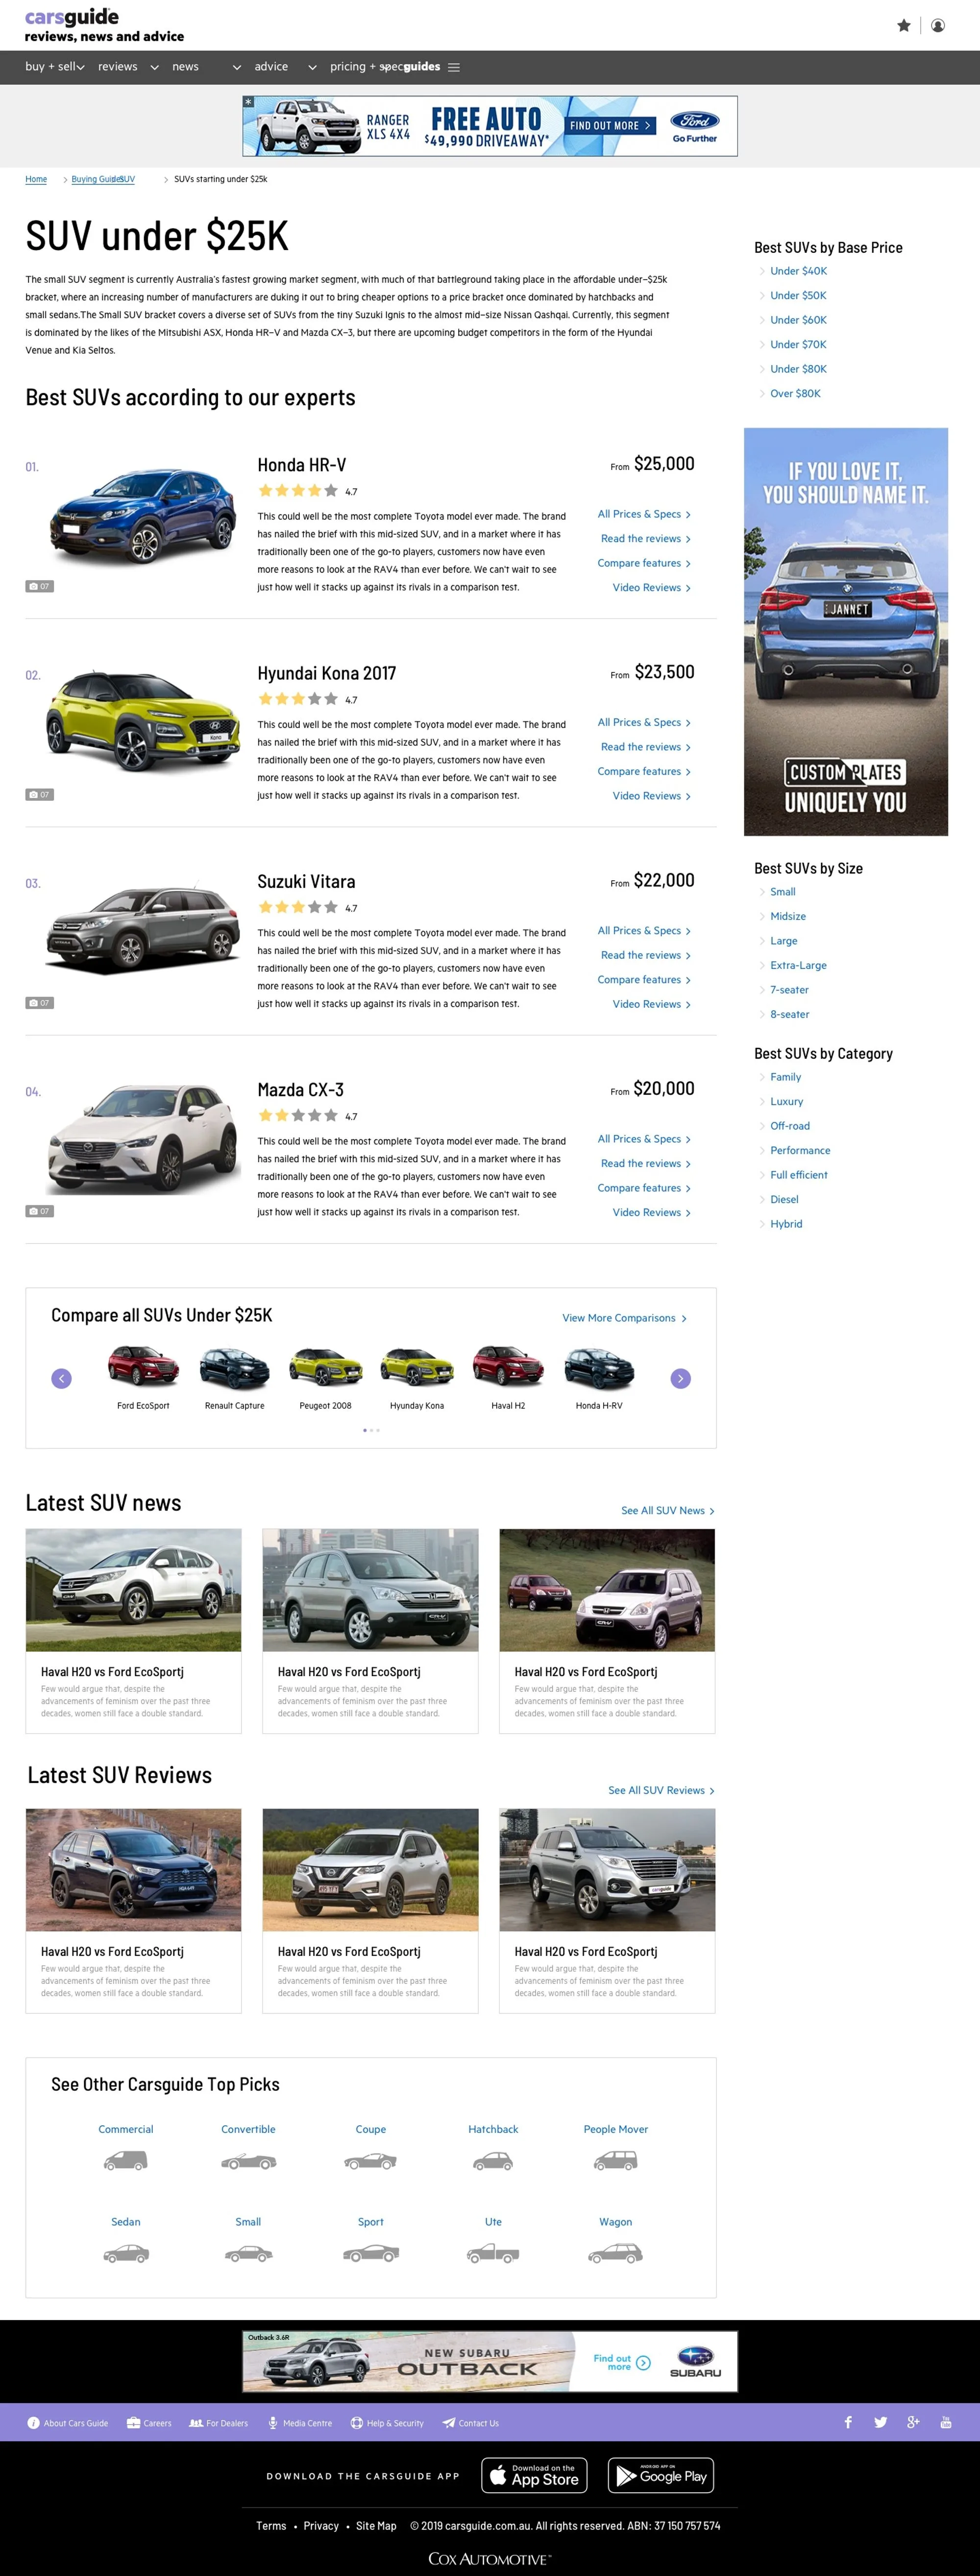
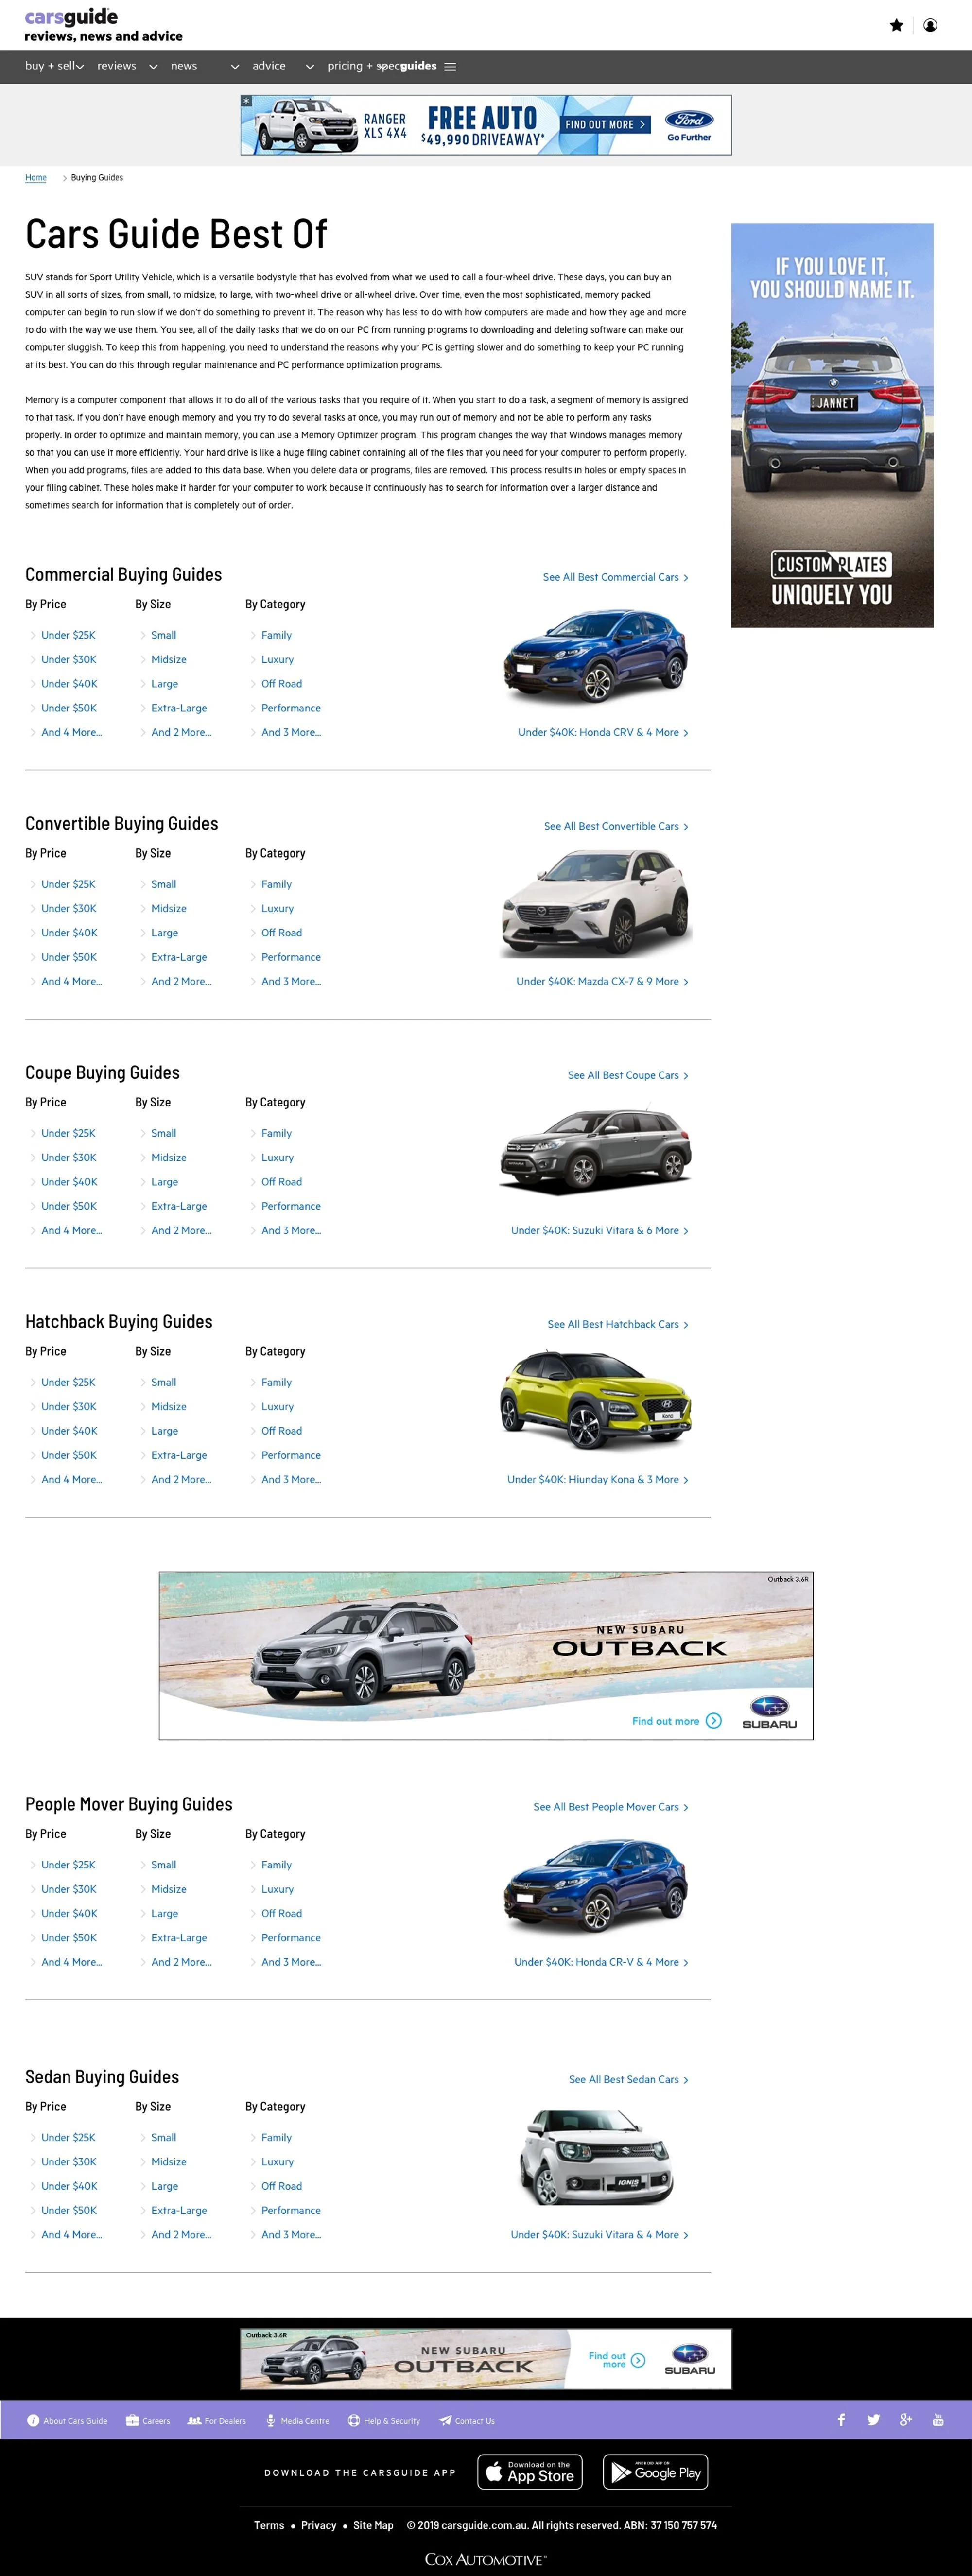
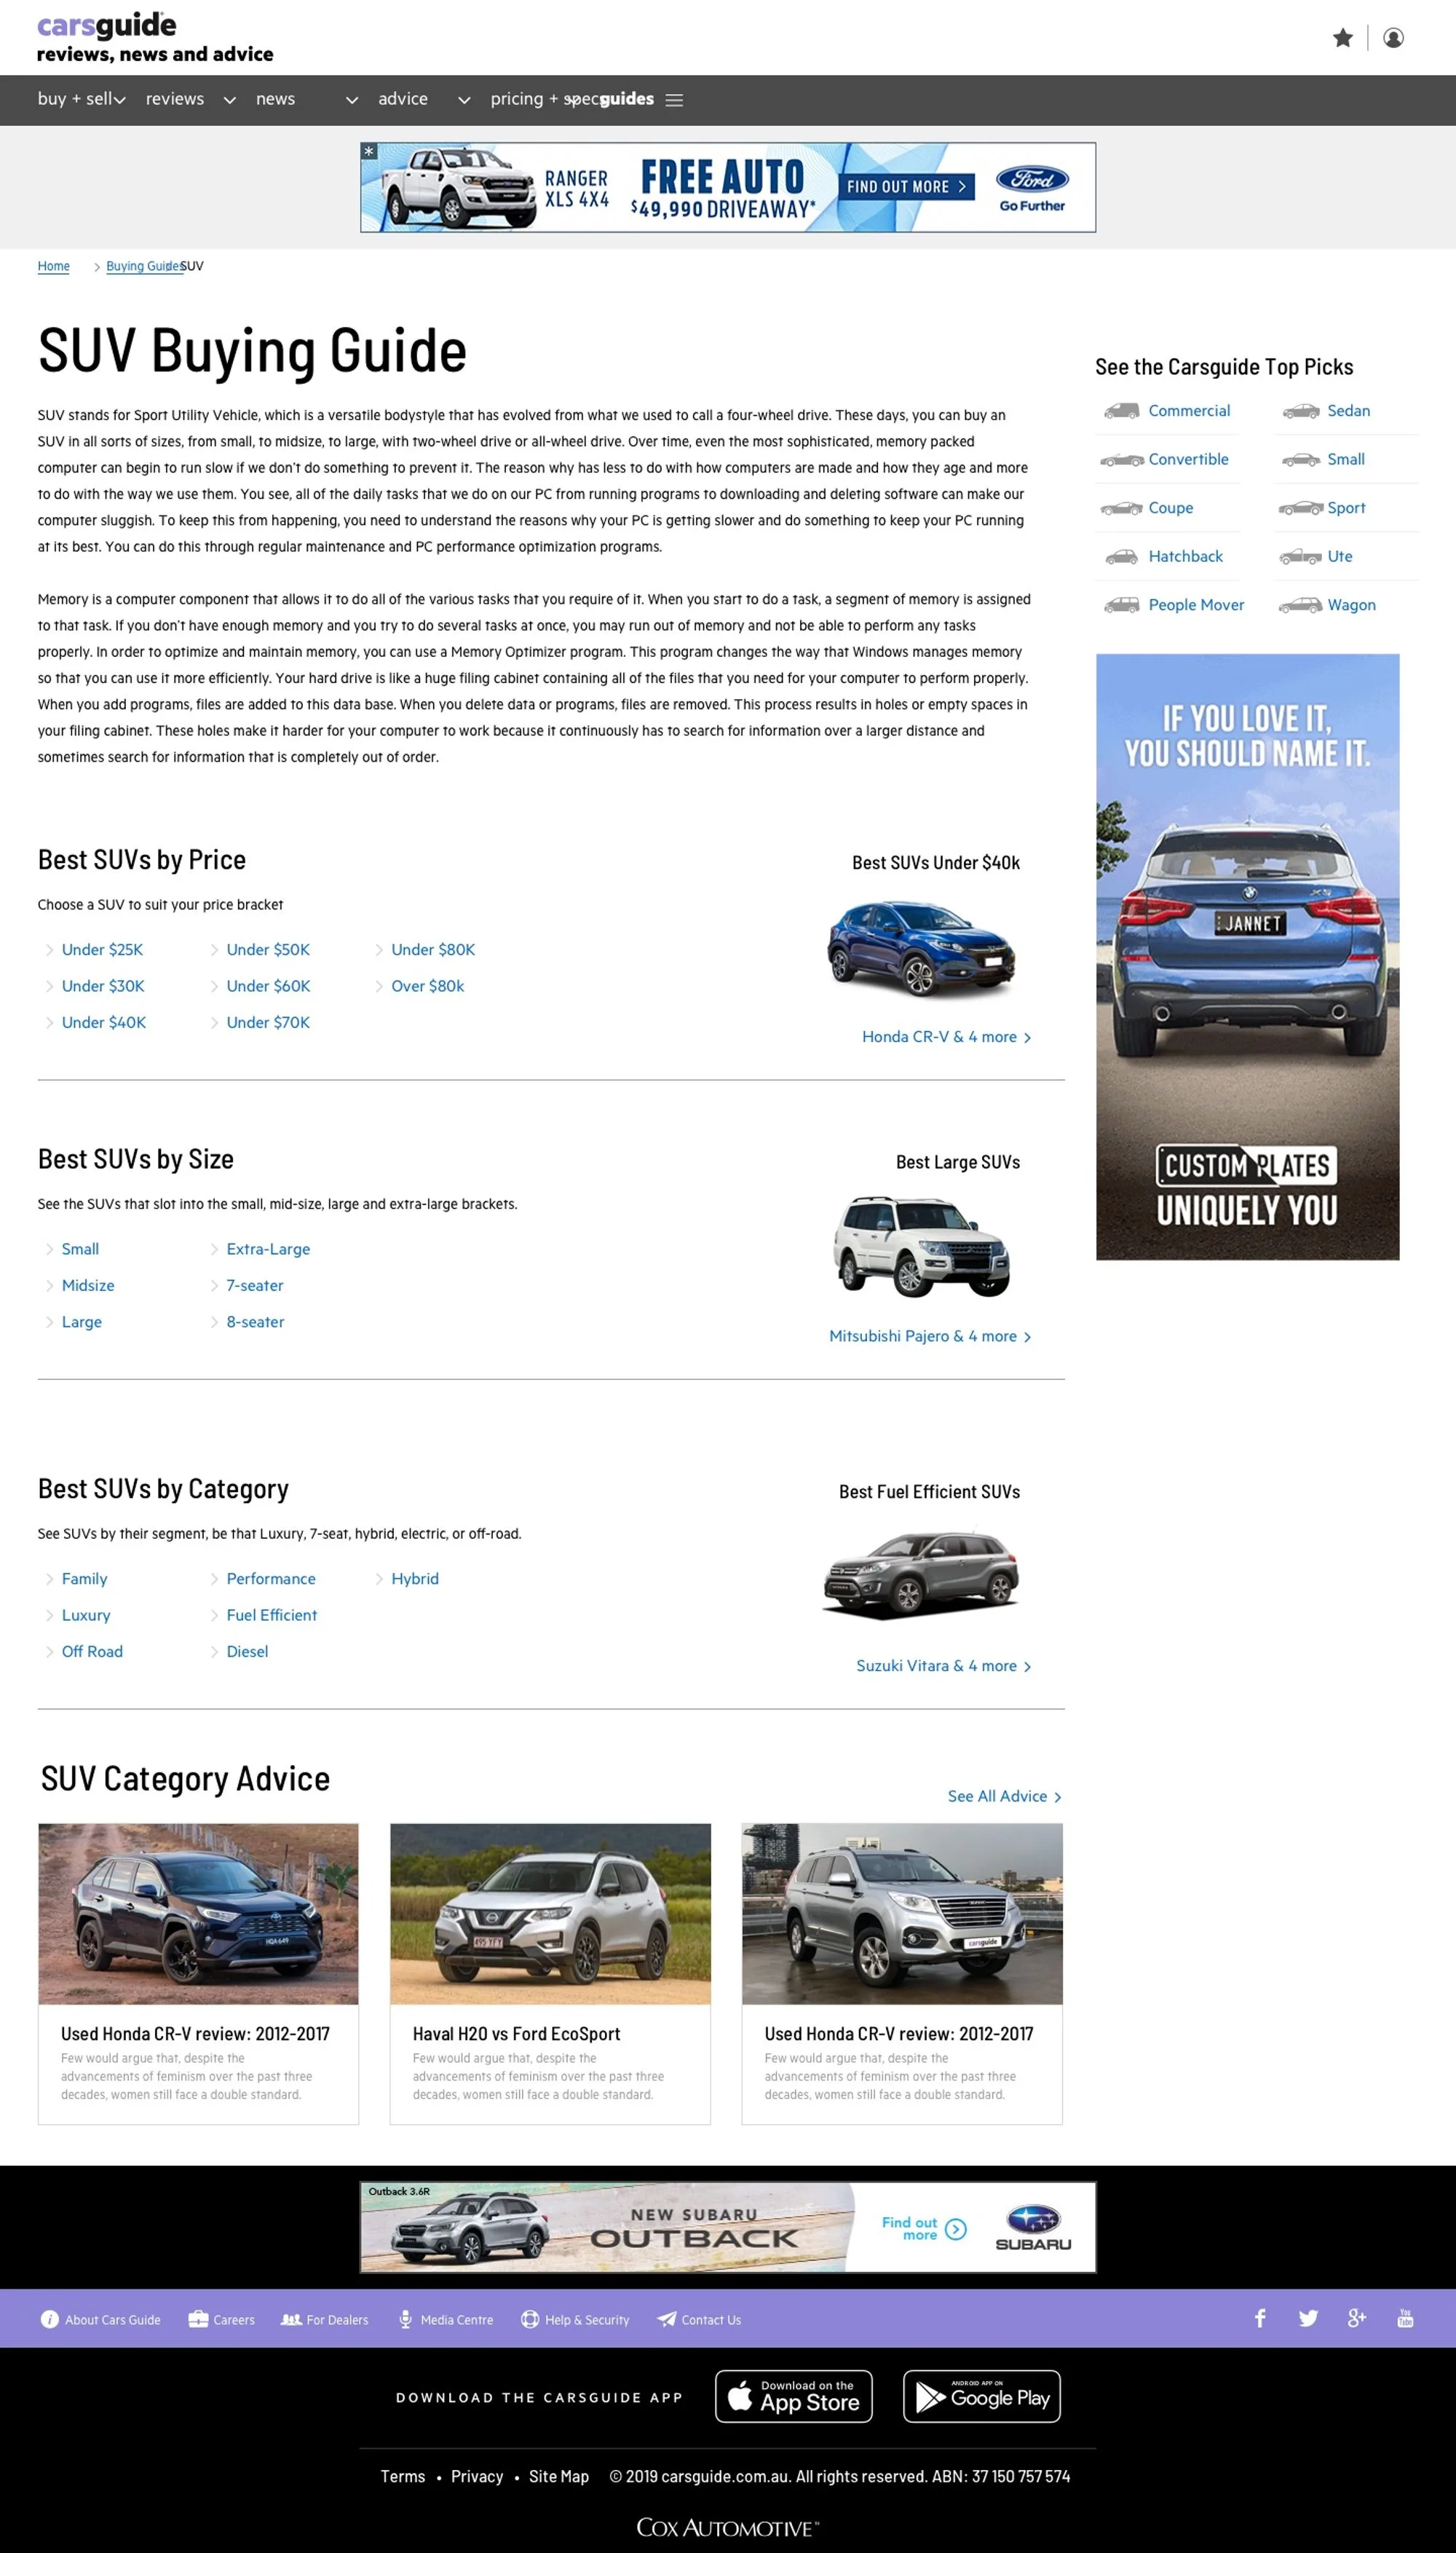
When the sketch or low fidelity wireframe above has reached consensus. We spec it out for the development team's benefit. Conversations happen on top of the story-map and the wireframes as shown below.
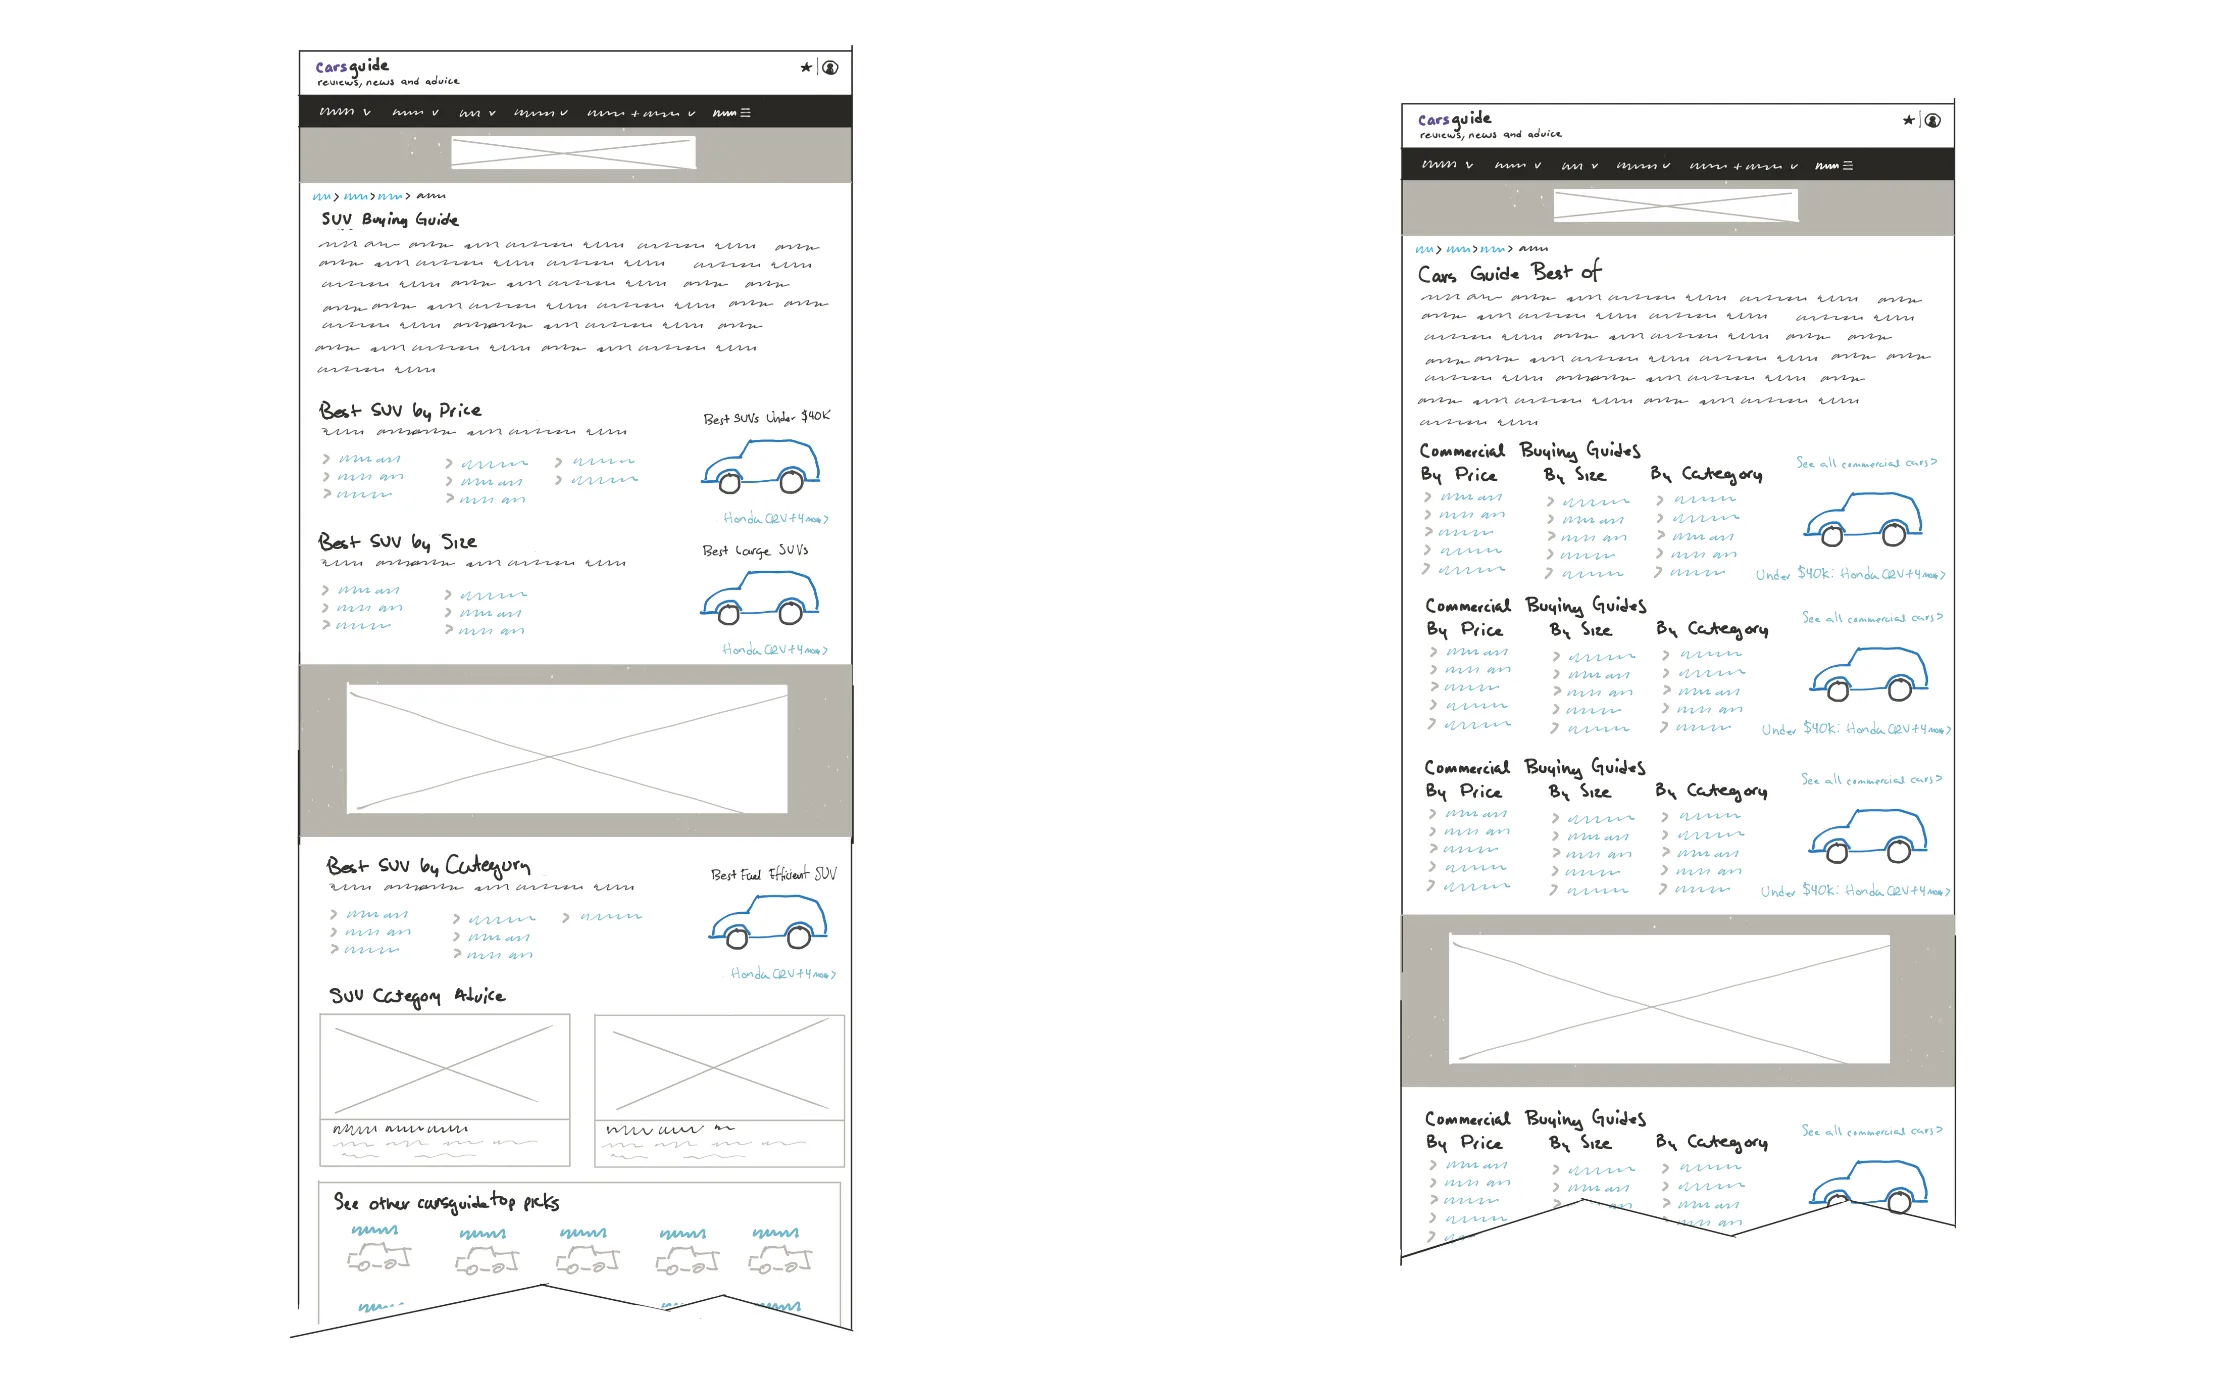
You can see the high fidelity wireframes for the desktop and the mobile version of the website below.


Edgar held the role of UX Design & Research Manager at Carsguide between 2019 – 2019 in Sydney, NSW.
RELATED CASE STUDIES