Design
Pioneering the intersection of music and technology by creating a user-friendly digital platform for music learning.
OVERVIEW
Pioneering the intersection of music and technology by creating a user-friendly digital platform for music learning.
01
Outcome
Overview
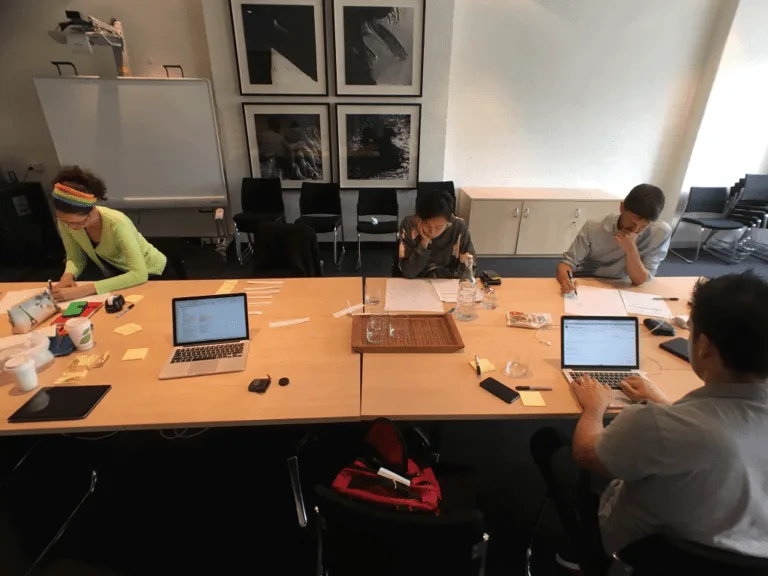
Throughout the design process, I adopted a collaborative approach that encouraged active stakeholder participation. This strategy helped our team identify key elements of information, functionality, and flow that formed the basis of our design. To better understand the architecture and flow, we transformed several music lessons and key supporting features into over 70 wireframes, providing an invaluable platform for validation.
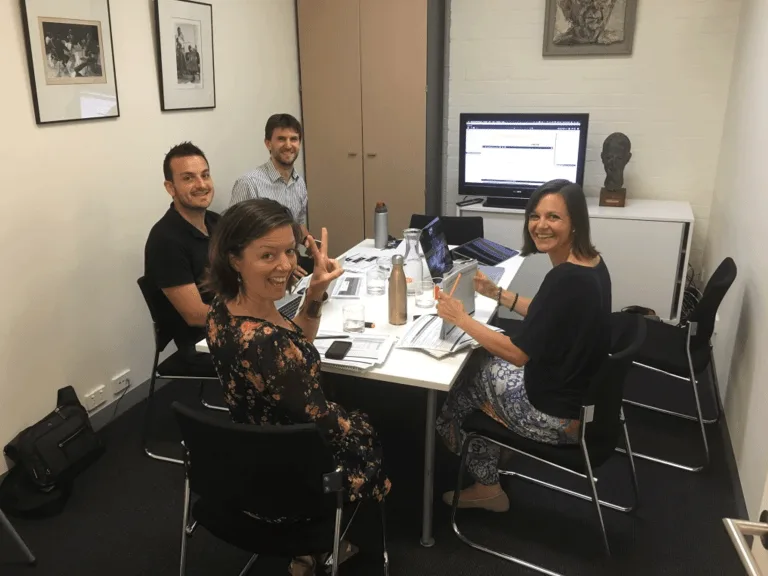
As our project progressed, we developed prototypes by interconnecting all the wireframes with clickable zones. This allowed the product to feel more akin to the final result, enabling us to evaluate interaction and consolidate flow. To ensure our design was user-friendly and intuitive, we organized several walkthrough sessions with persona representatives, providing them an opportunity to interact with the prototype and ask questions. This feedback was crucial in refining our approach.
Ultimately, we described the solution using a three-dimensional matrix, which effectively communicated the users' journey, key interactions, and low-level details of the first version. Finally, I spearheaded the effort to create the final look and feel of the app, culminating in high-fidelity versions of key pages. These comprehensive comps became the blueprint for the app's aesthetic and functional design, marking the end of our extensive design process.
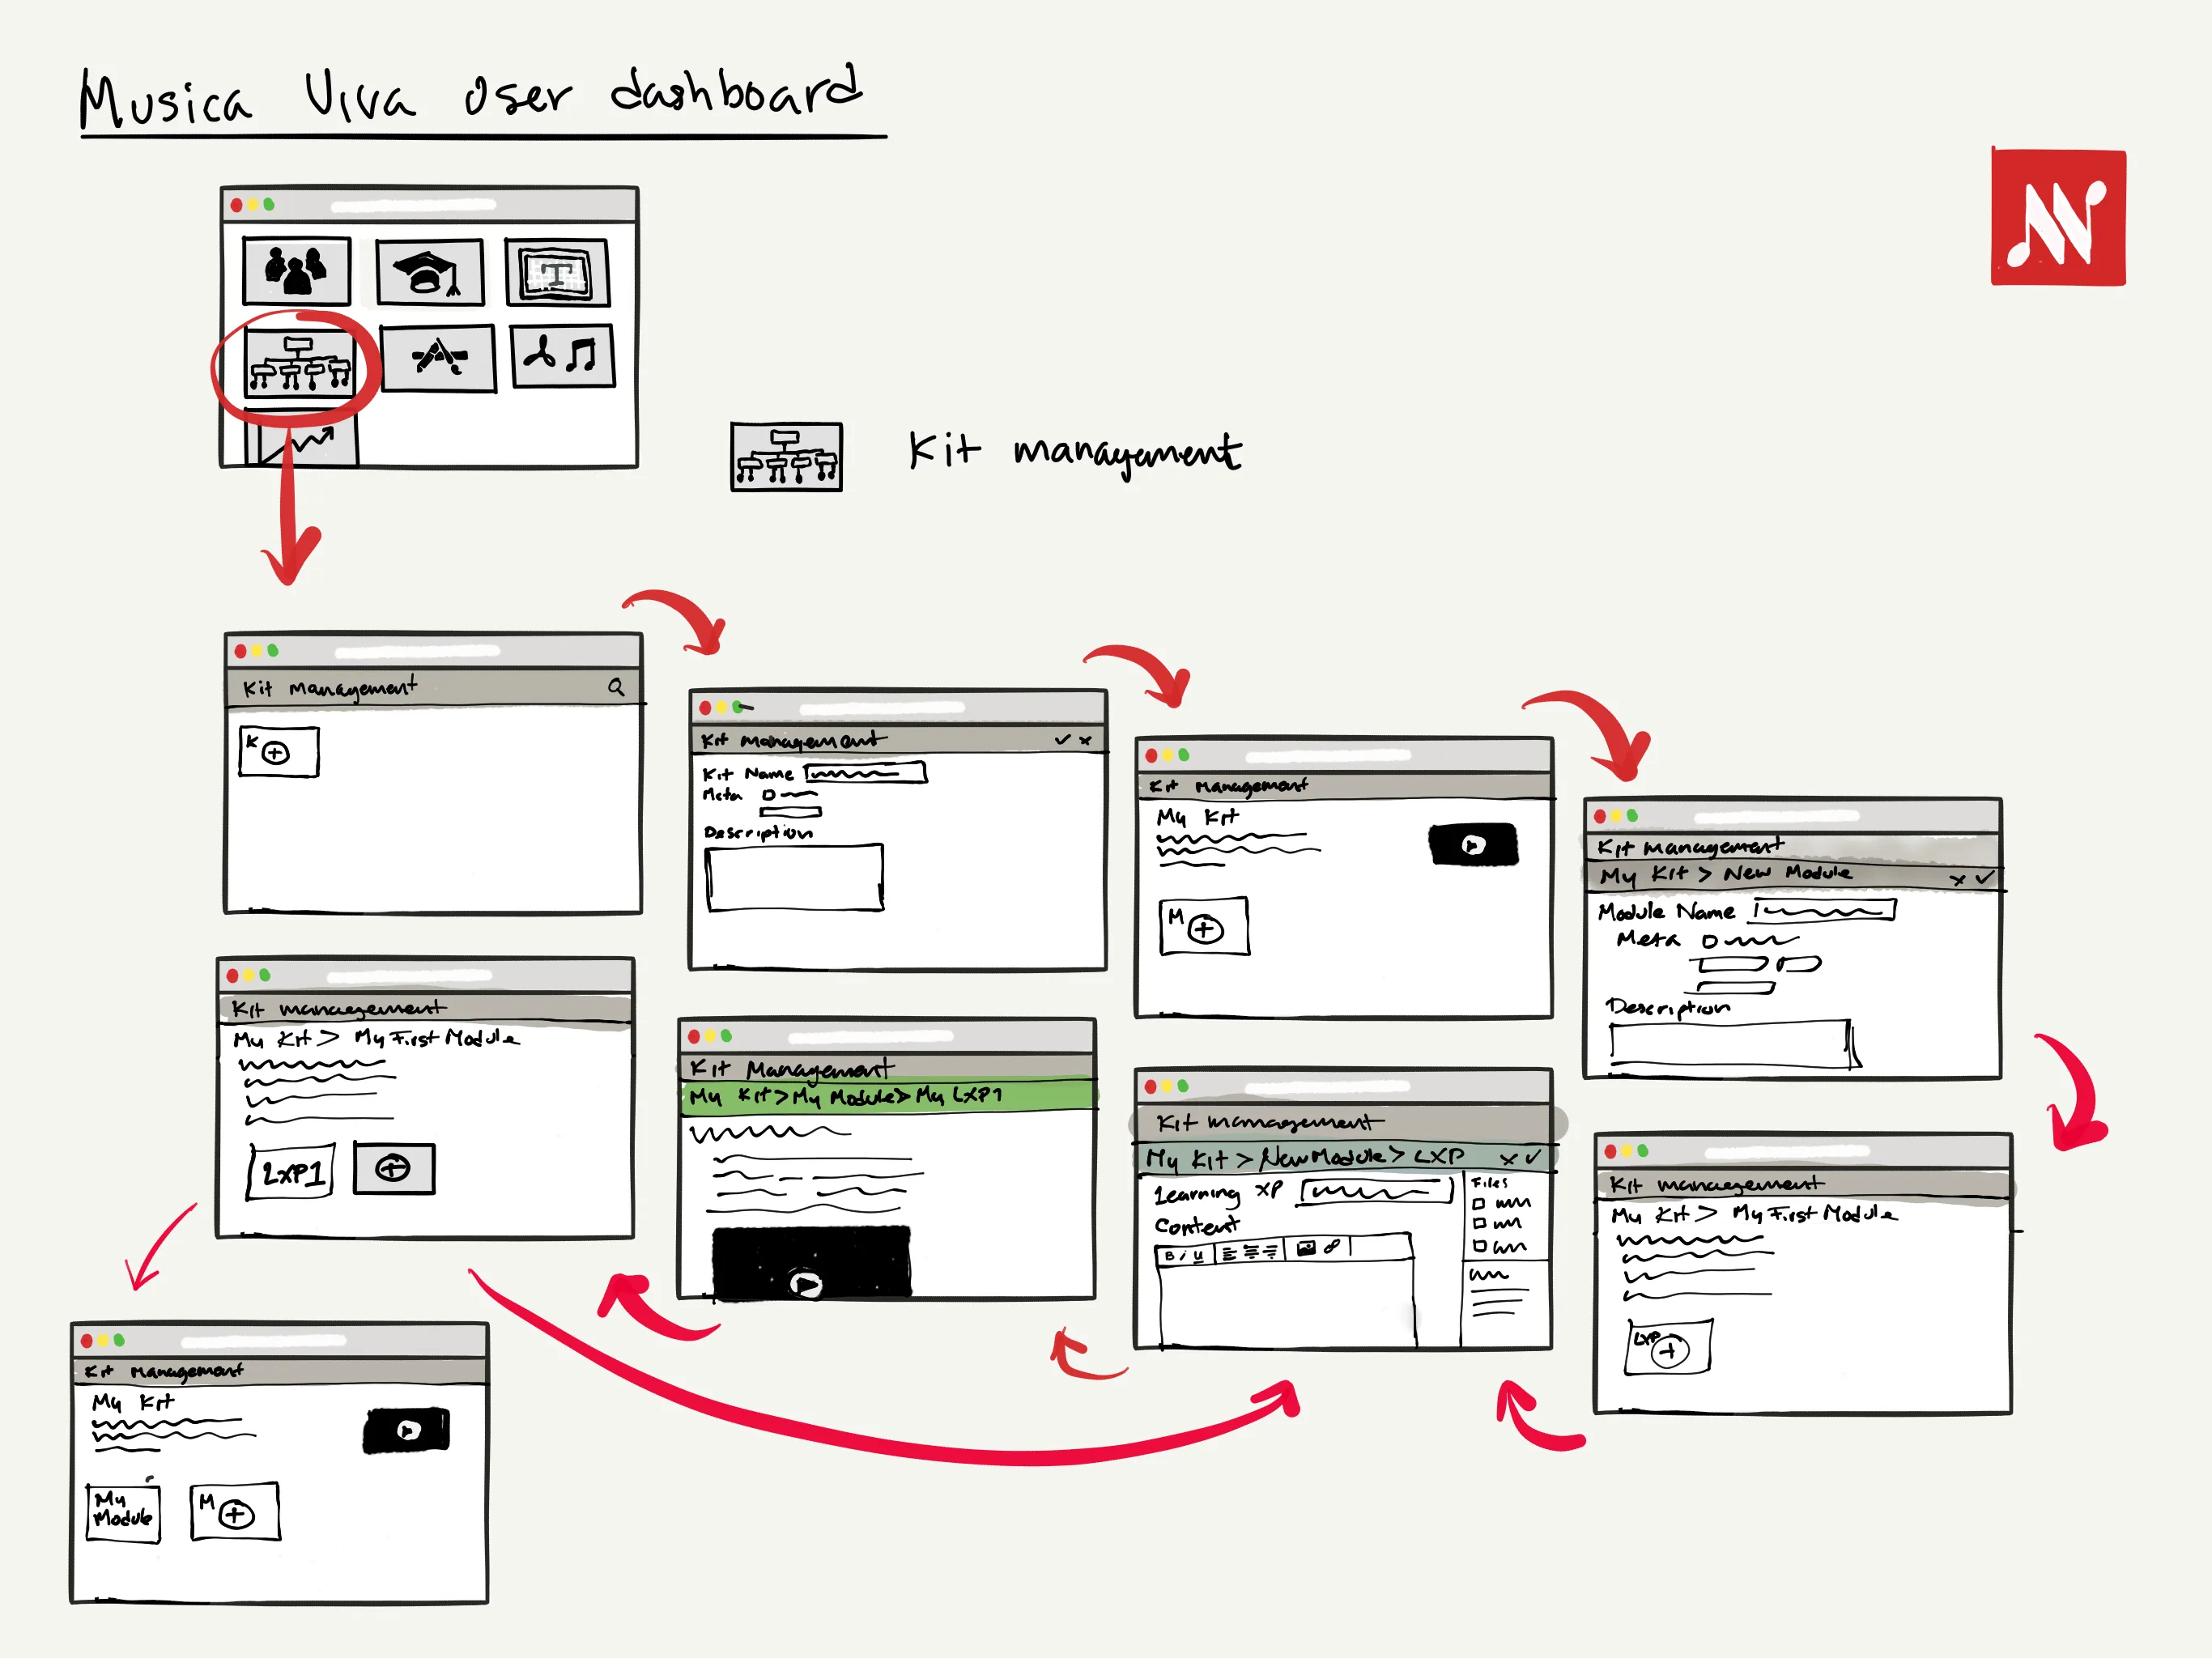
The design process commenced with a focused exploration of content flows and information architecture, setting the groundwork for the entire project. A critical visual component of this stage was drafting sketches of the anticipated flow, incorporating valuable input from Subject Matter Experts (SMEs) and user Personas. This process ensured that our design was both informed by specialist knowledge and aligned with user expectations.
Following this, we transitioned into sketching screens that were again developed alongside SMEs and user Personas. This approach brought the initial content flows to life by visualizing the architecture and providing concrete designs for each screen. These sketches offered a preliminary glimpse into the user interface, marking a significant progression from abstract flow diagrams to tangible screen layouts. This cohesive series of design stages fostered a collaborative and comprehensive approach to our design process.
02
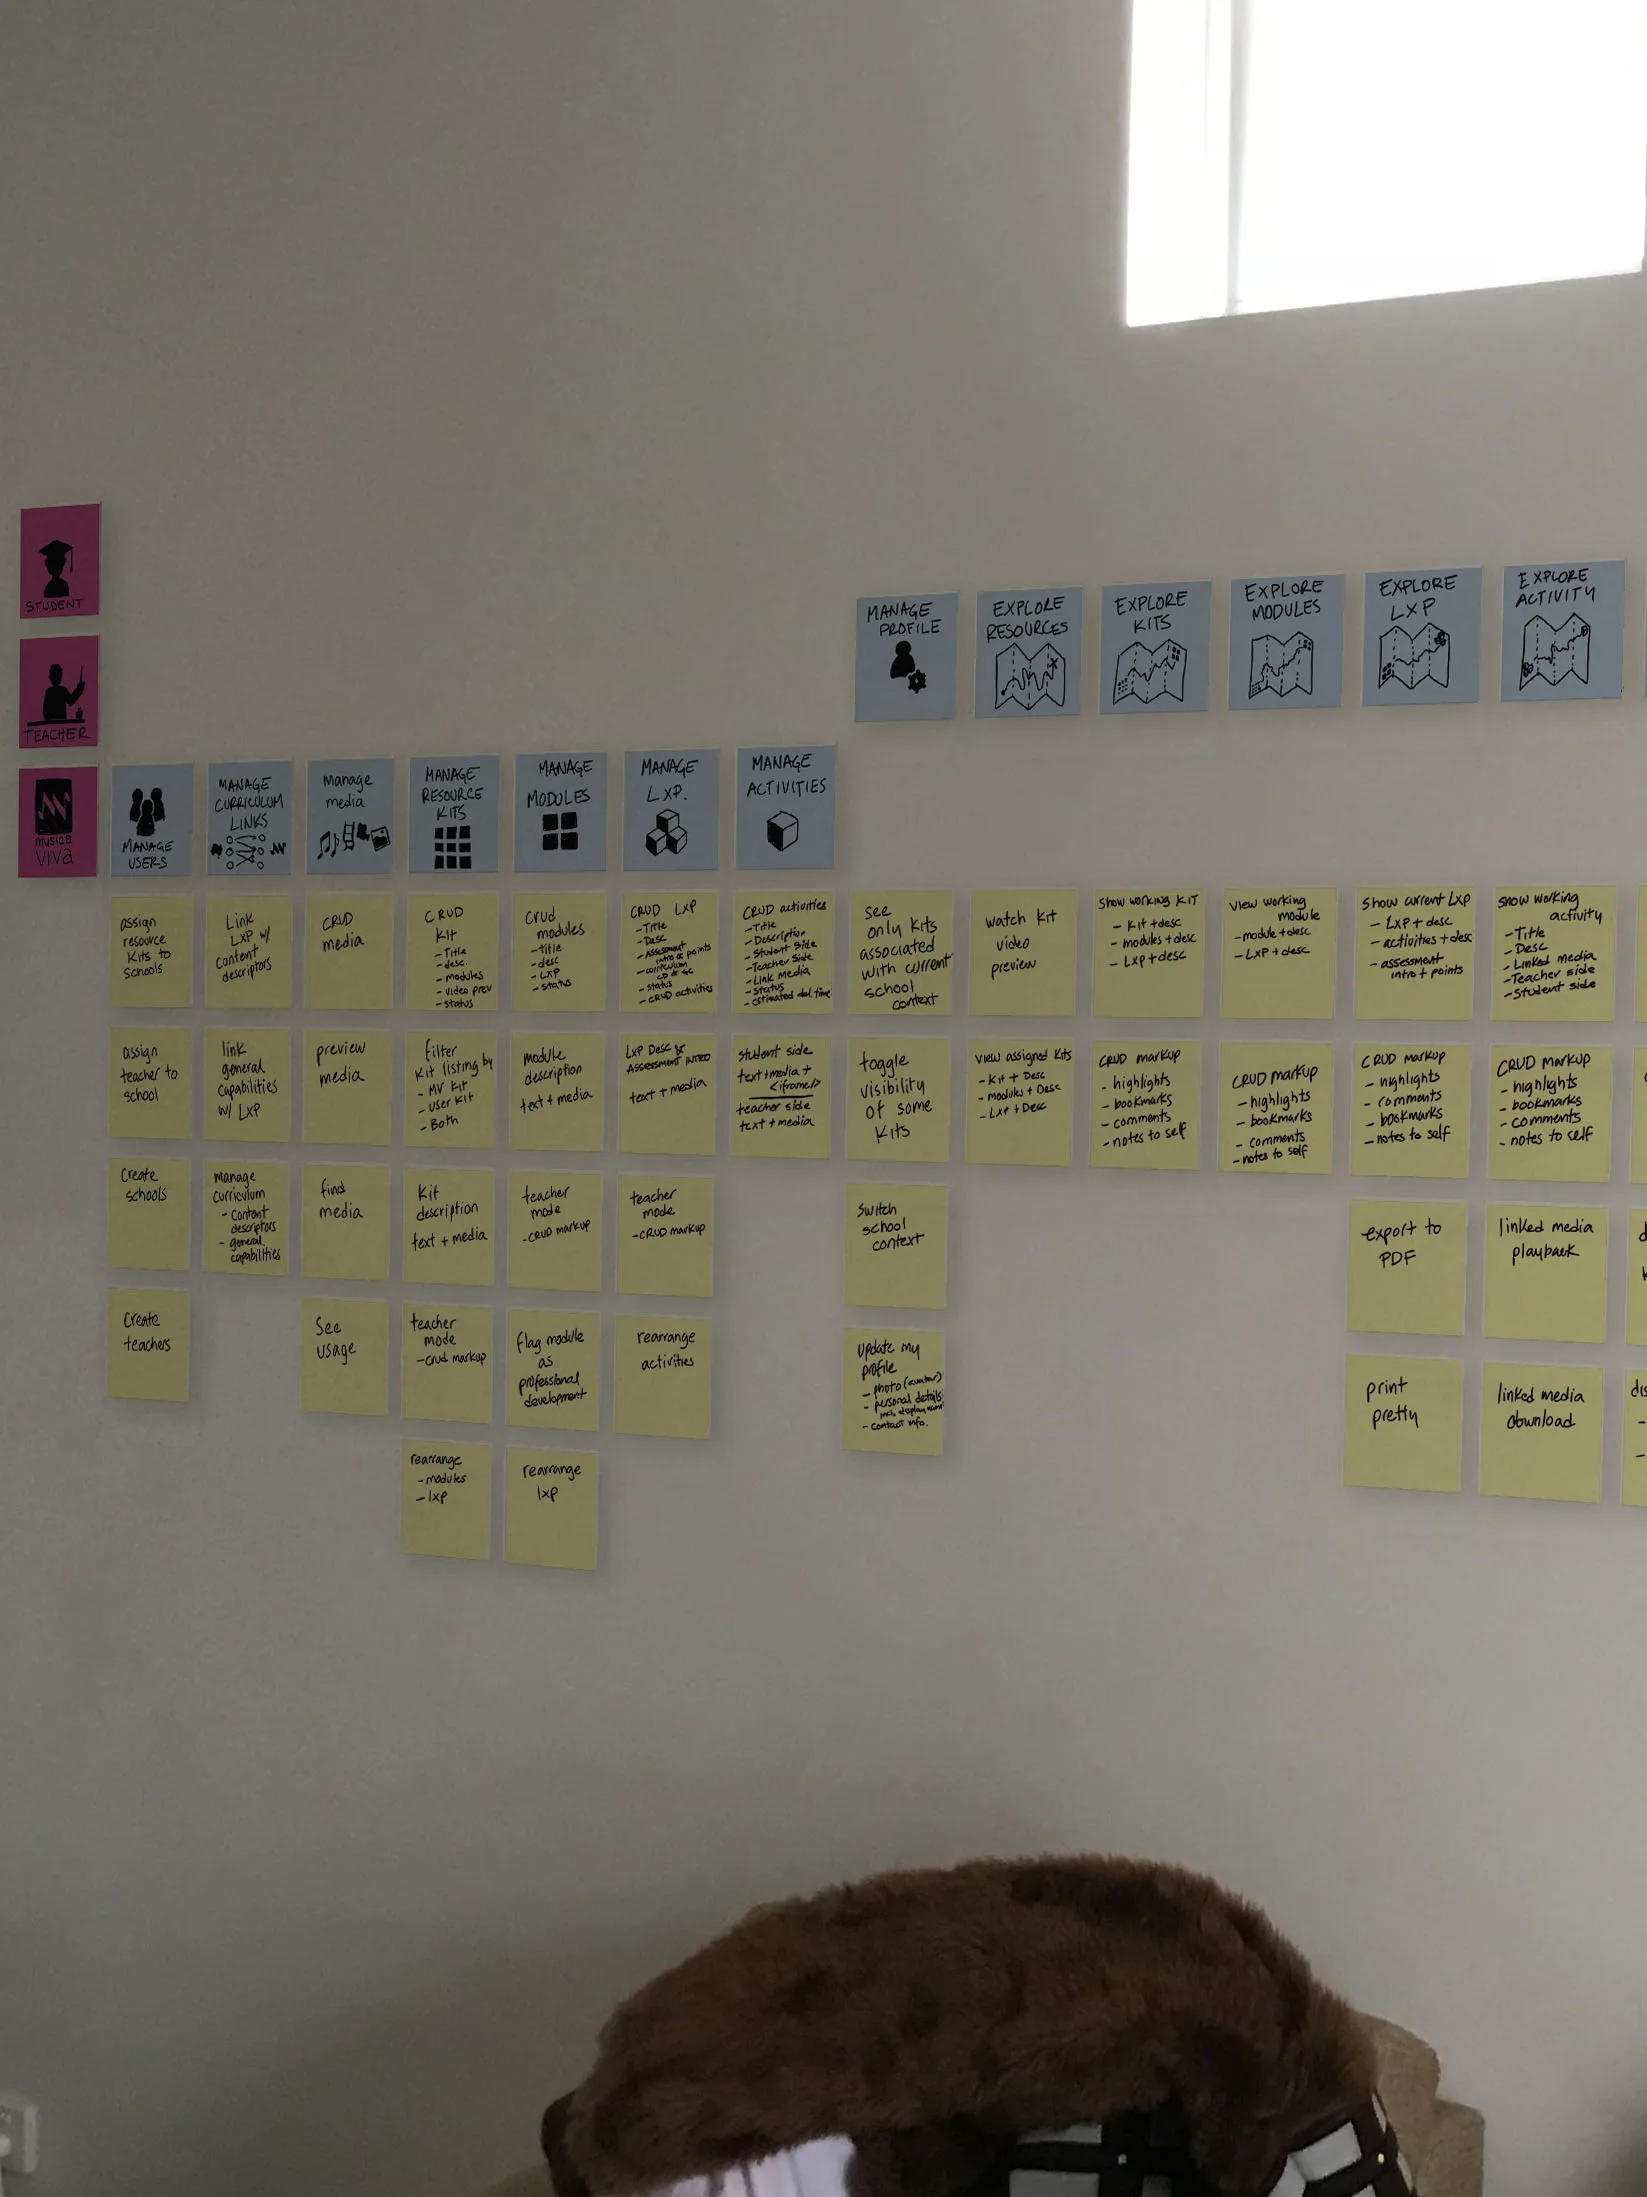
The journey of creating a high fidelity, feature-rich product initiated with the construction of a Solution Story-map. This visual tool allowed us to communicate intricate ideas to our team and stakeholders, encapsulating the envisioned user experience in a digestible format.
Once the story-map had solidified our direction, we proceeded to create a prototype solution. Here, the emphasis lay heavily on content and interaction, ensuring that our prototype could evoke a sense of how the final product would look and behave. This stage breathed life into our ideas, transforming them from static maps into a dynamic, interactive model.
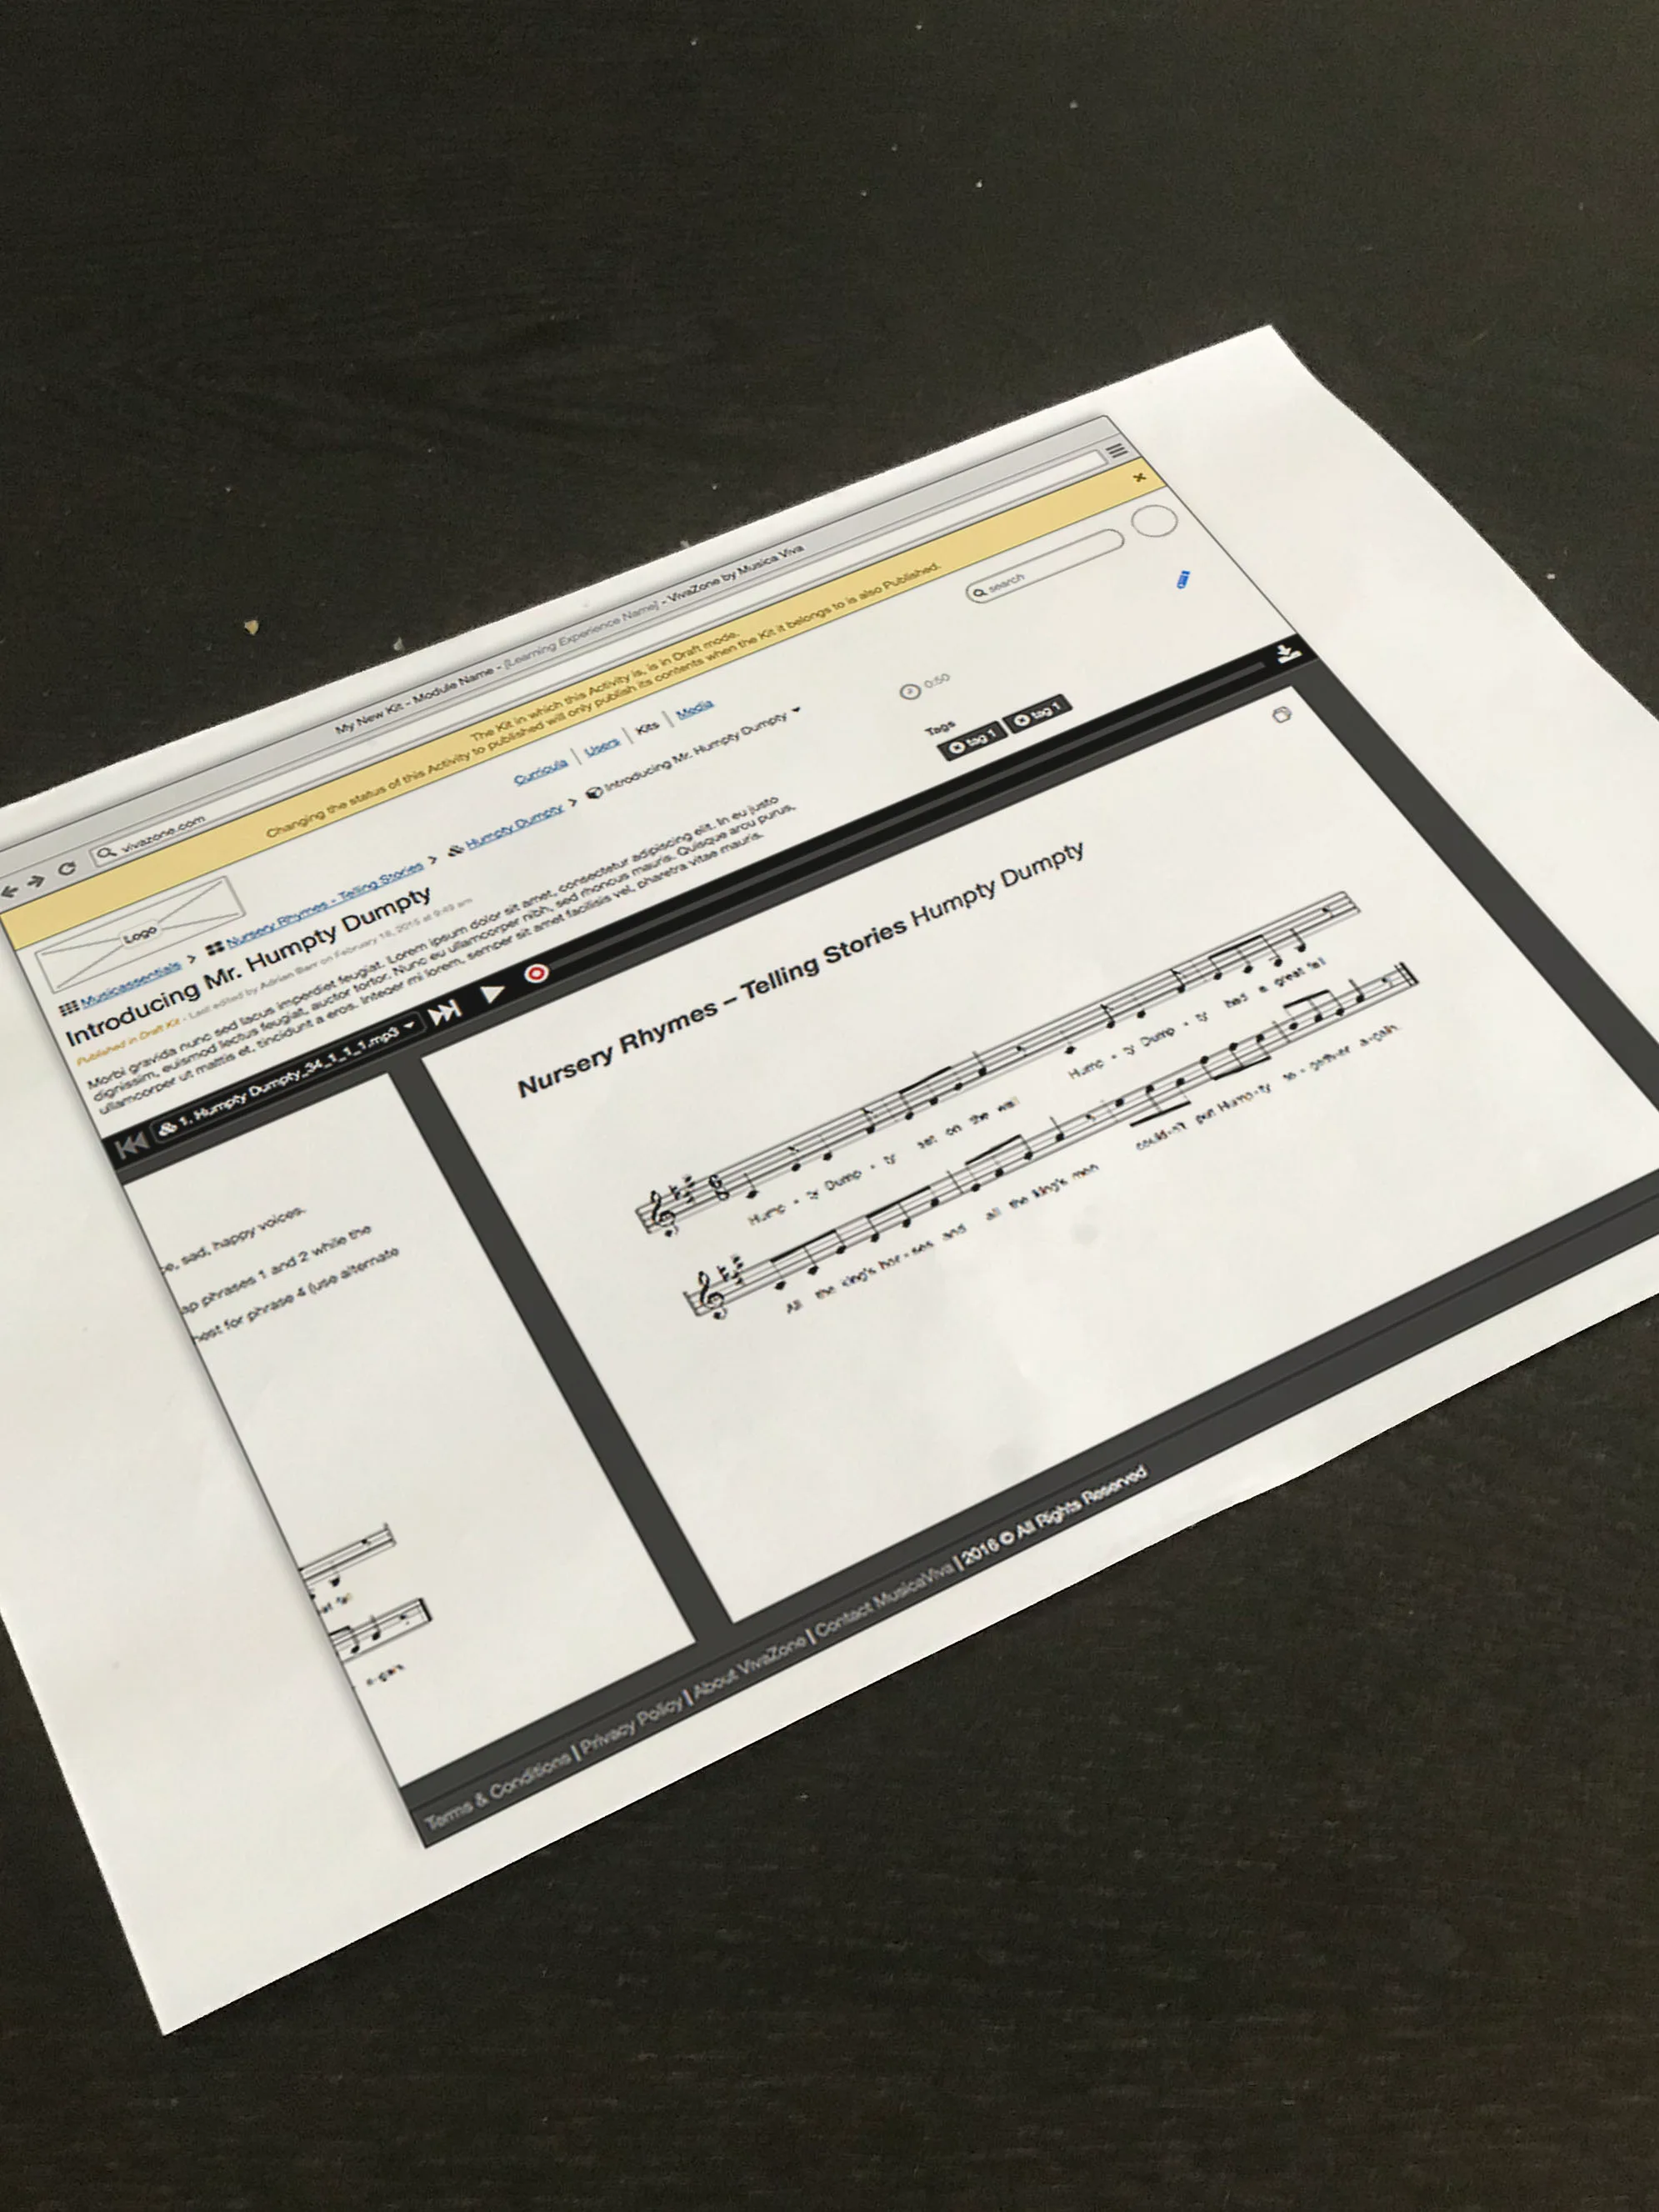
The culmination of our process was the creation of high fidelity wireframes. Serving as a blueprint, these wireframes detailed every aspect of our design with precision, ready to be handed off to our front-end development team. This marked a significant milestone, as our ideas, now matured into a sophisticated design, were set to become a tangible, user-facing product.
03
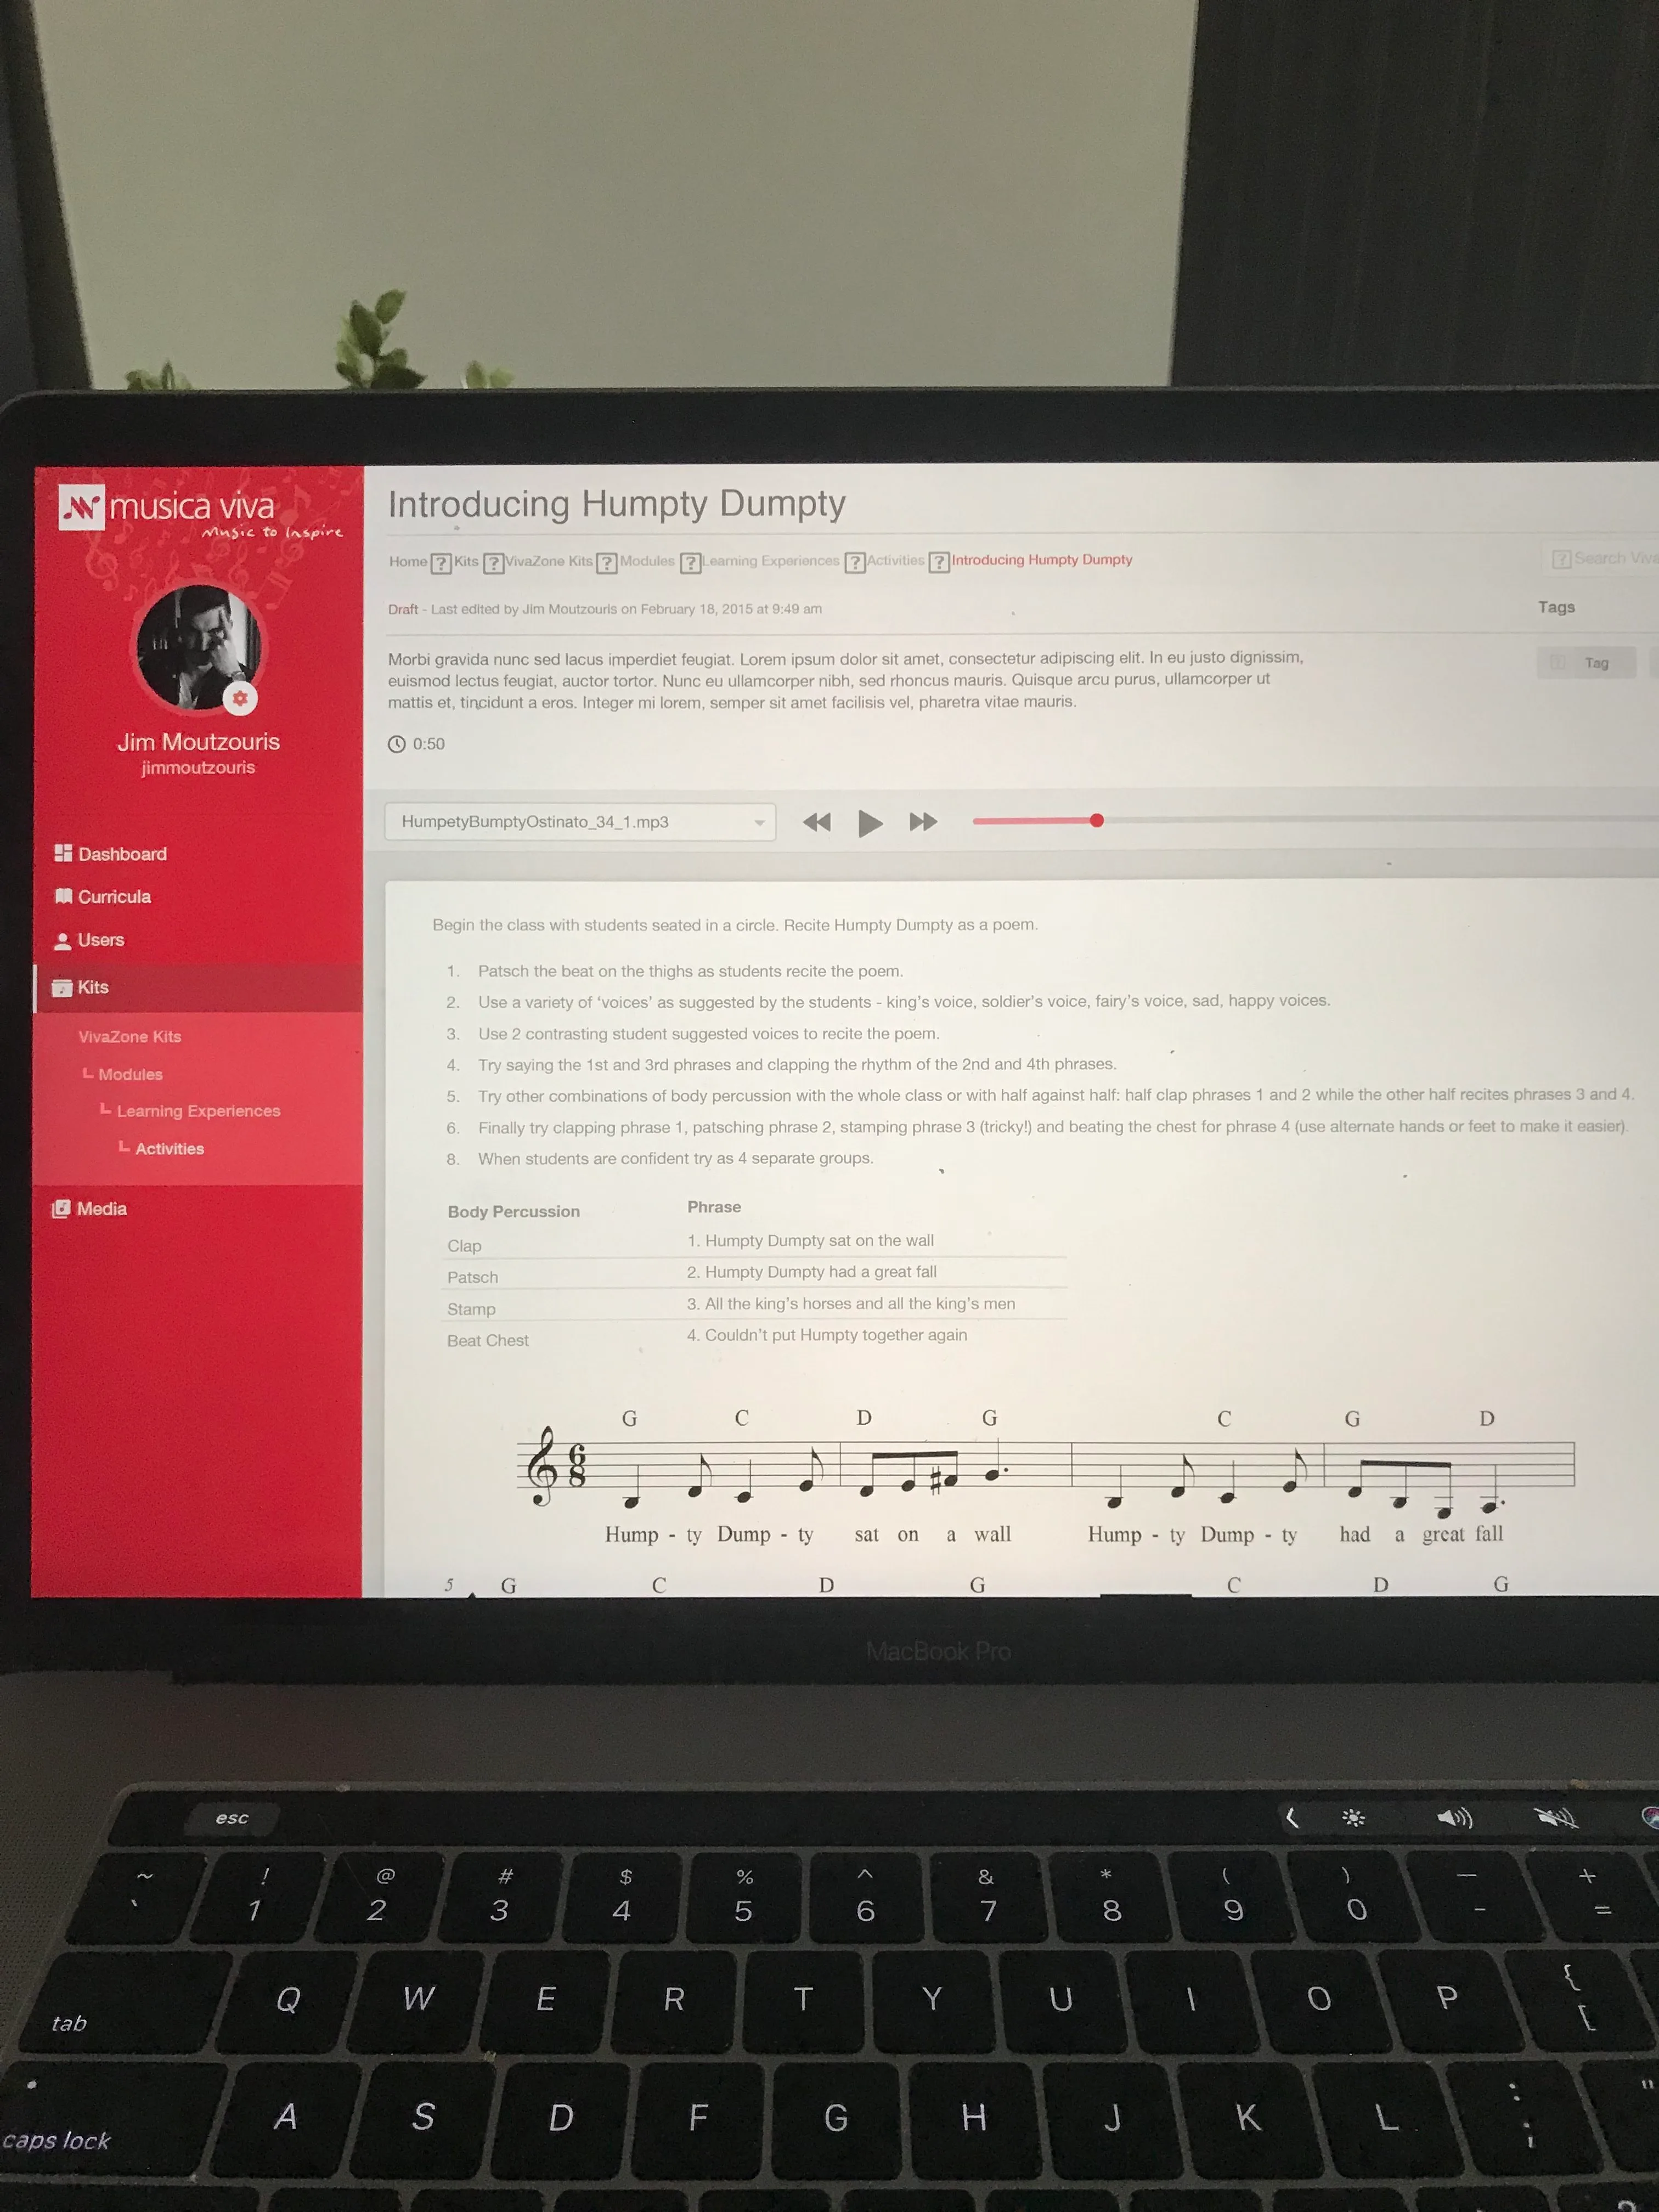
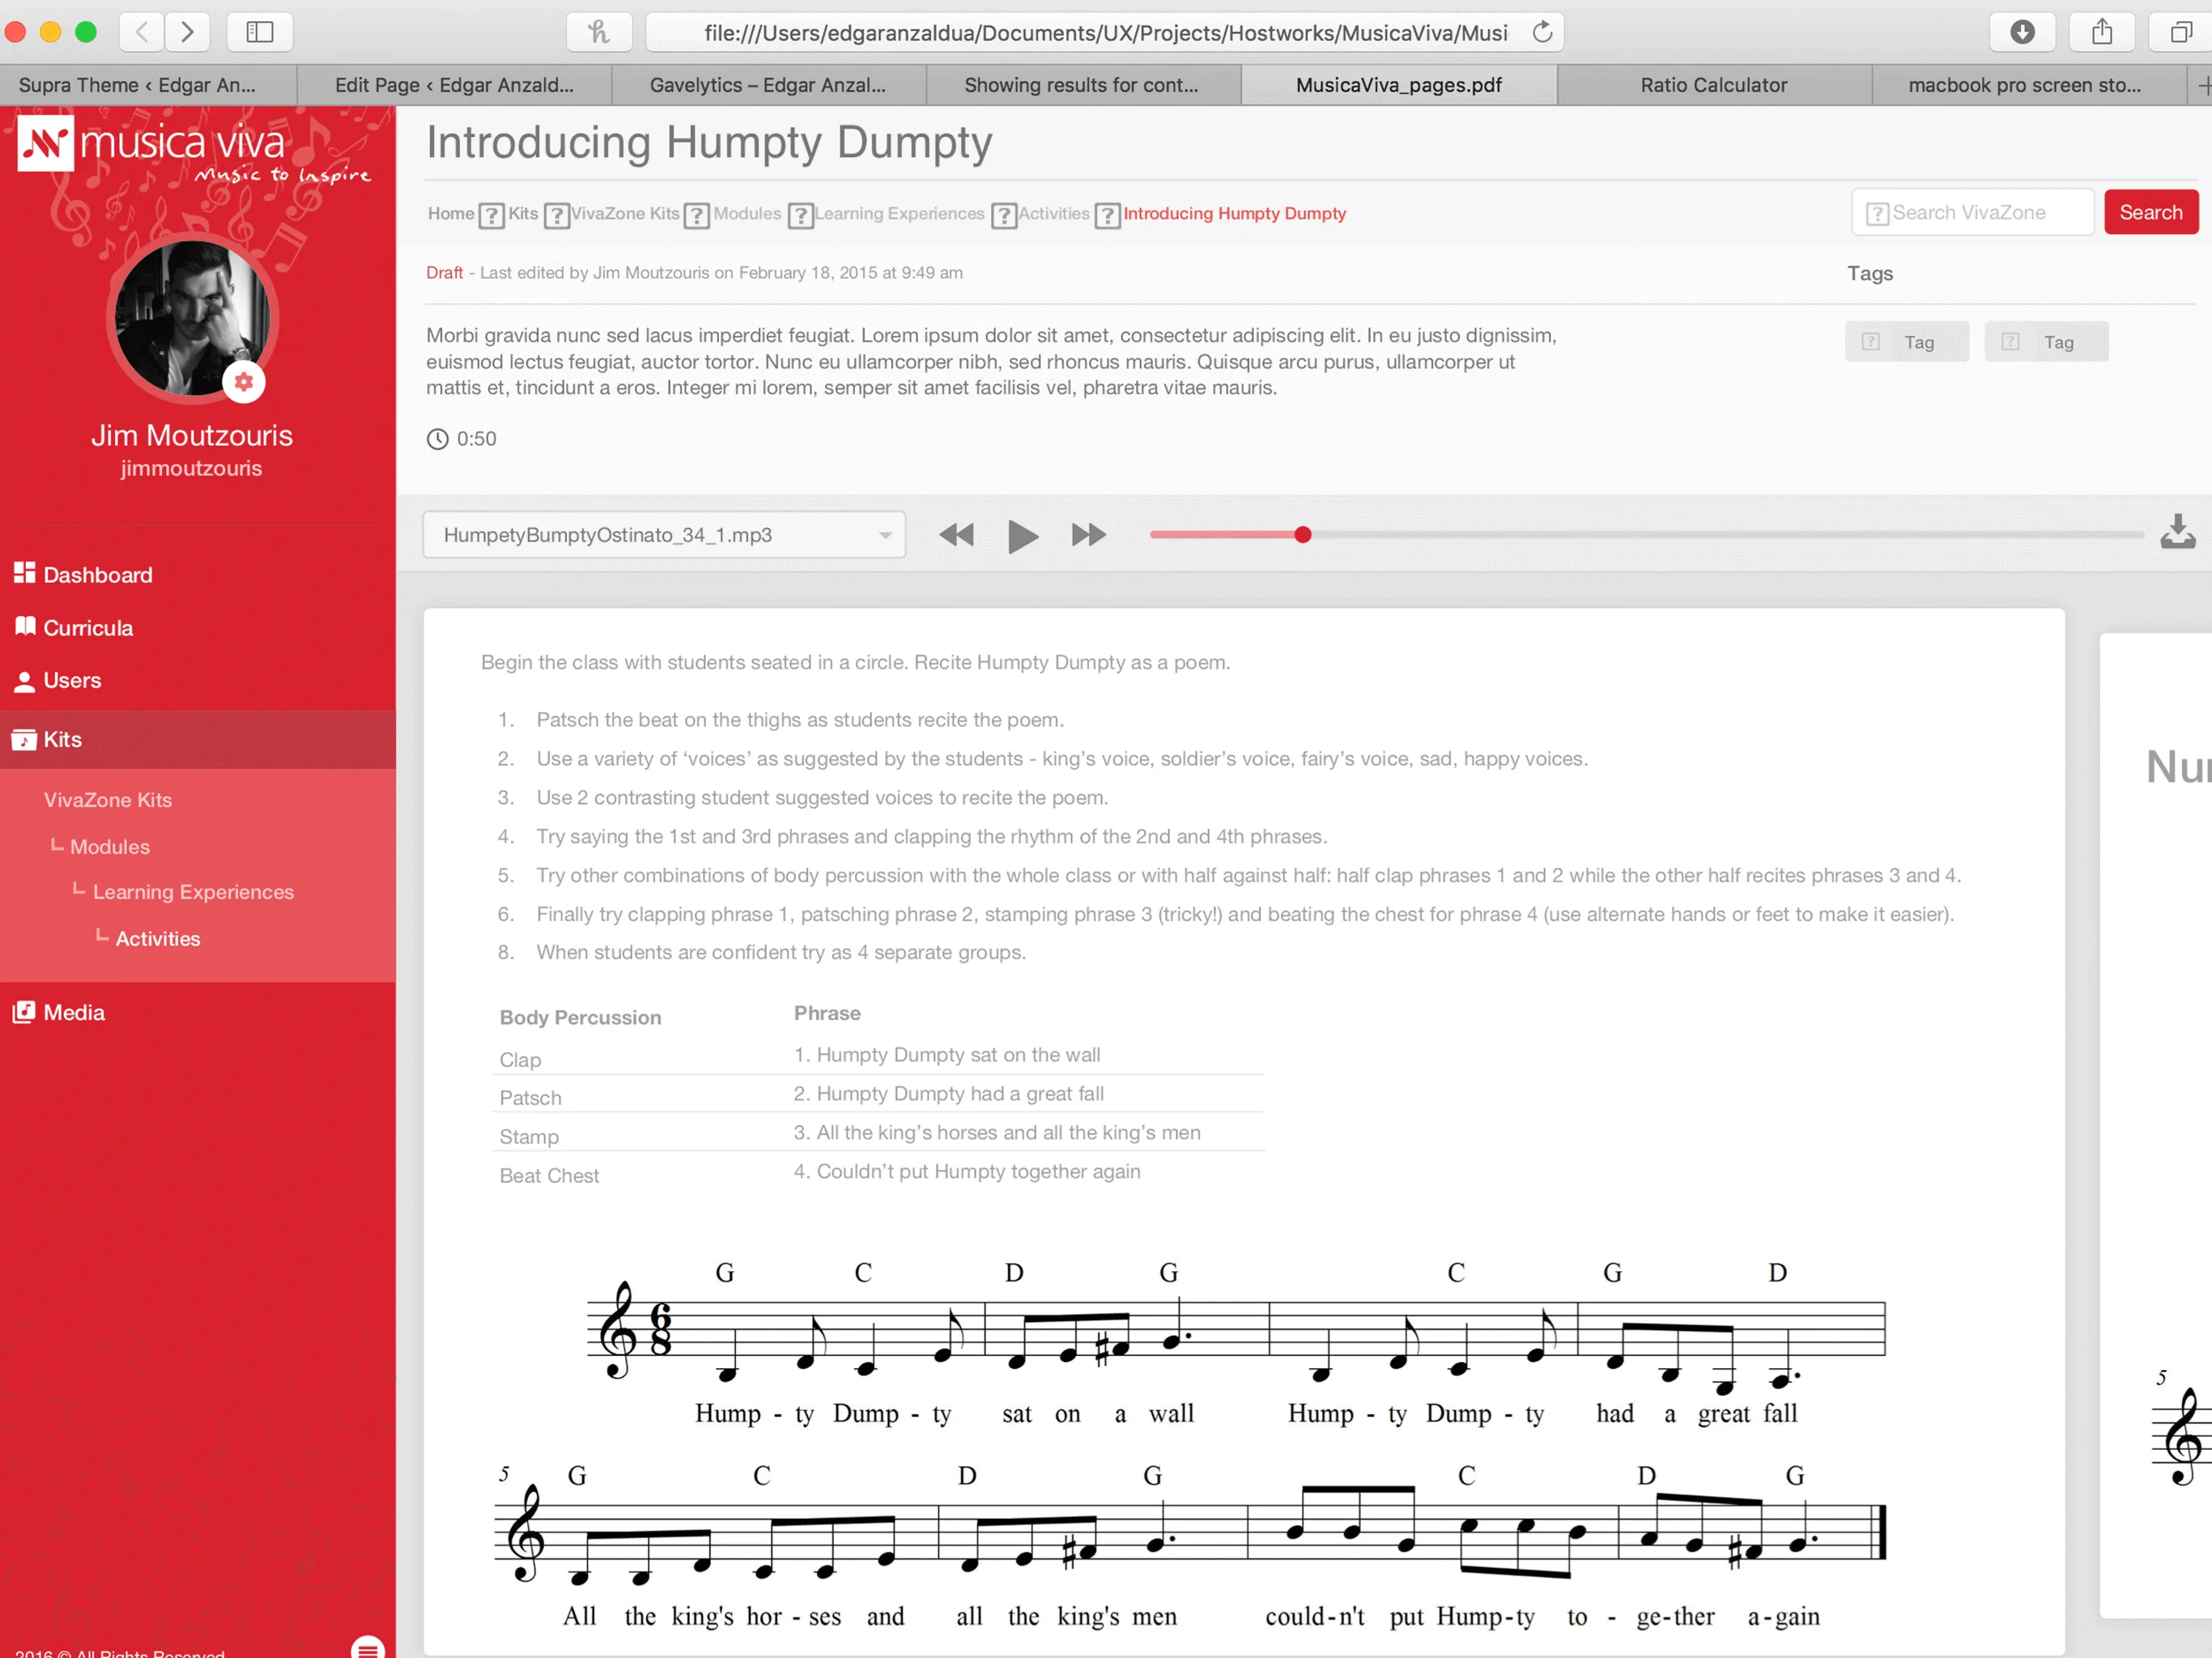
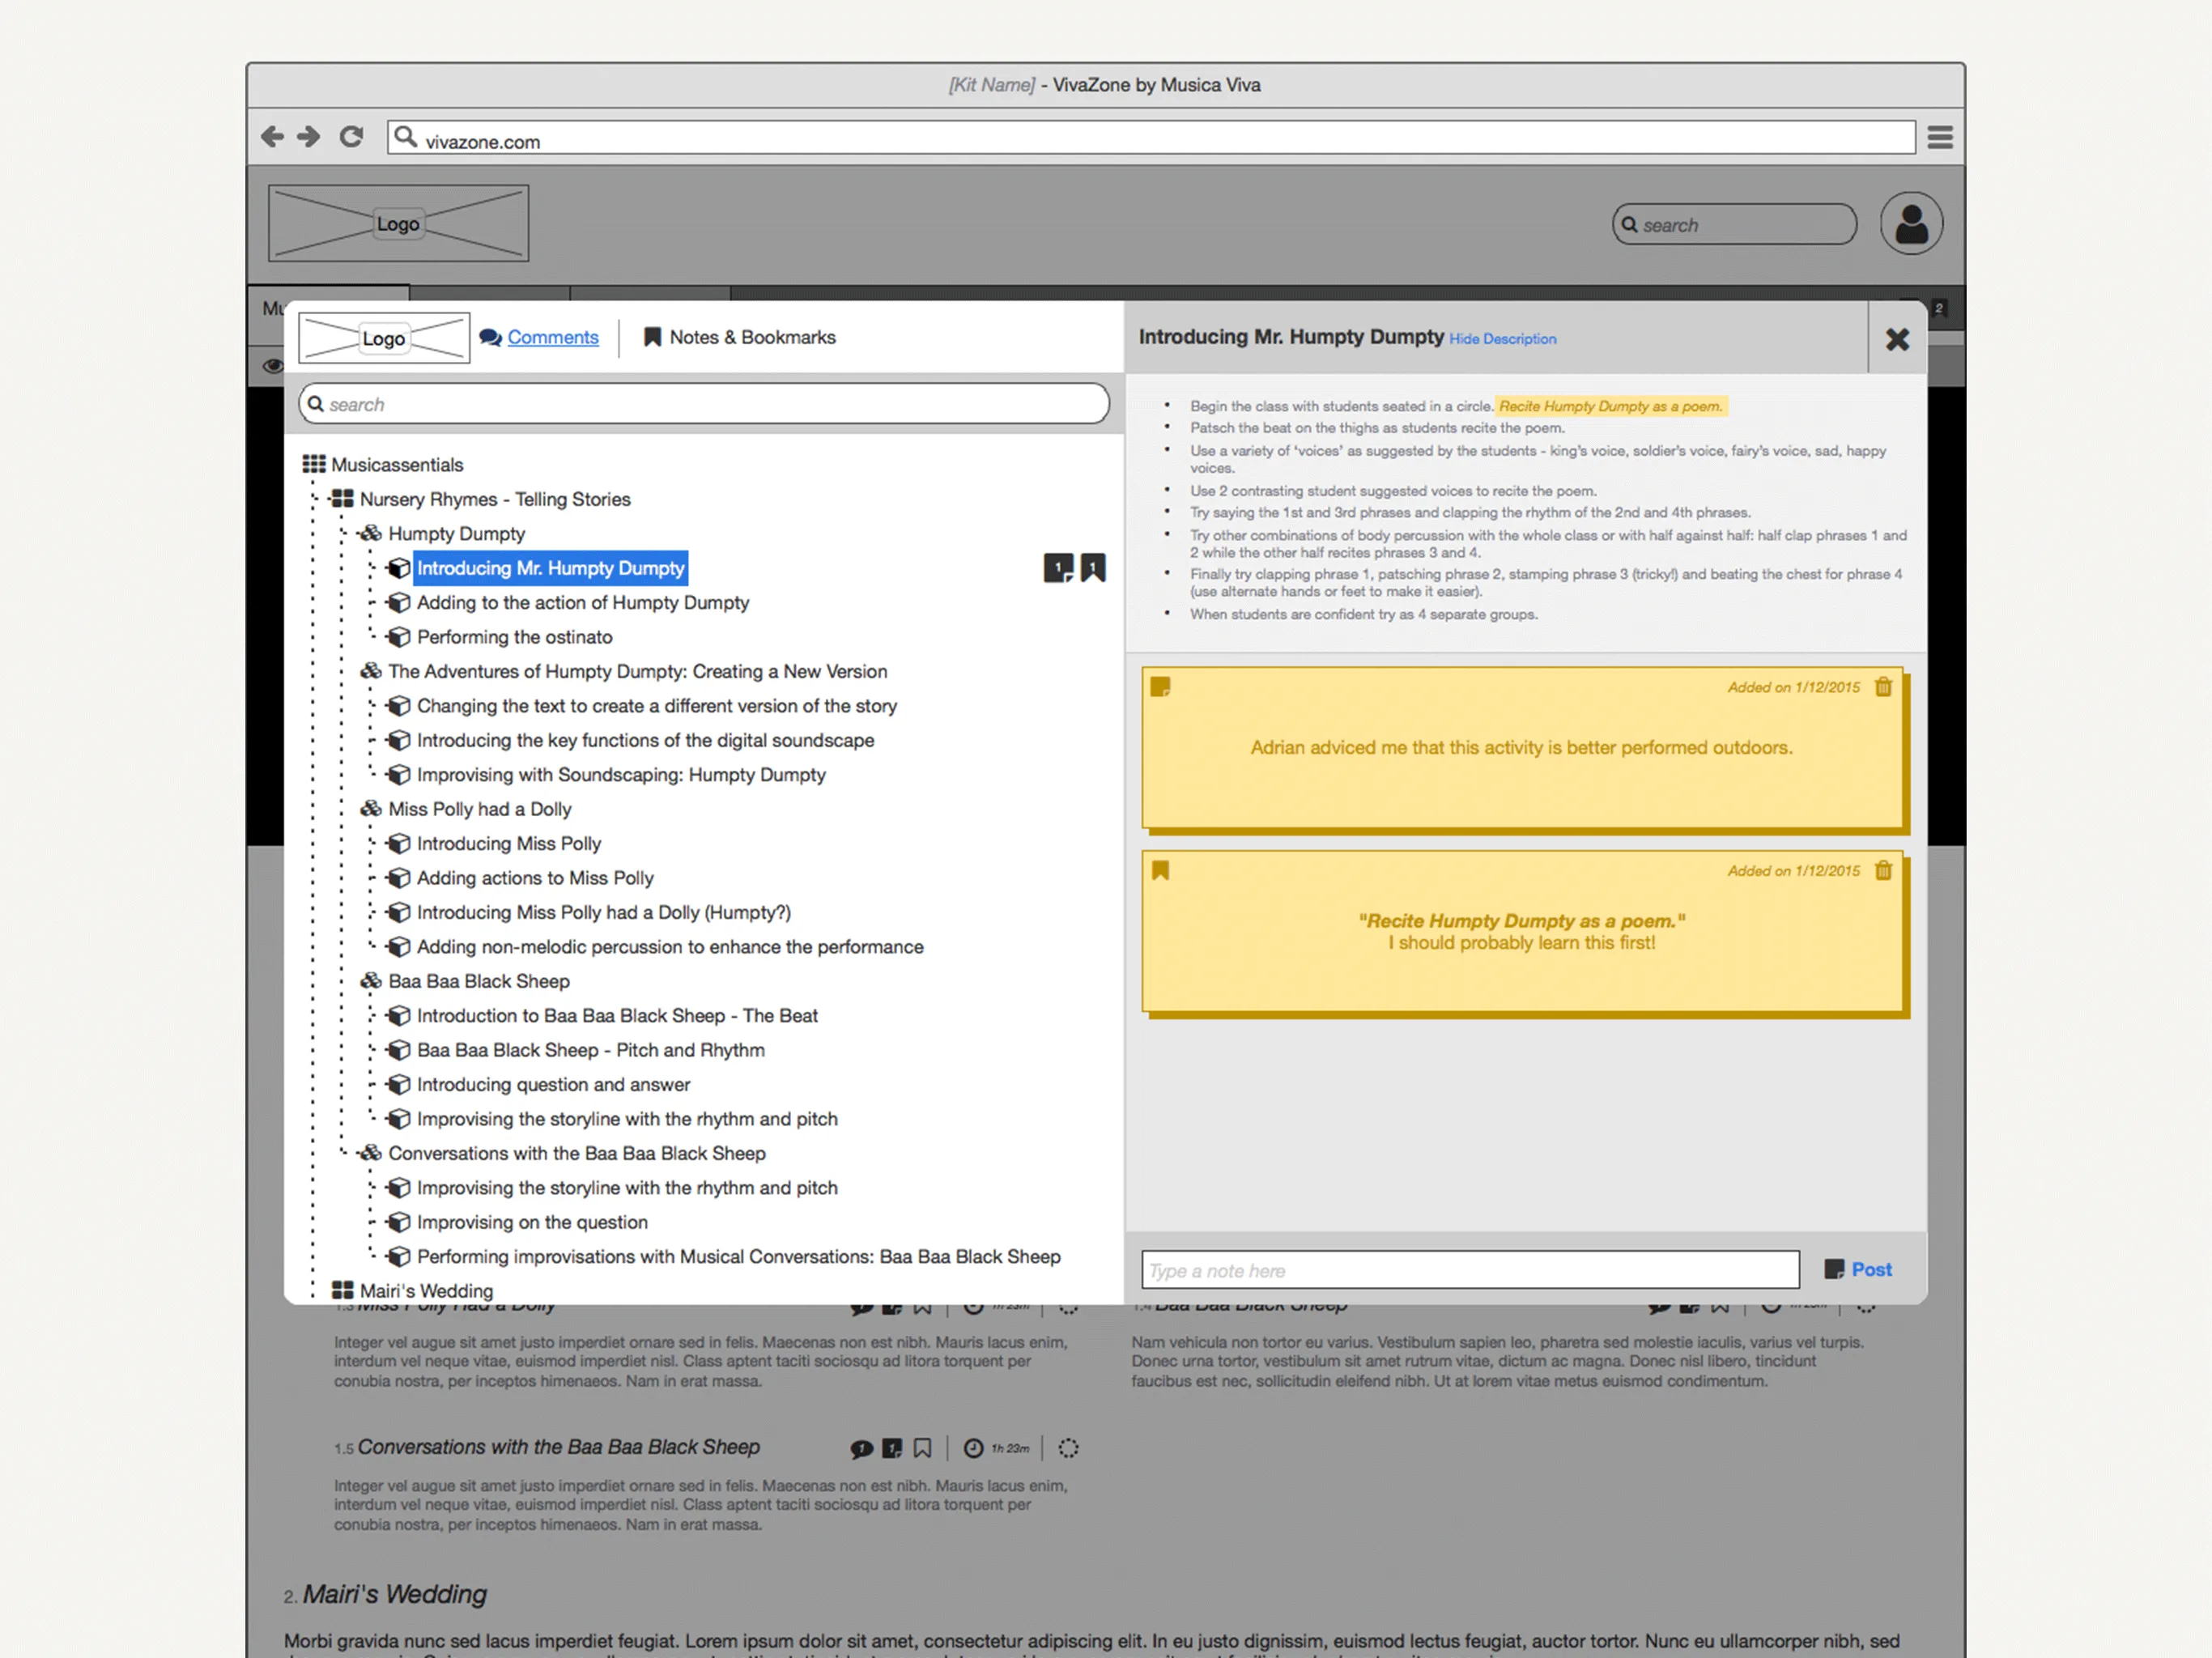
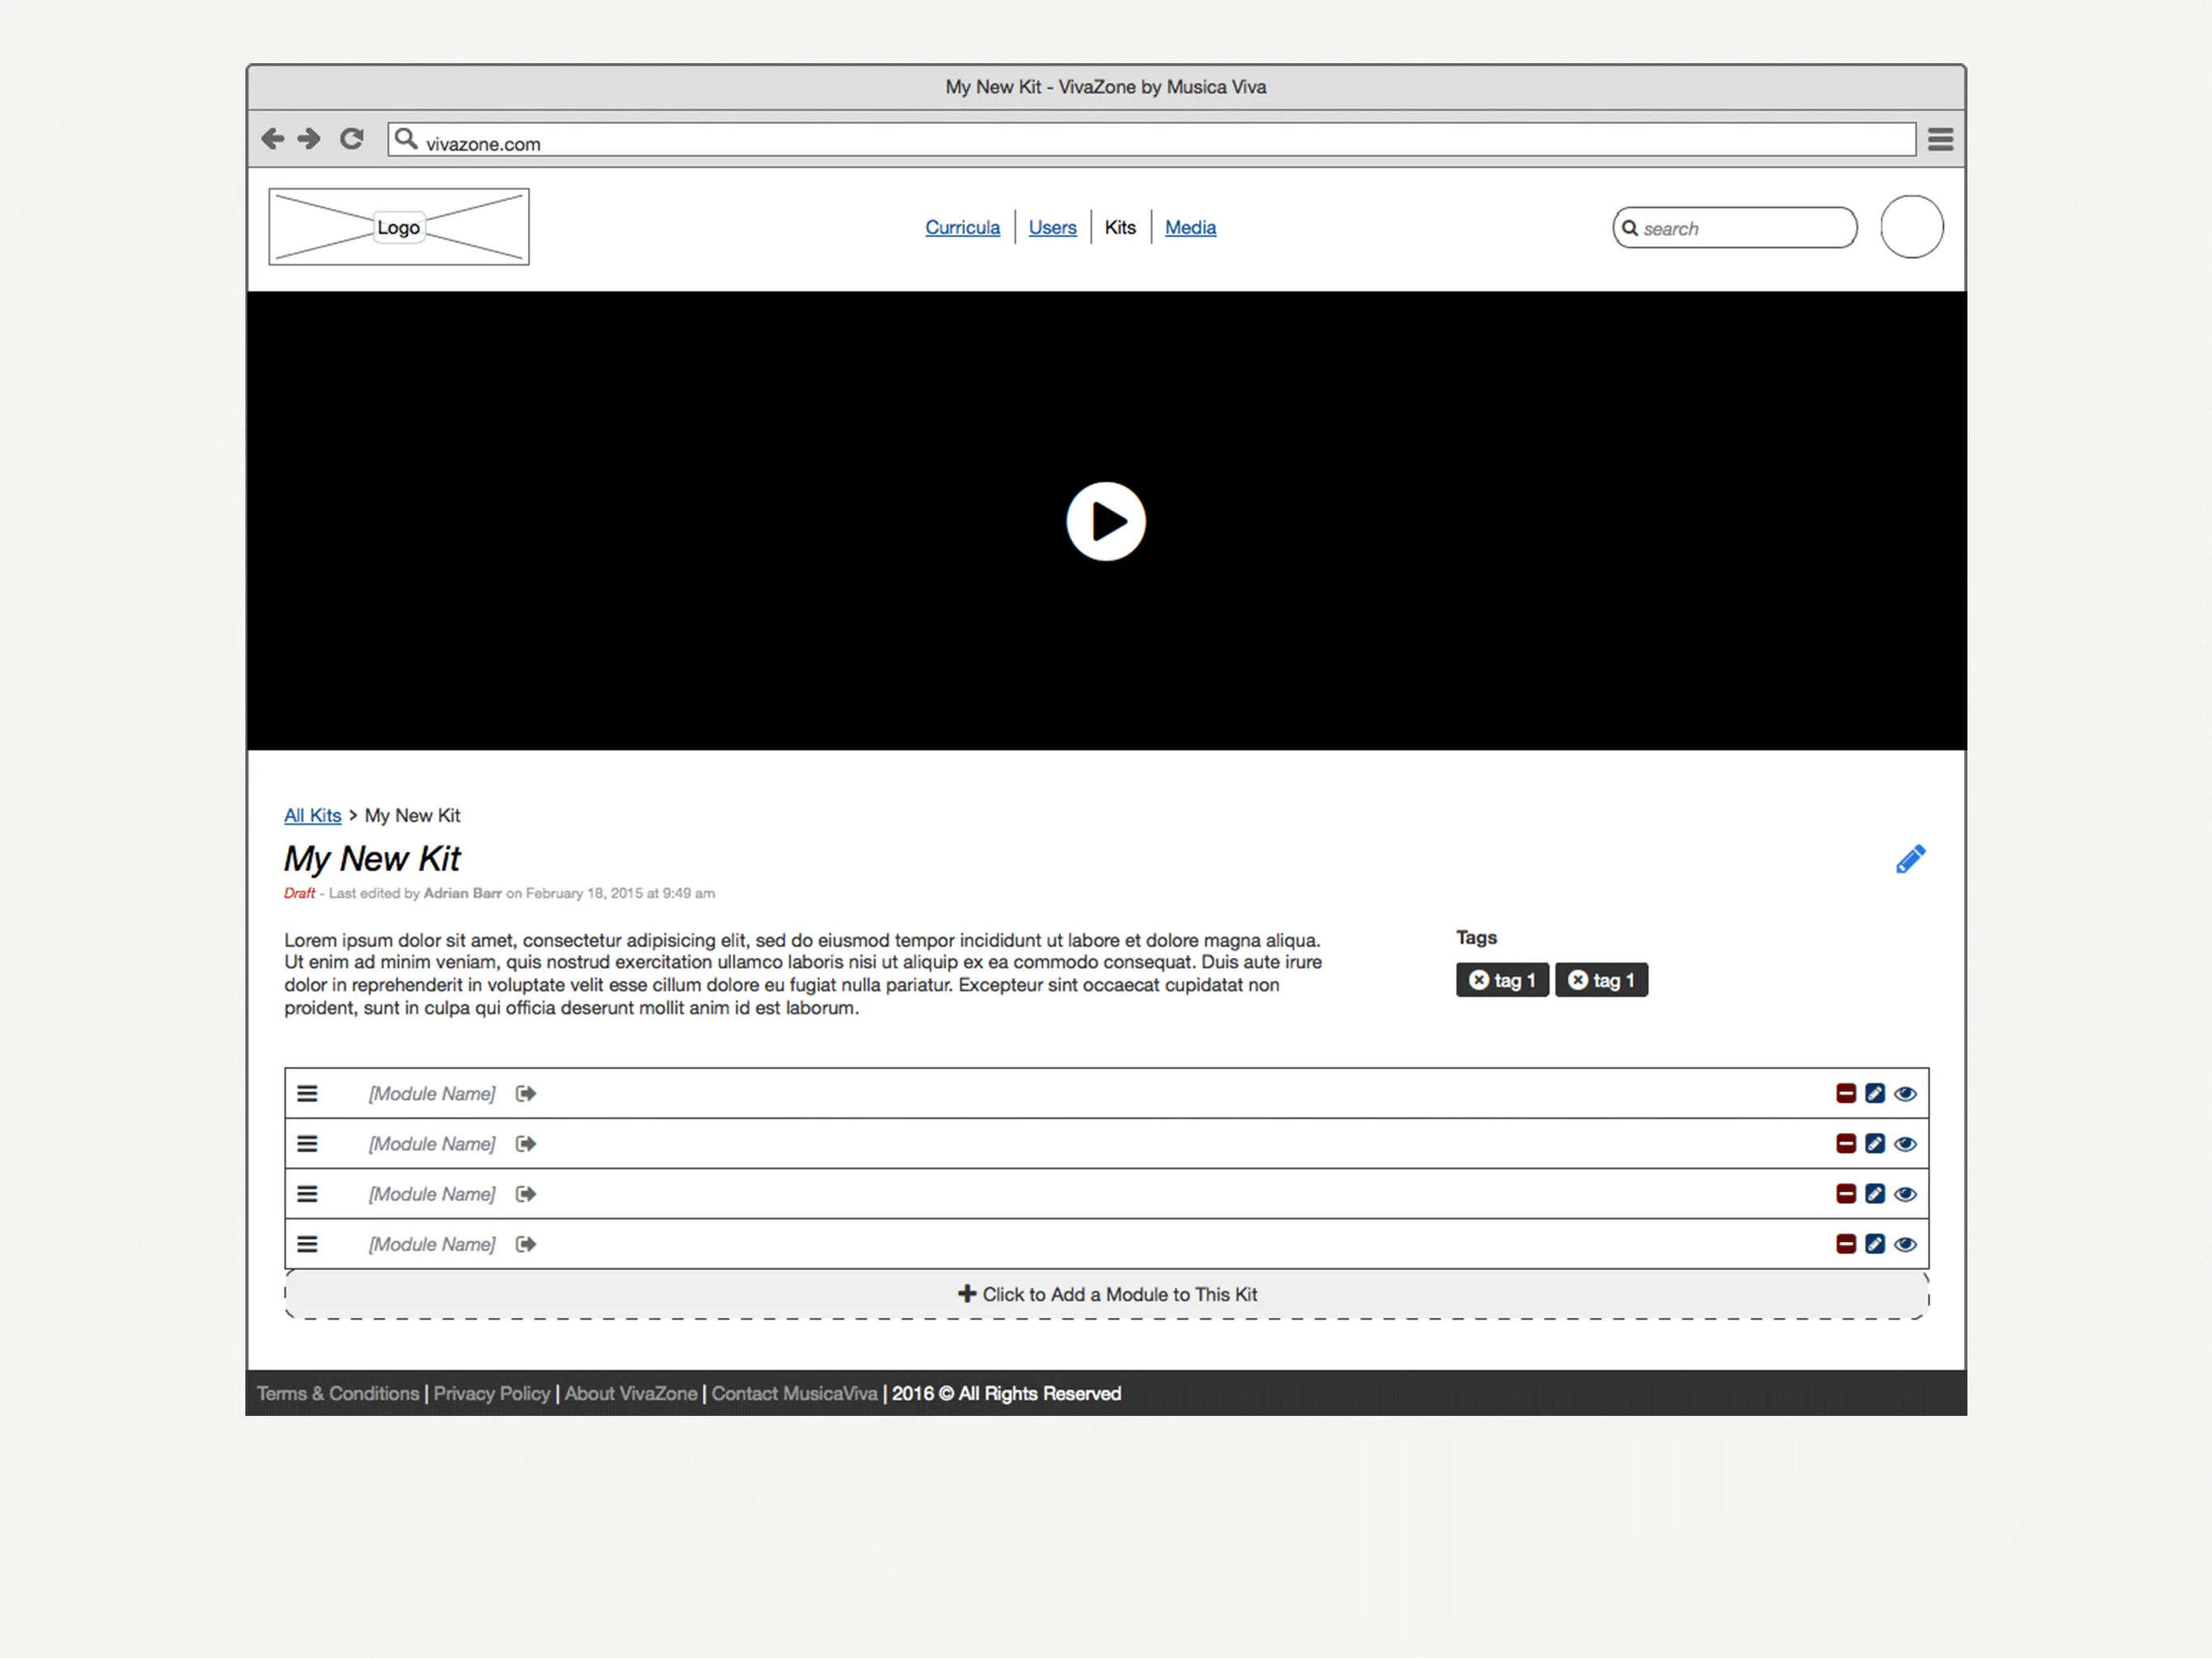
High Fidelity Feature Comps (as seen in the product)
I created these wireframes with tools like Balsamiq, Photoshop and Zeplin, and are currently the production version of Musica Viva in Schools.
Managing Learning Kits

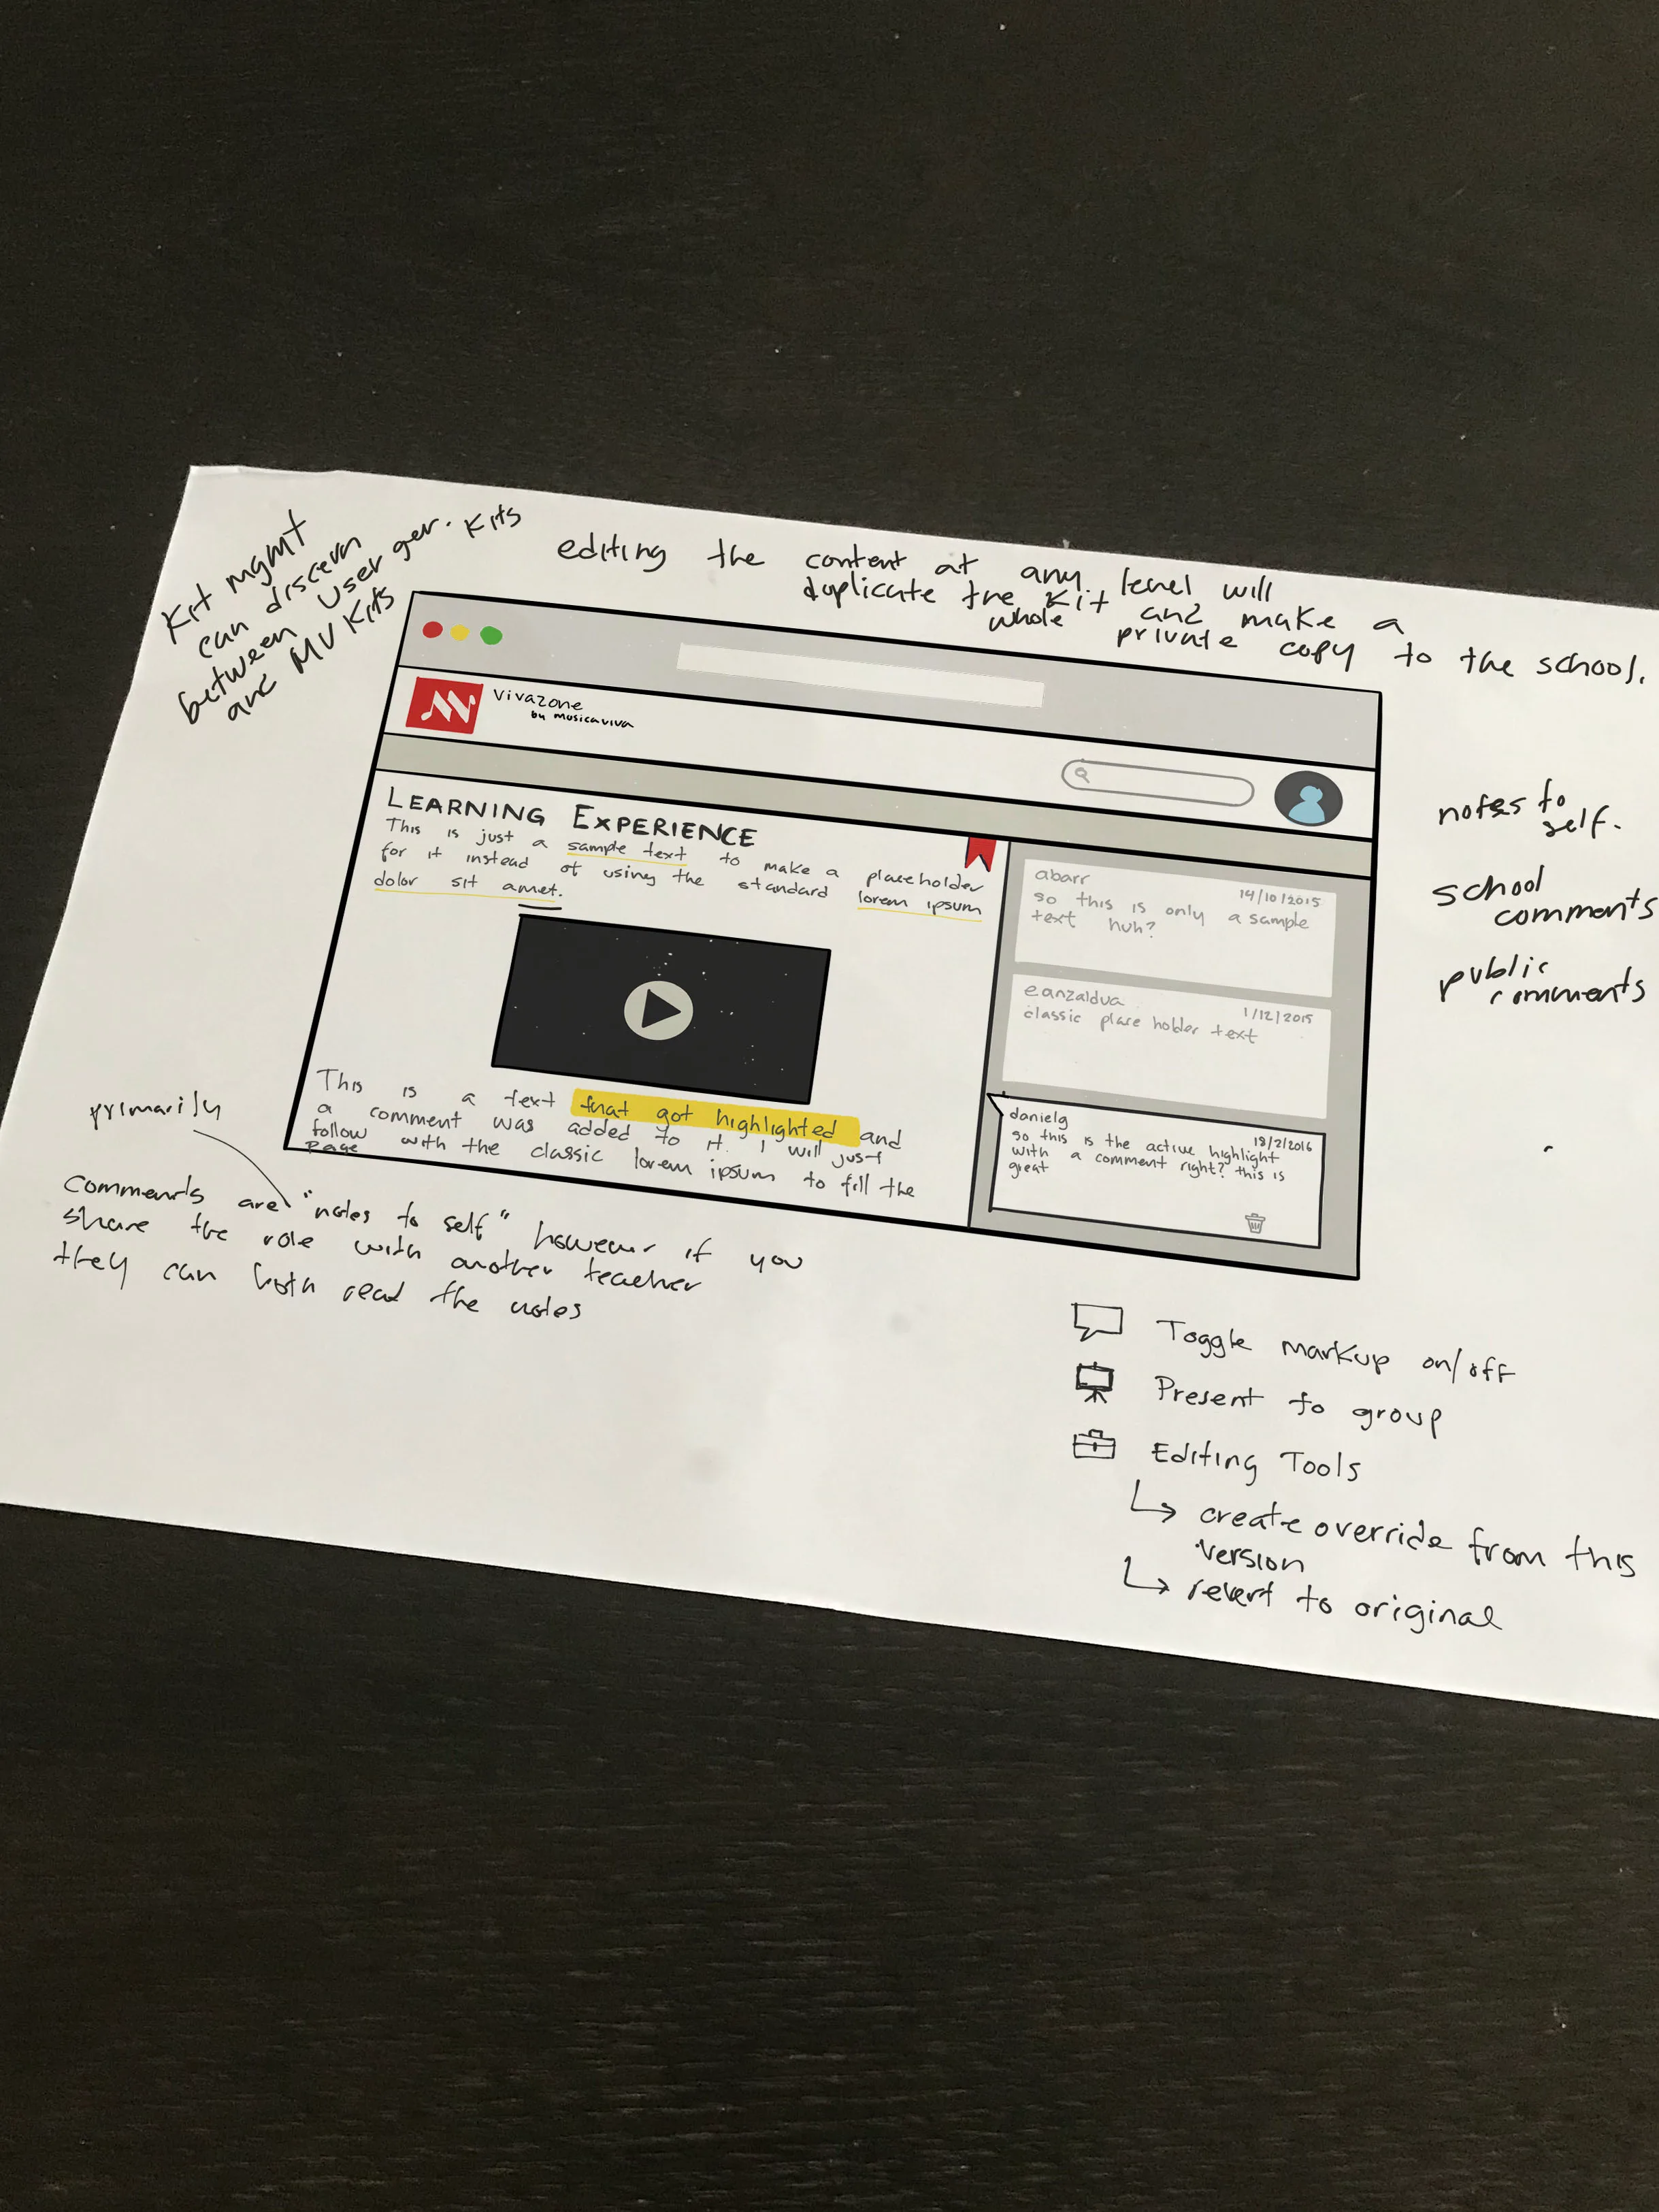
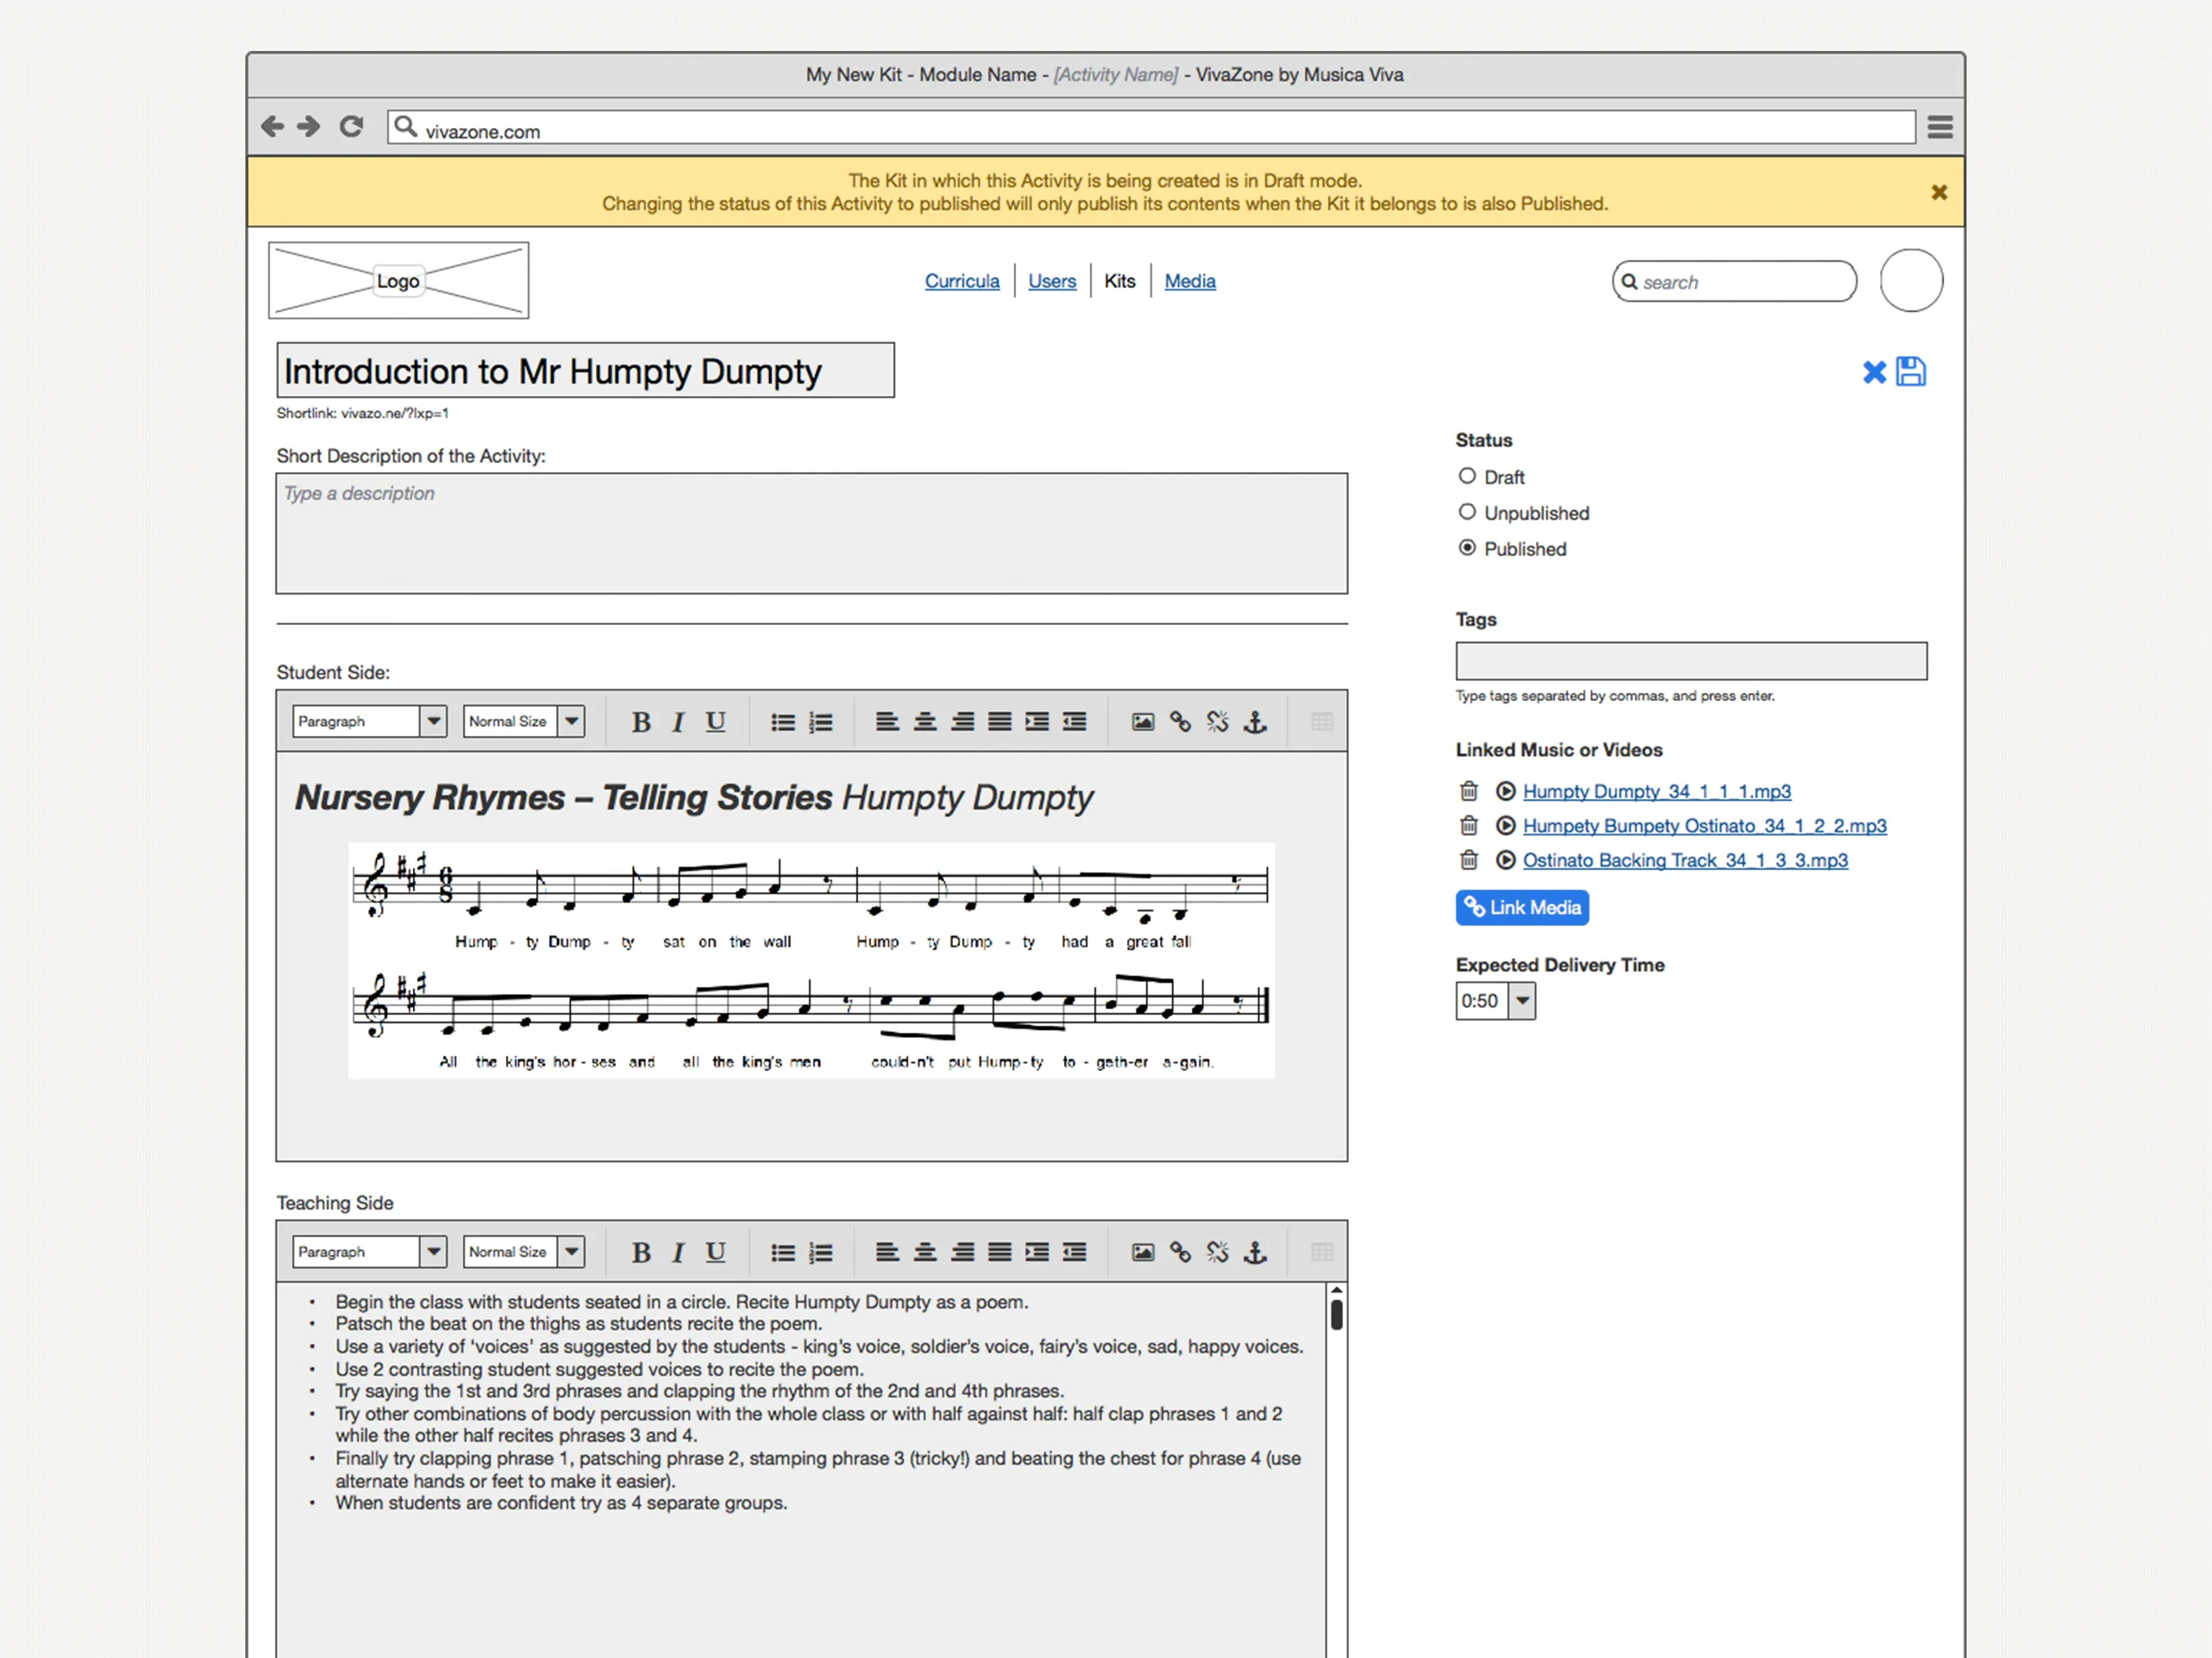
Editing a Learning Kit
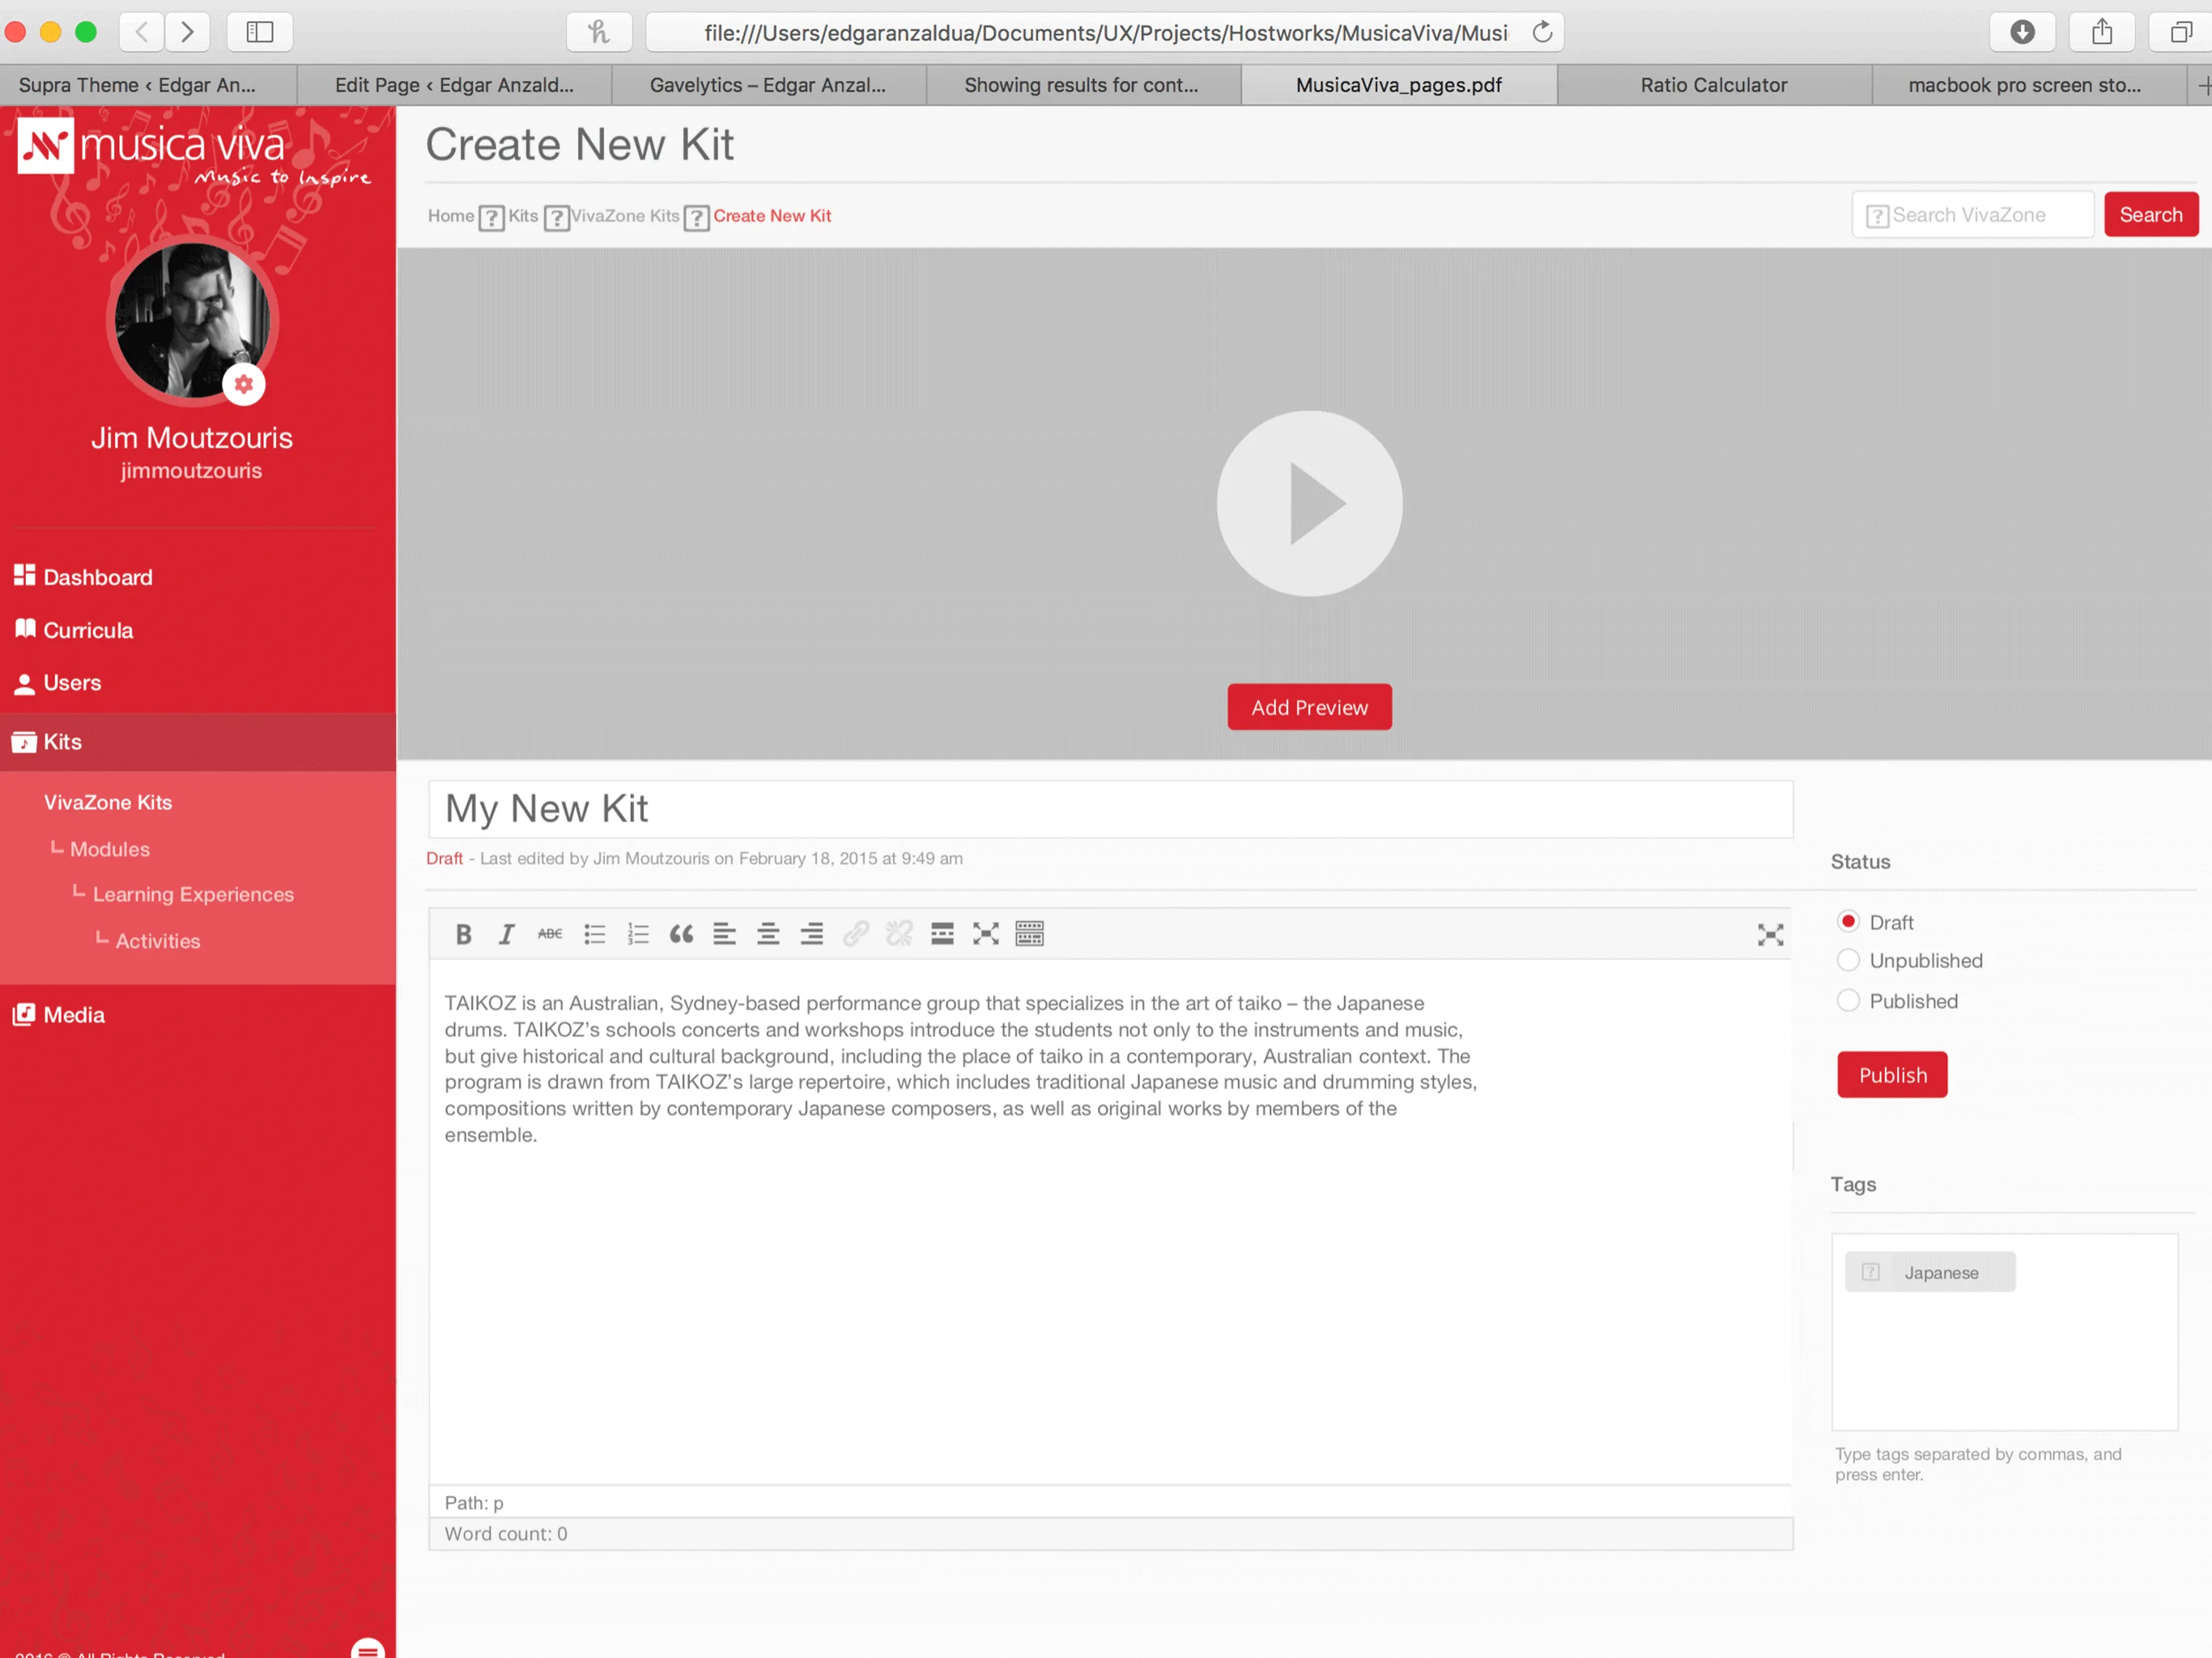
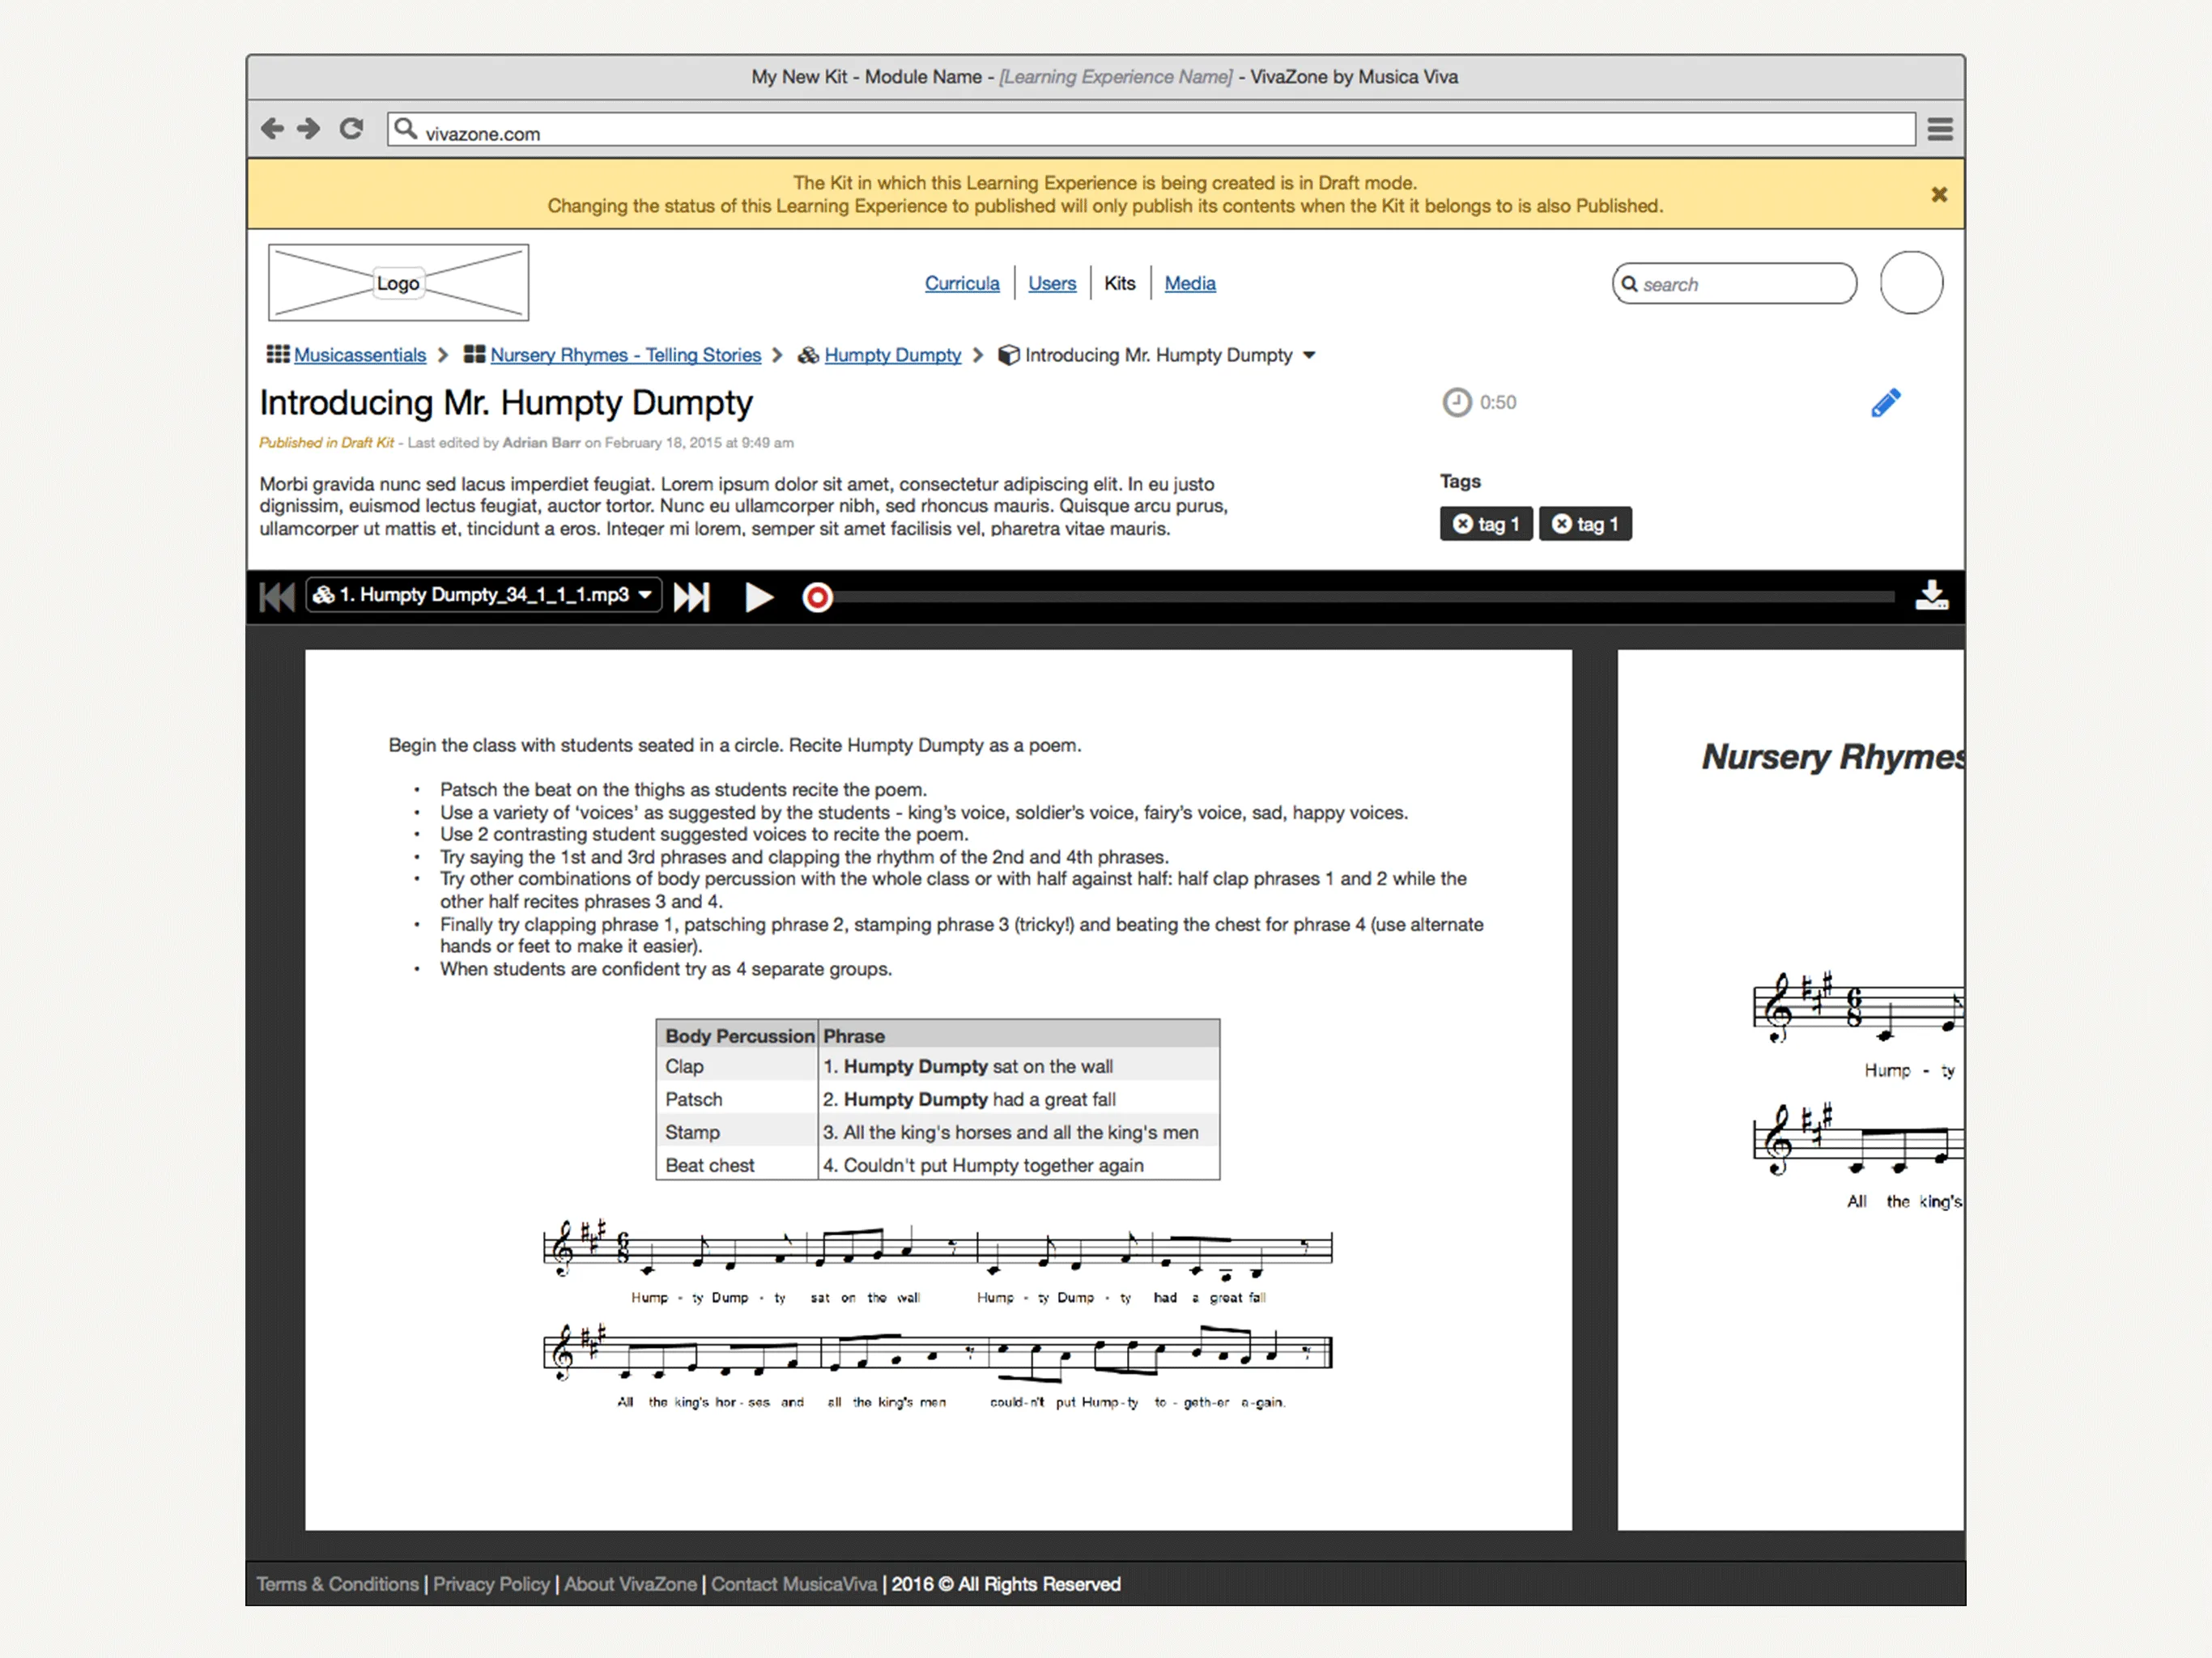
Editing a Learning Experience

Learning Experience
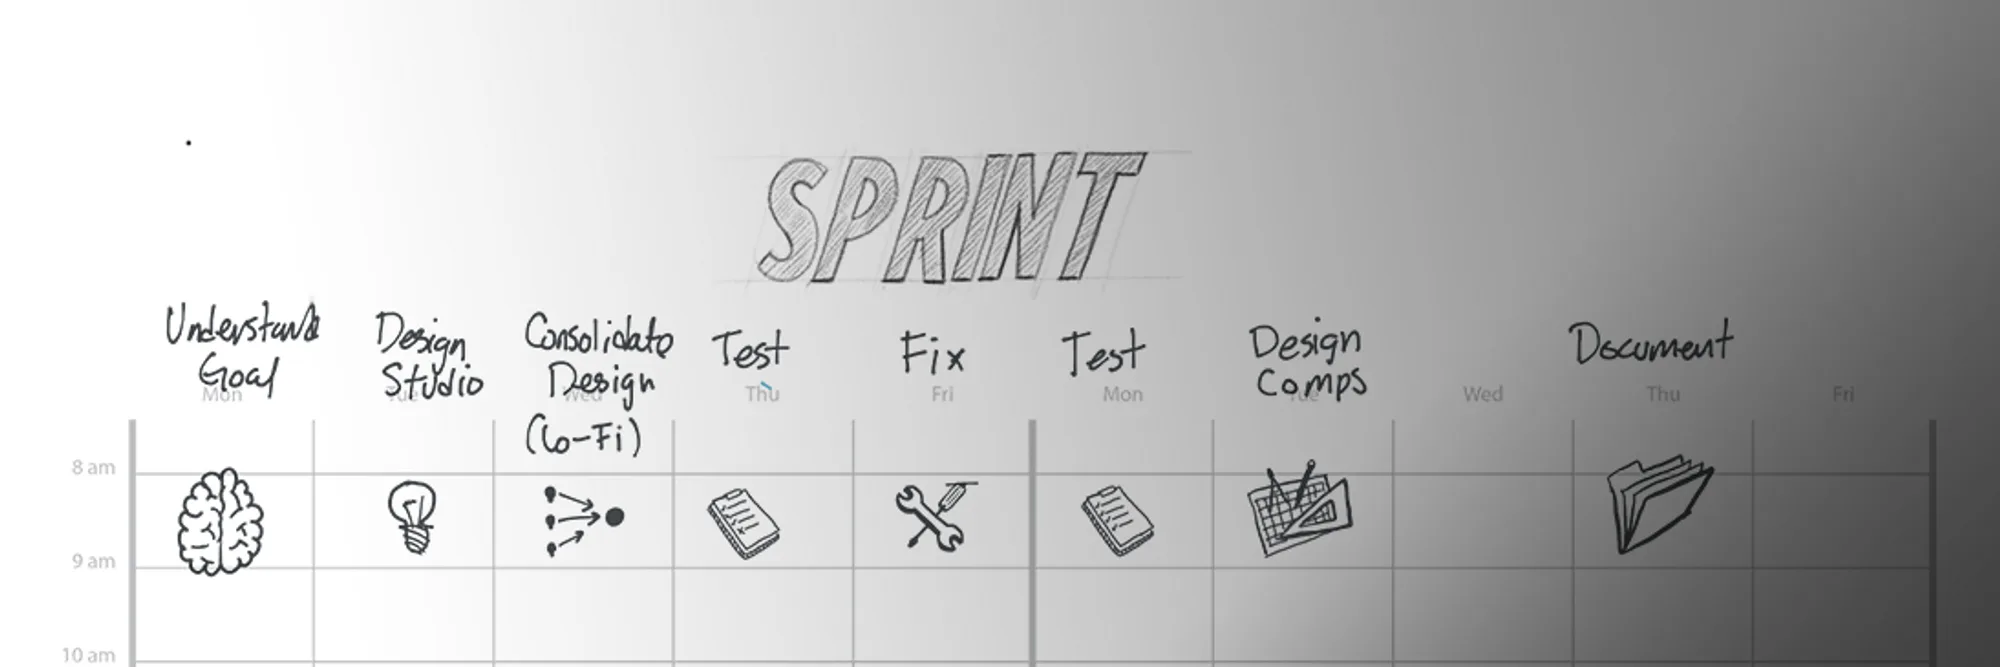
Process
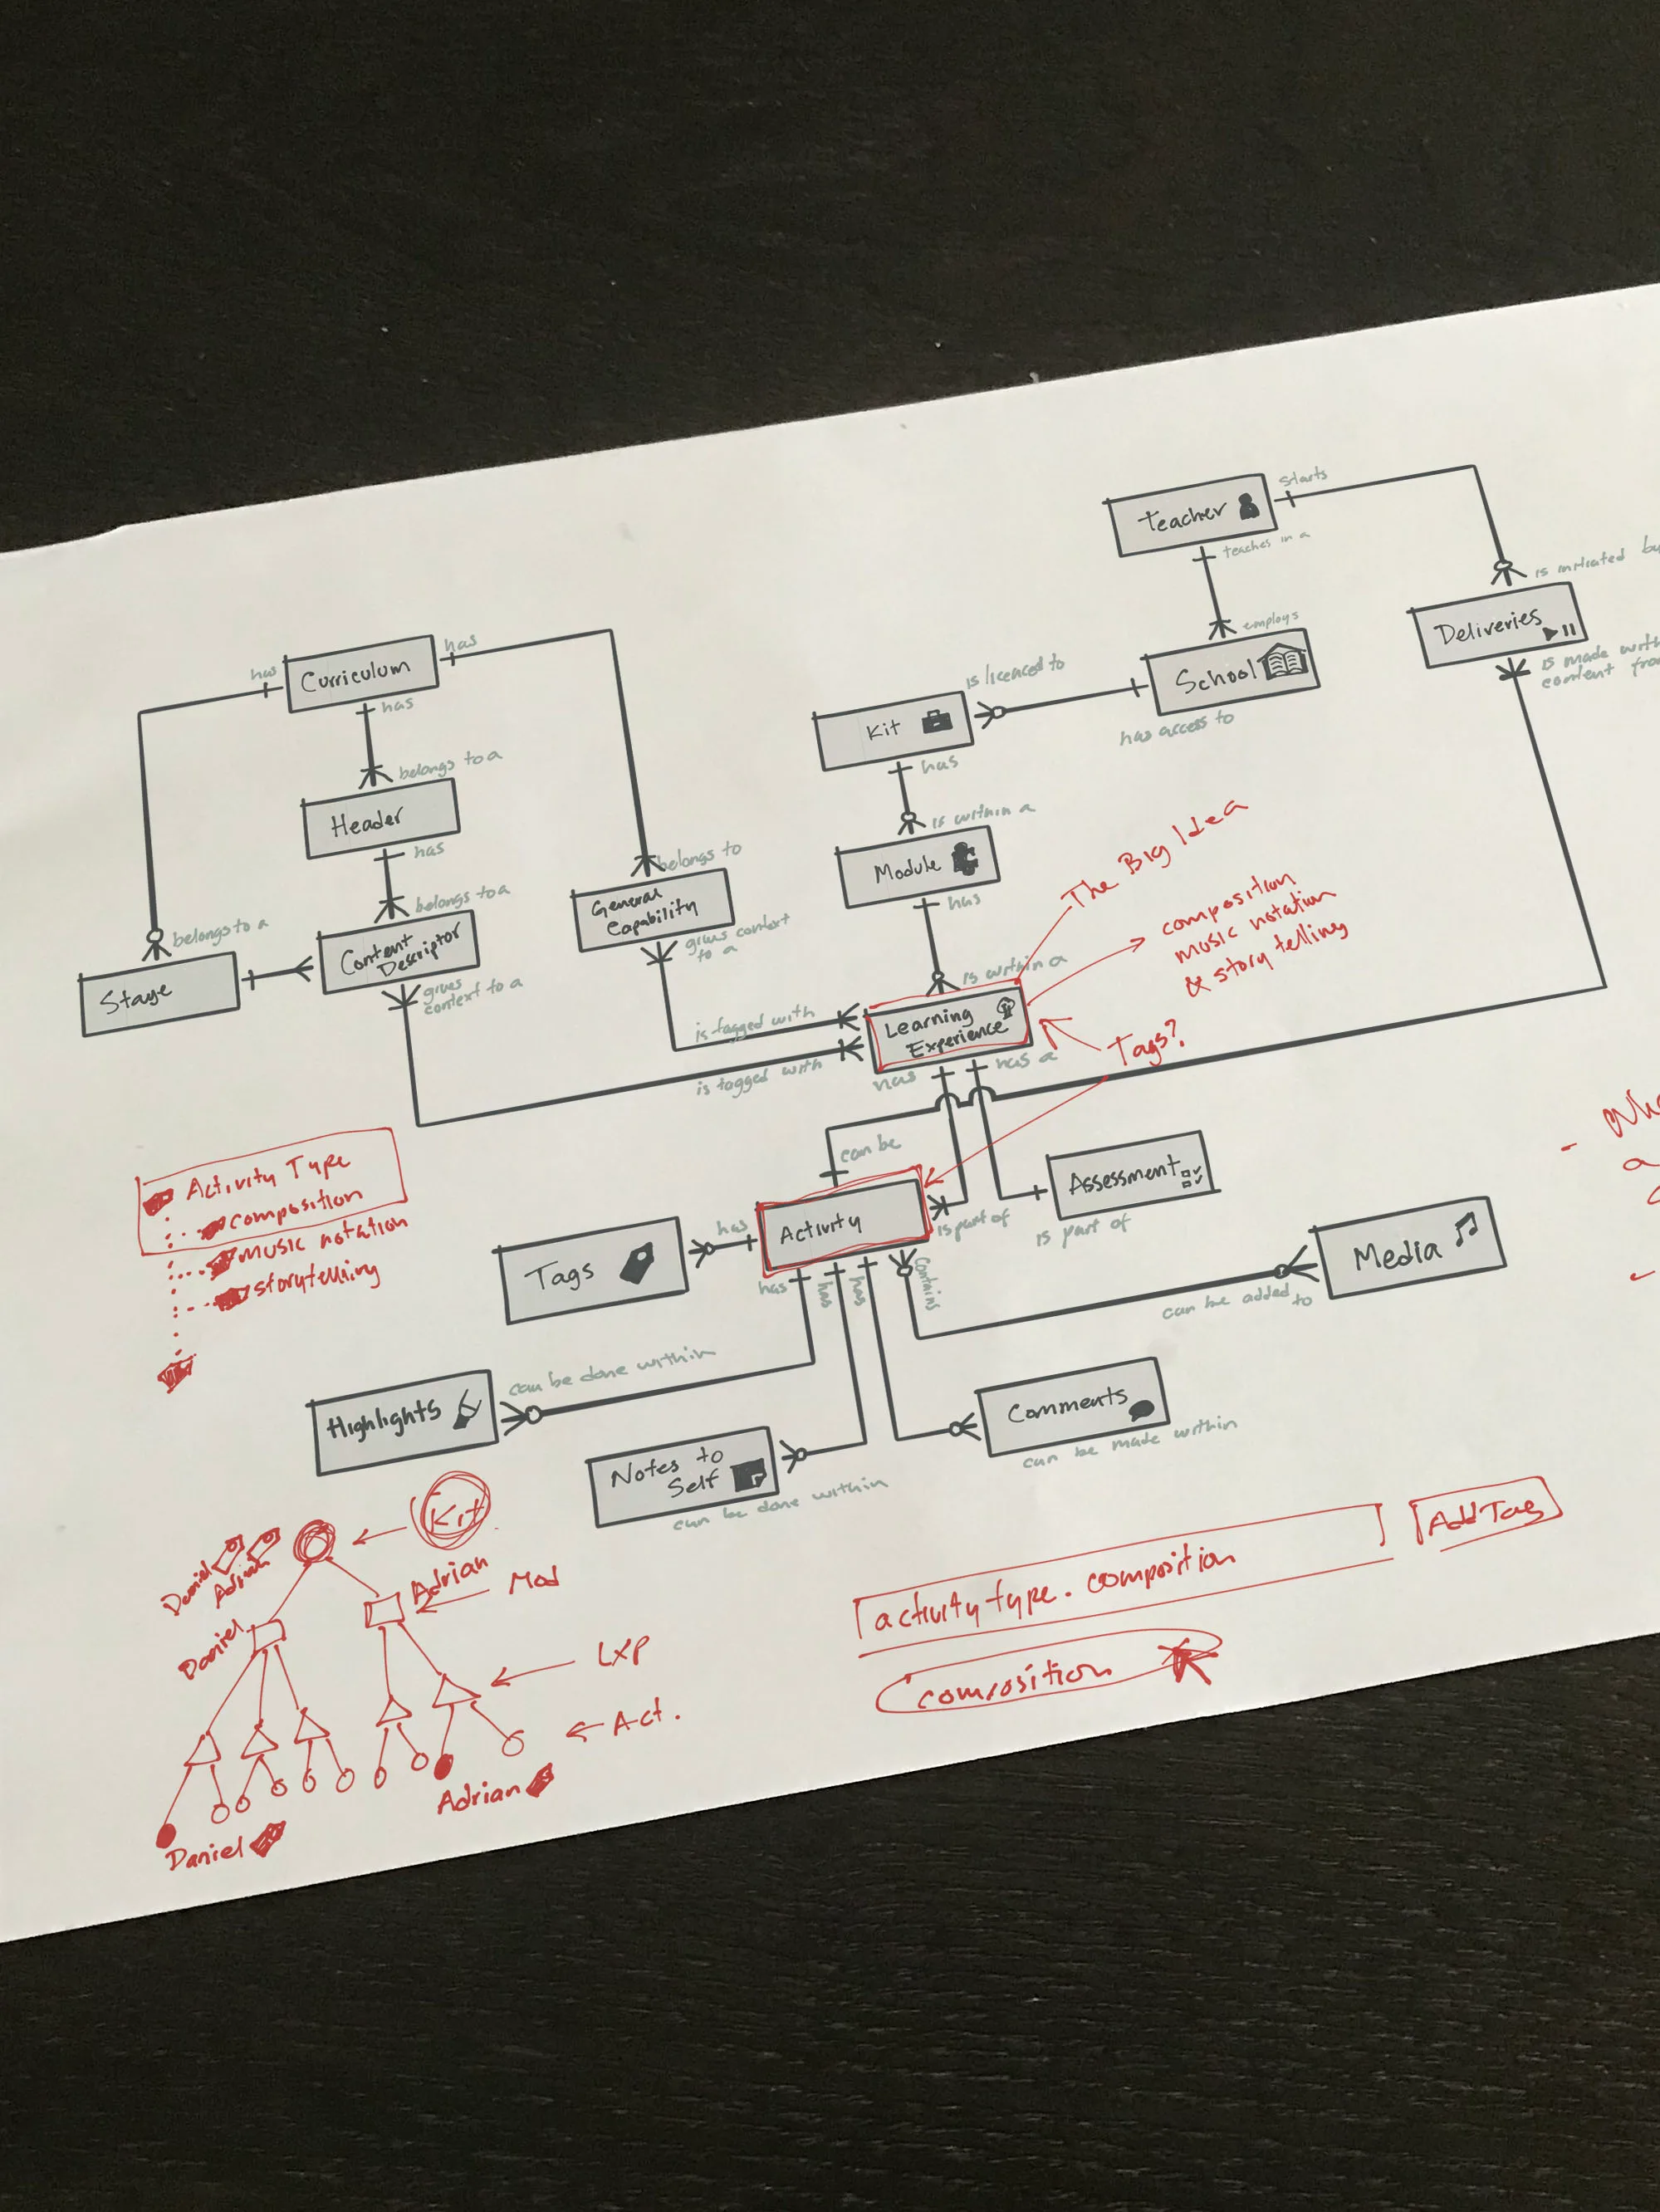
Collaborative design
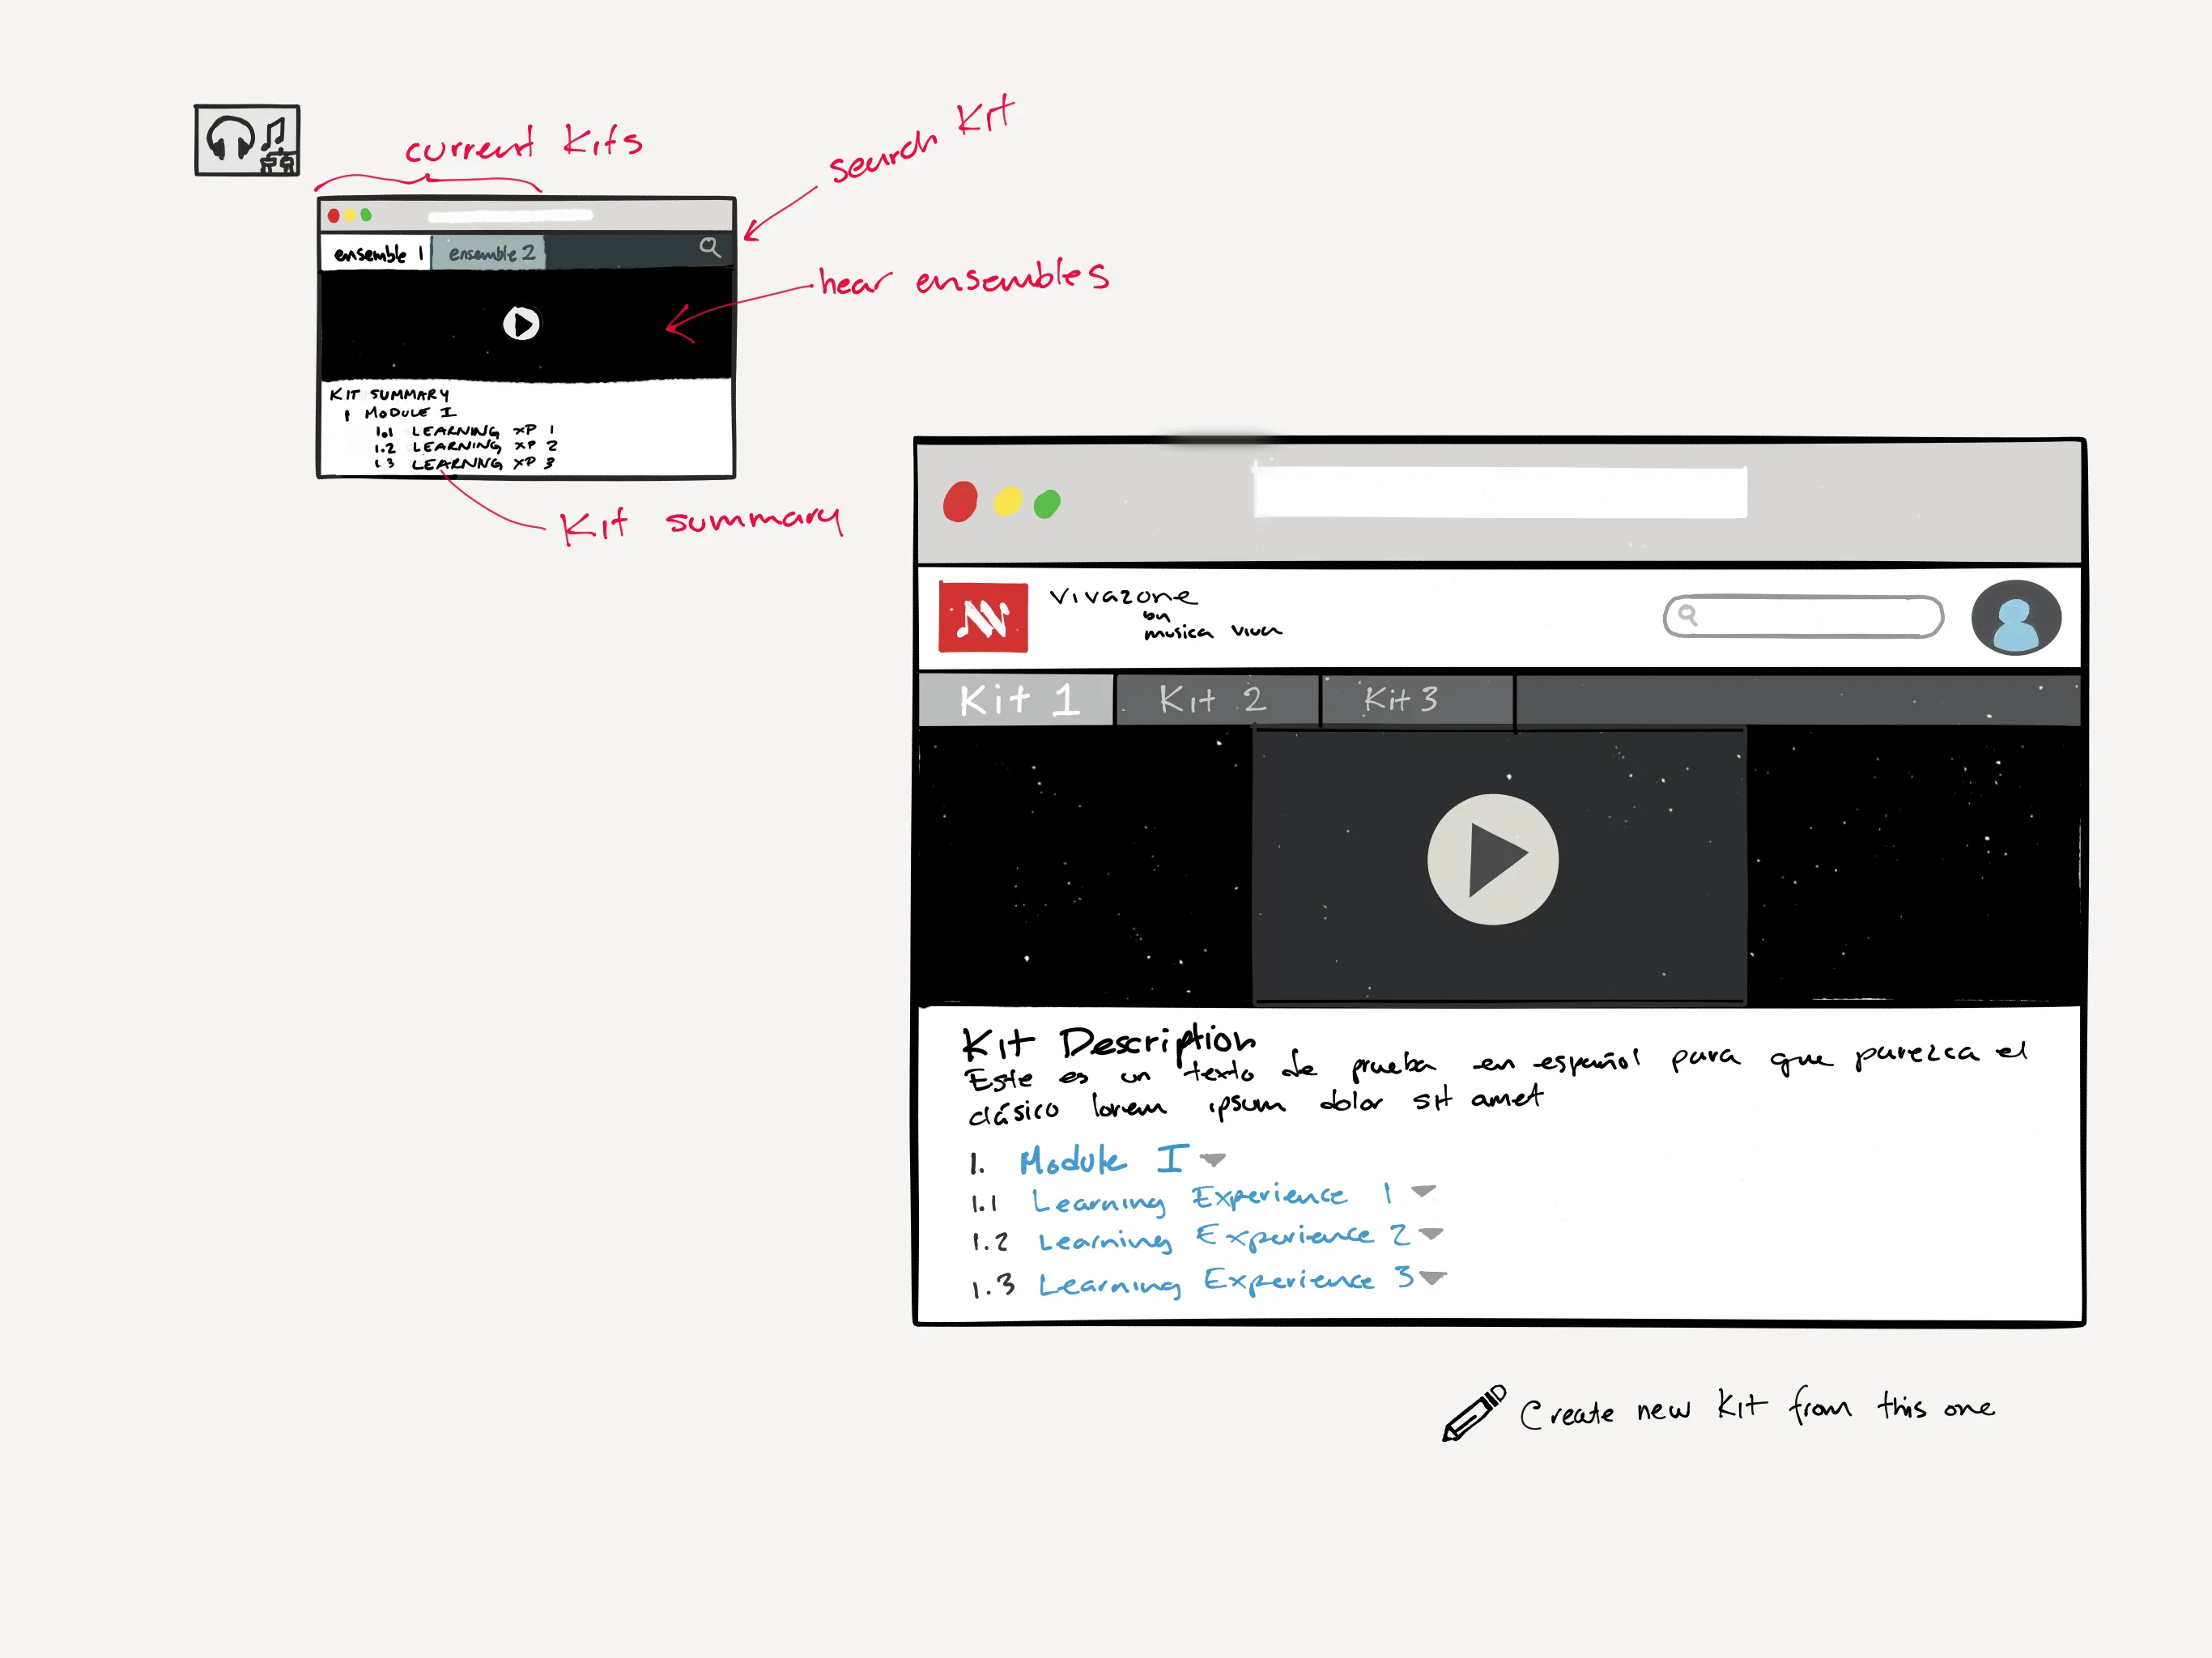
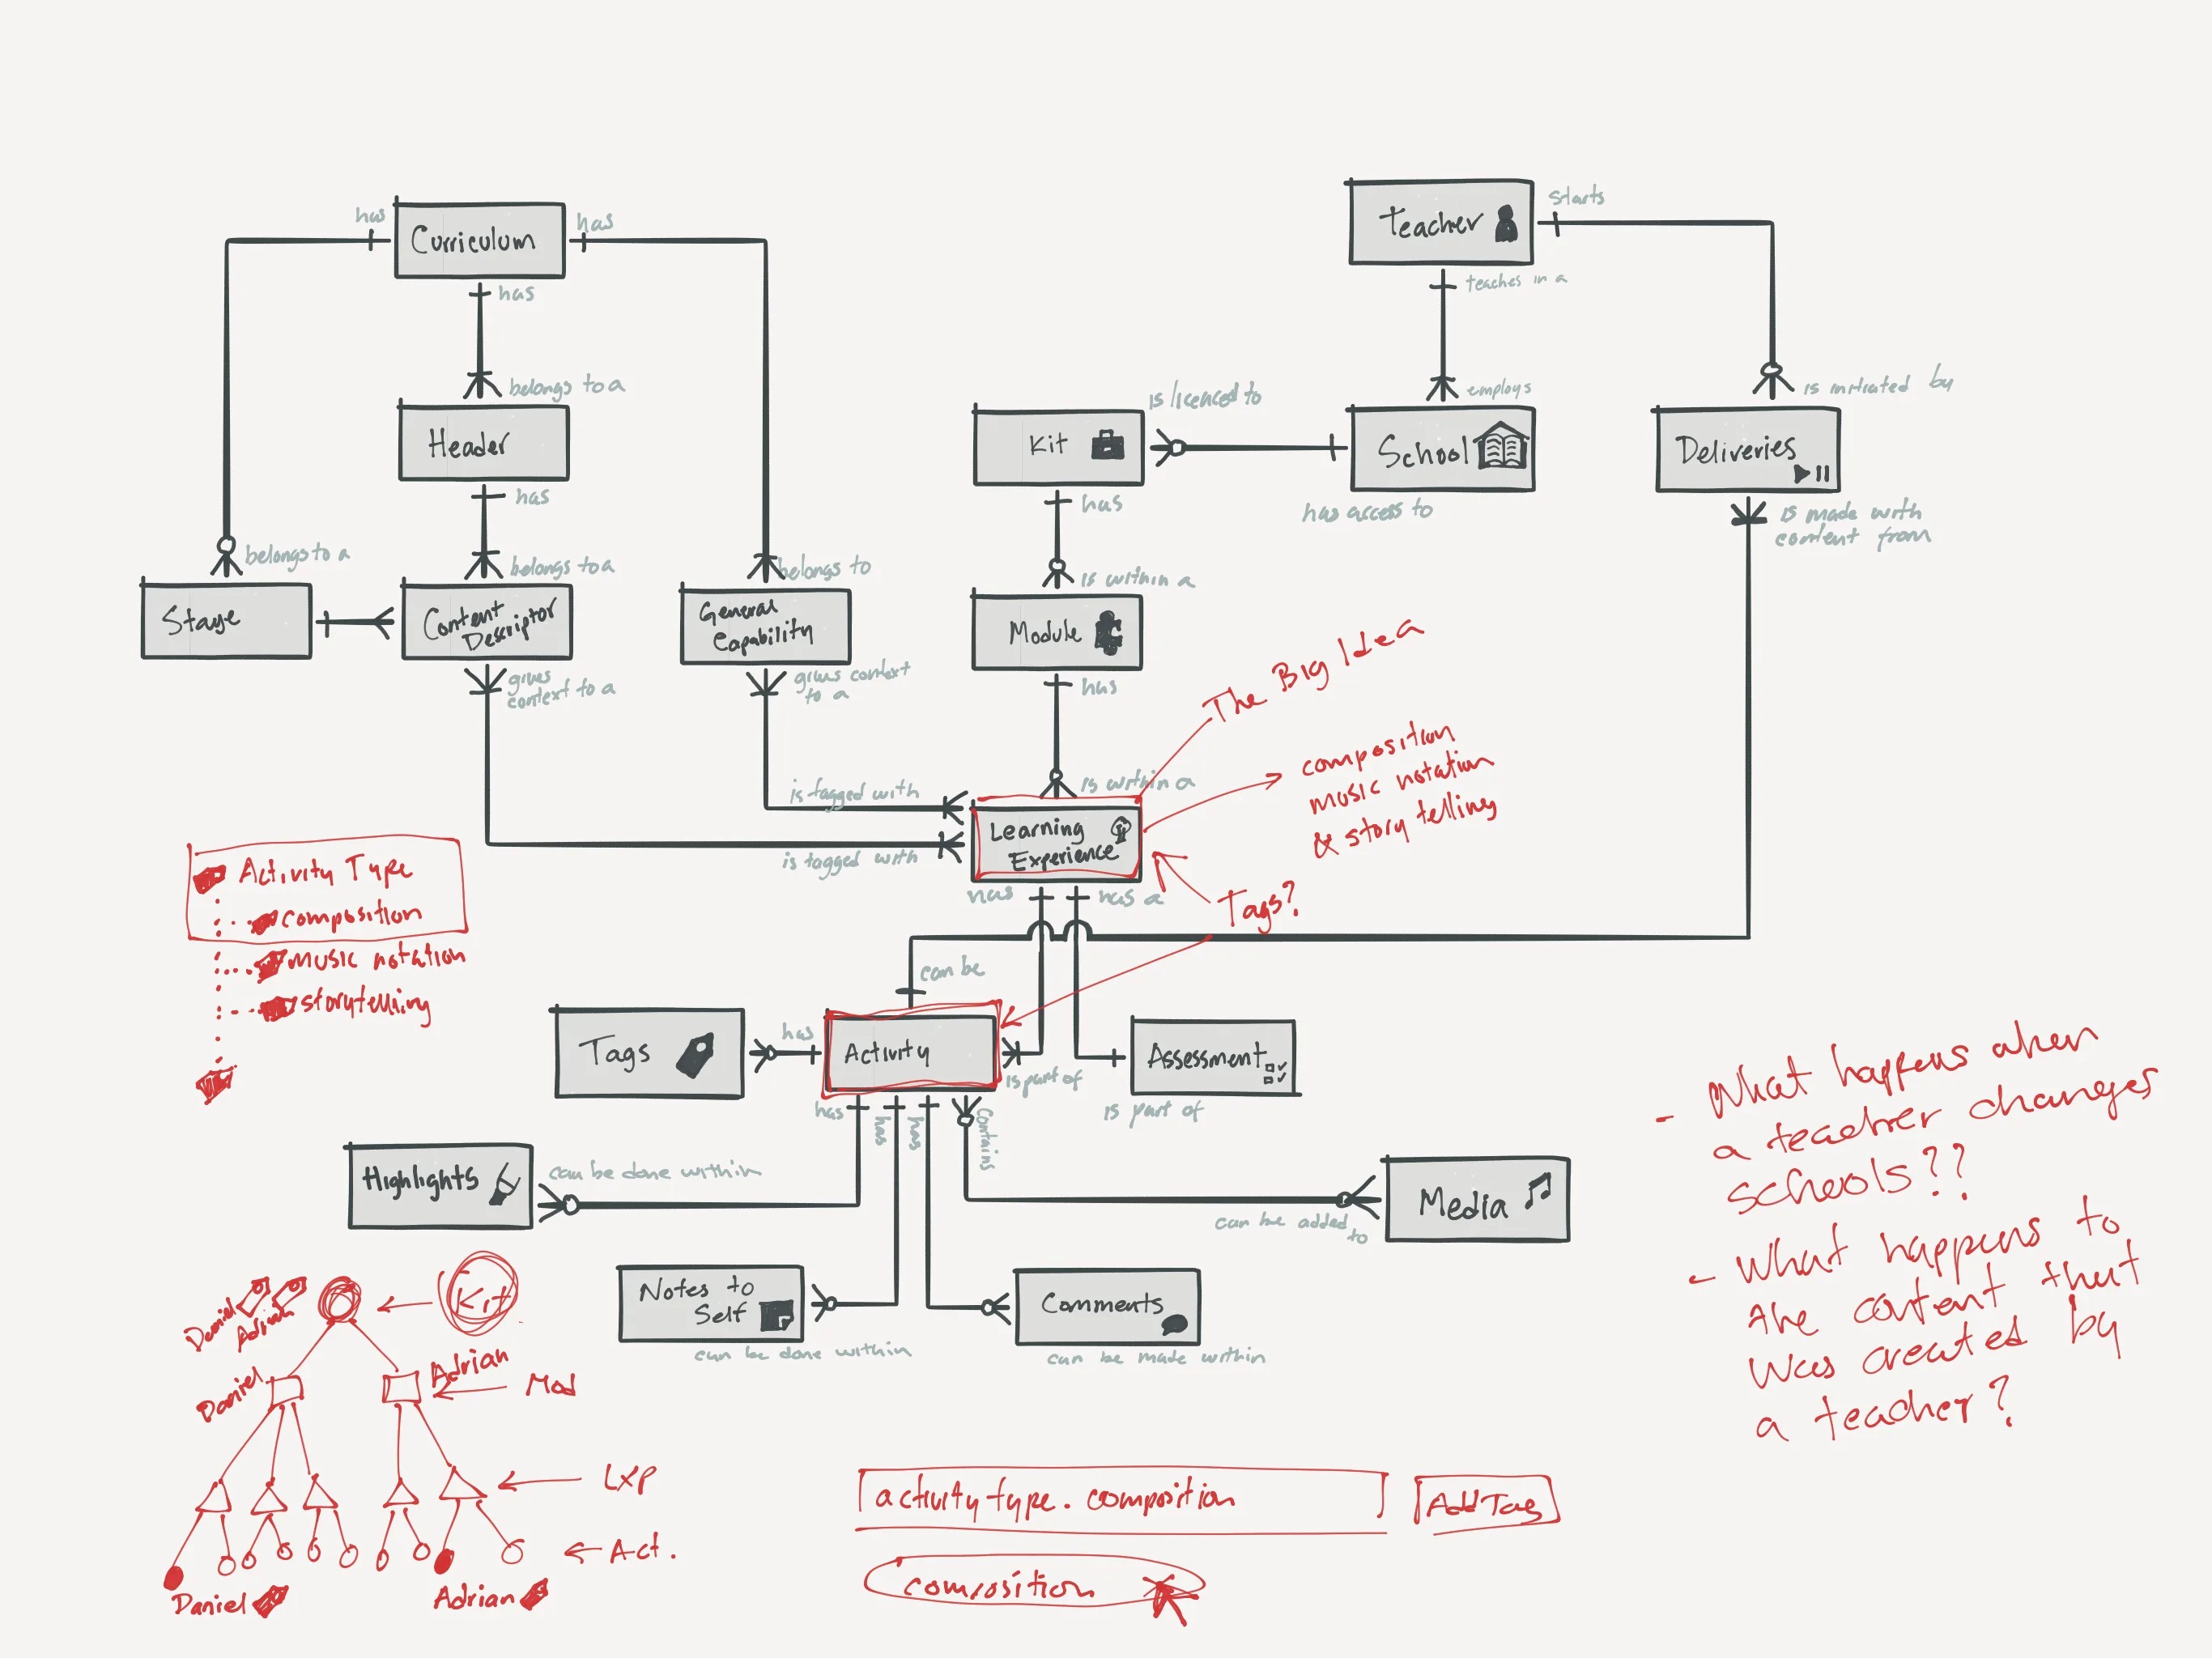
The solution design for this Problem Story-map consisted of a series of sketching sessions I led, collaborating with SMEs and Teachers identify:
- information architecture
- data schema
- major features of this web-app
Which in turn allowed us to have productive conversations about:
- what the solution for the design could look like
- the flow from one screen to another
- day-dream about interactions
- build shared knowledge, and
- set an accurate business partnership expectation
All notes, as shown, where kept in context.
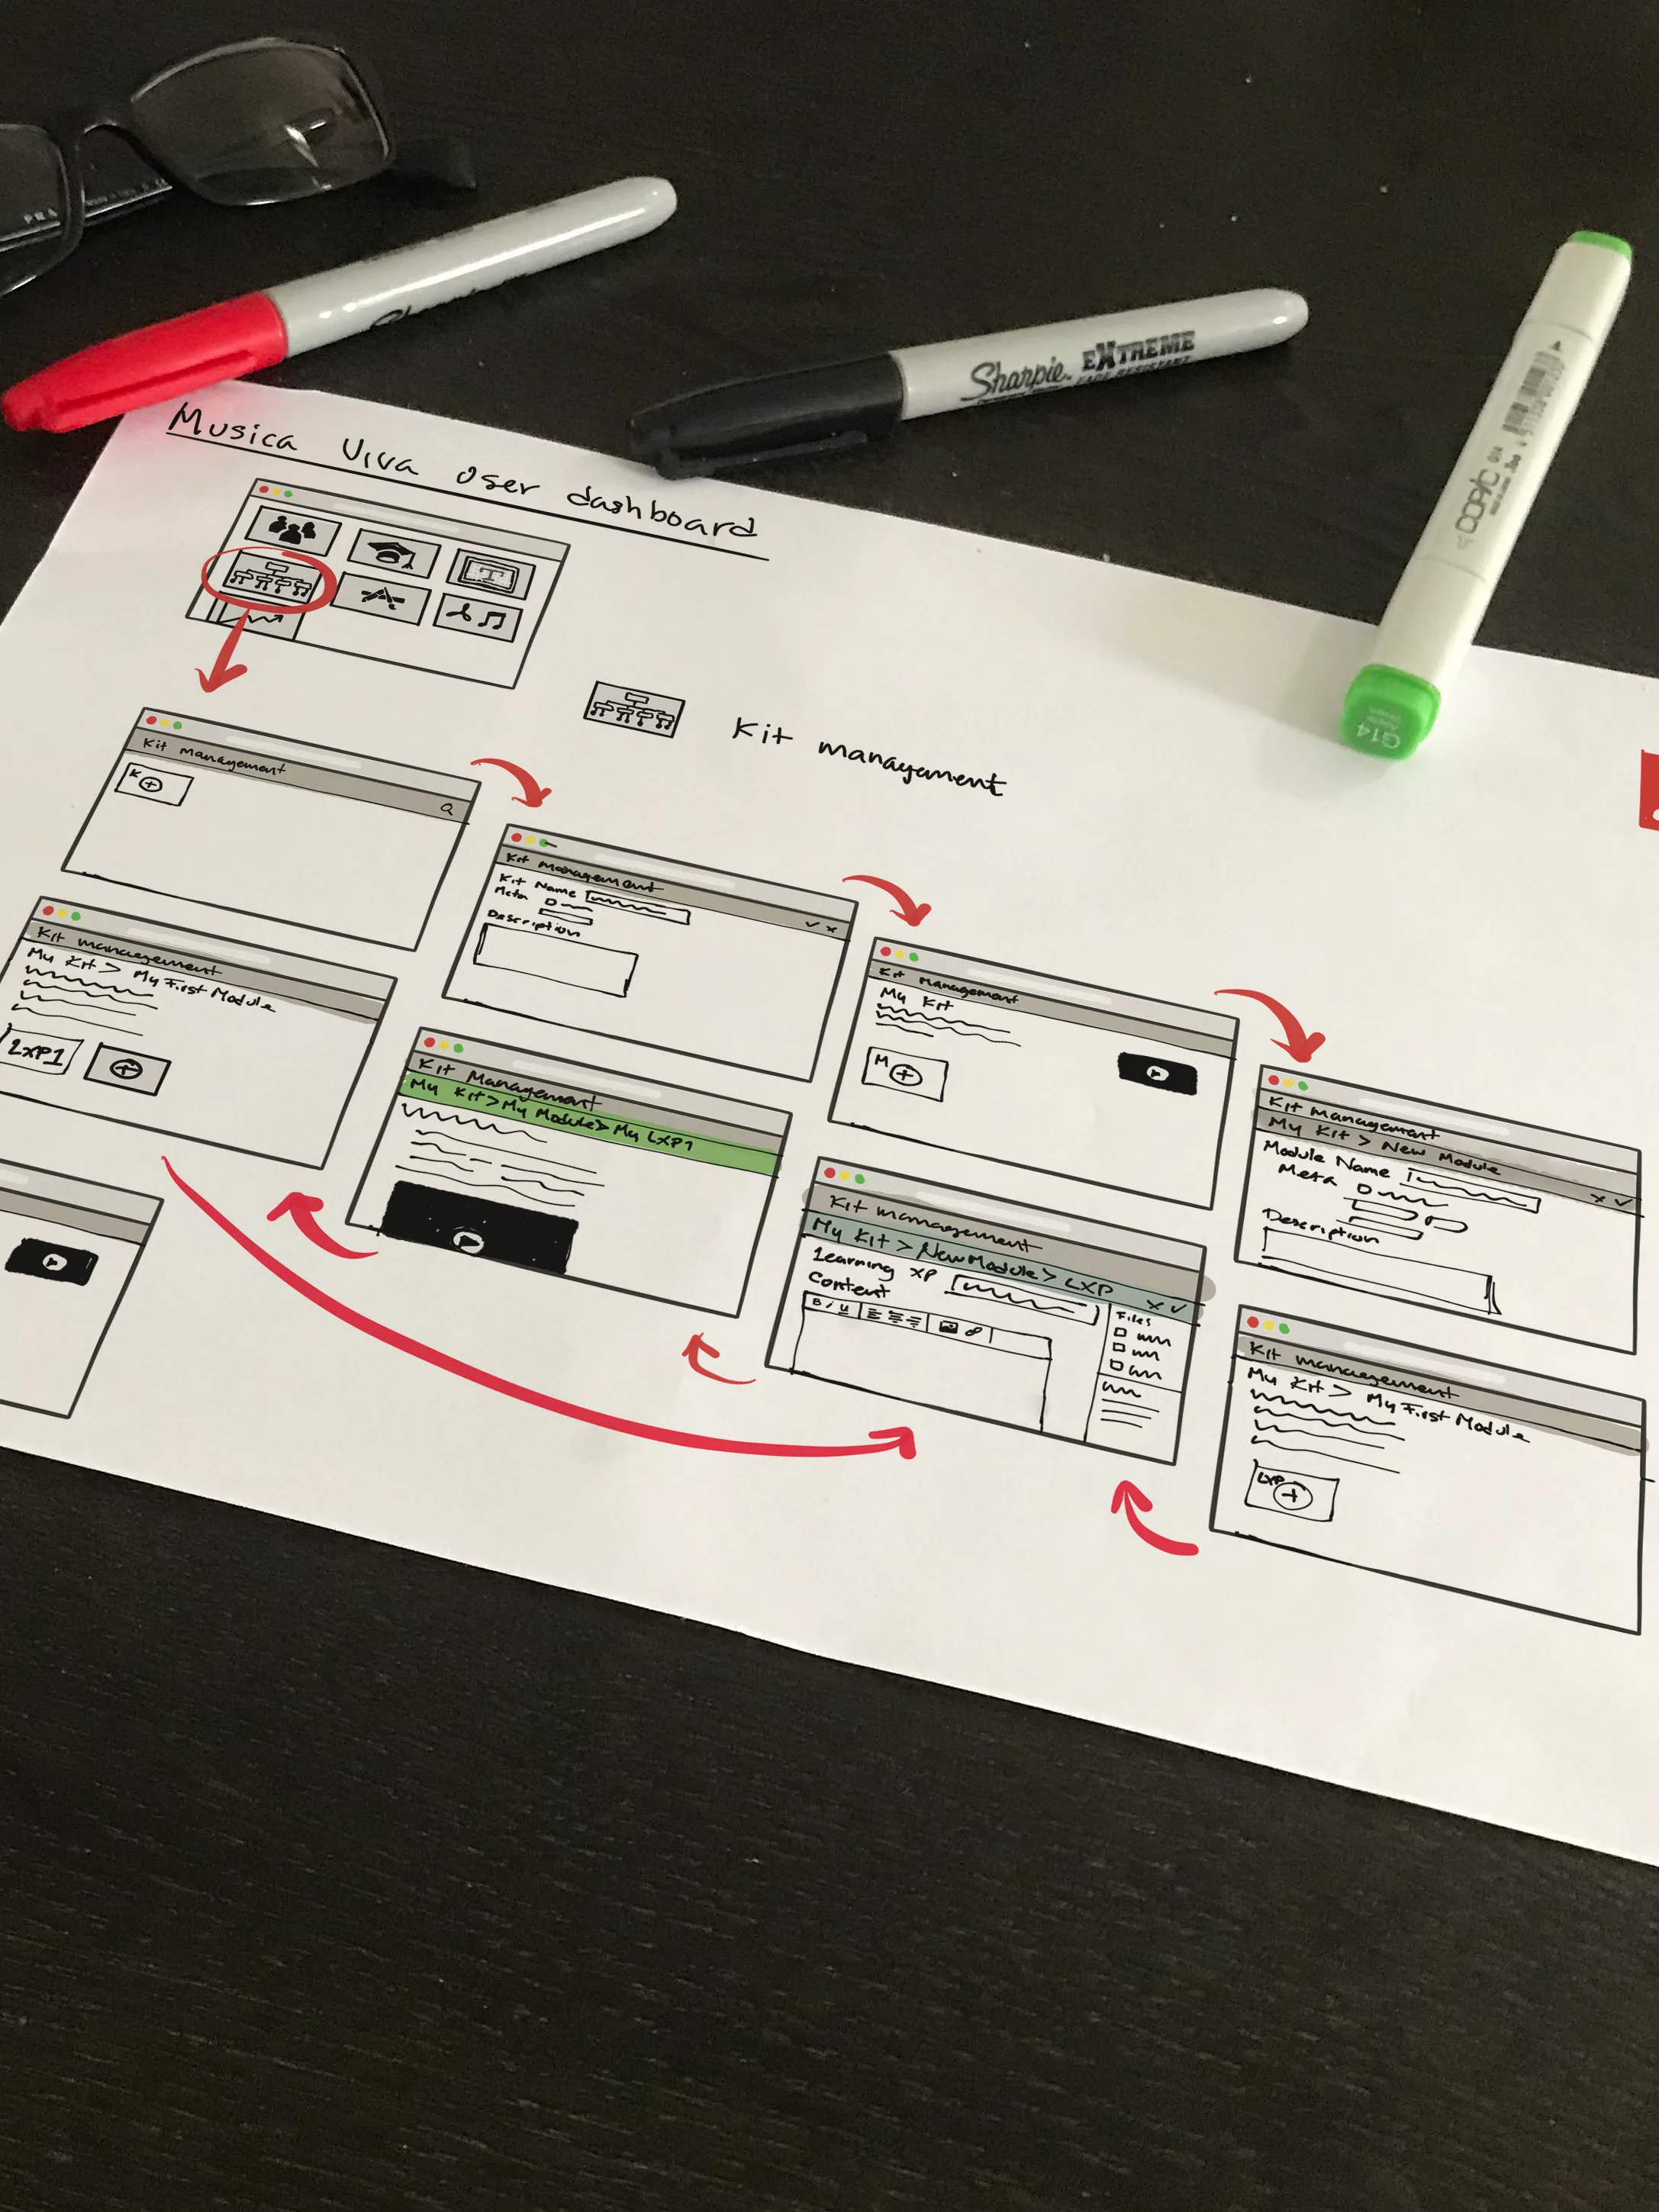
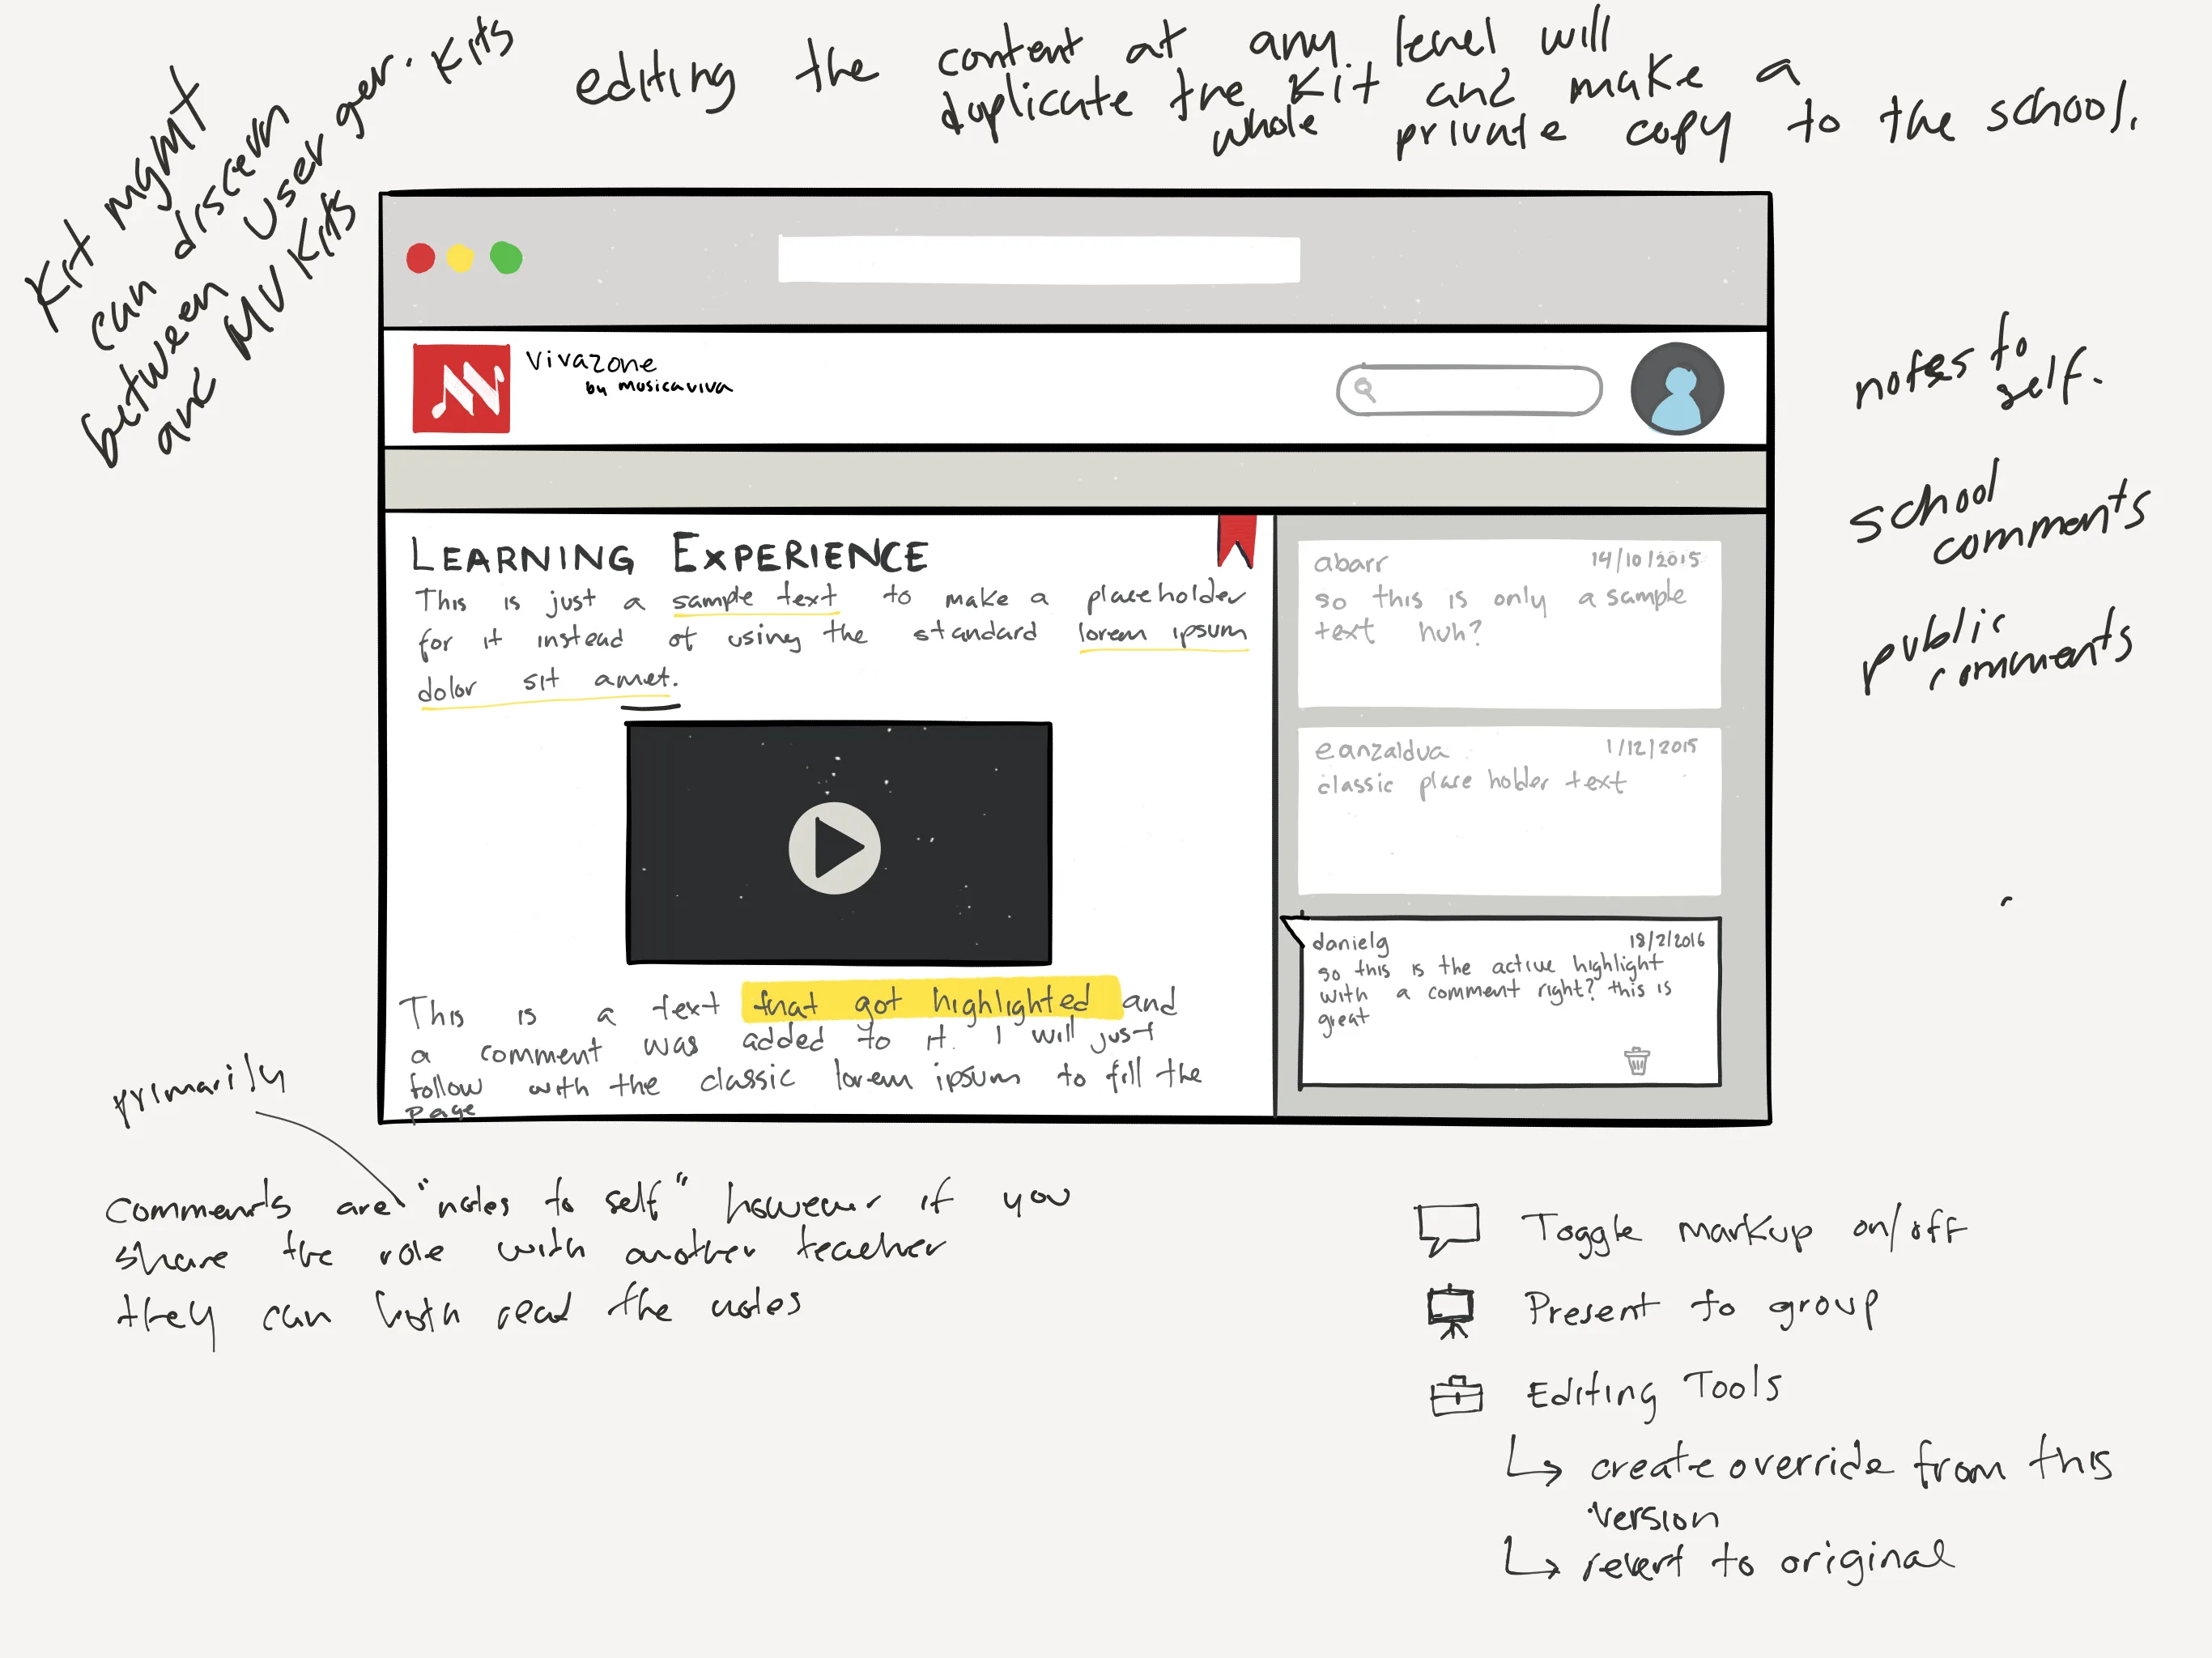
Wire-framing and prototyping
Having agreed on this fidelity, the I started building an interactive prototype in Balsamiq Mockups. Around 60 different wireframes were prototyped to explain drag-and-drop interactions and different states of the software.
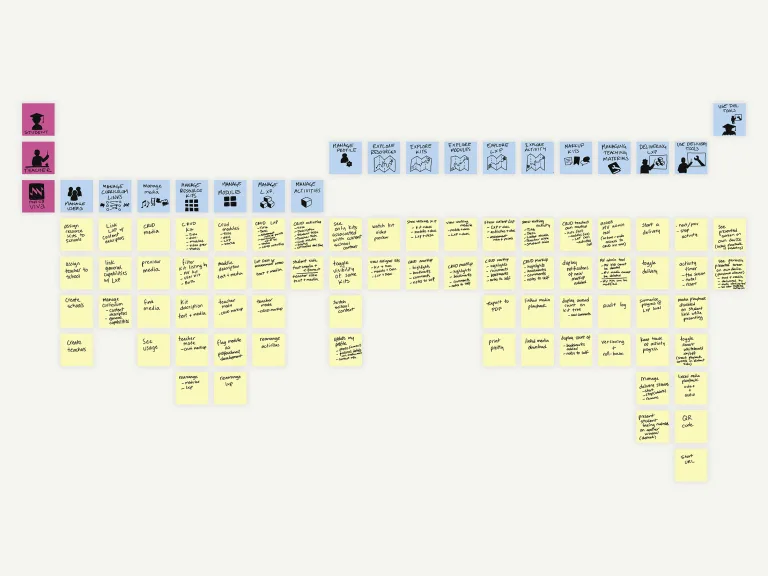
Solution design spec
Since design was siloed without collaboration of developers (due to geographical / travel constraints), a solution story-map was created to accomplish three things.
- Shared Understanding. Communicate the prototype with the developers without missing any important details.
- Finding Development Patterns. By explicitly defining all the elements the design was comprised of, we were able to find those “this is the same as that” which helped reducing development effort.
- Identifying Dependencies. Another side-effect of the solution story-map / prototype combo is that allows determining what needs to be built first.
- Writing user stories. Perhaps the most useful by-product of the Solution Story-map was that it facilitated the developers the writing of user stories as Jira tickets, which were then reviewed by a product manager to verify that shared understanding between the development team and the design team.
High-fidelity wireframing
After the interactive prototype succeeded we built a moodboard for the look and feel, created a couple of variations of Style-tiles, and once we picked the winner, we wireframed the app in high-fidelity and uploaded the designs to Zeplin for development reference.

Low and Mid Fidelity Wireframes
04
Edgar held the role of UX Lead (Consulting) at Musica Viva between 2015 – 2016 in Adelaide, SA.
RELATED CASE STUDIES